
Easy No-Bake Banana Pudding Recipe
 Add Preferred Source
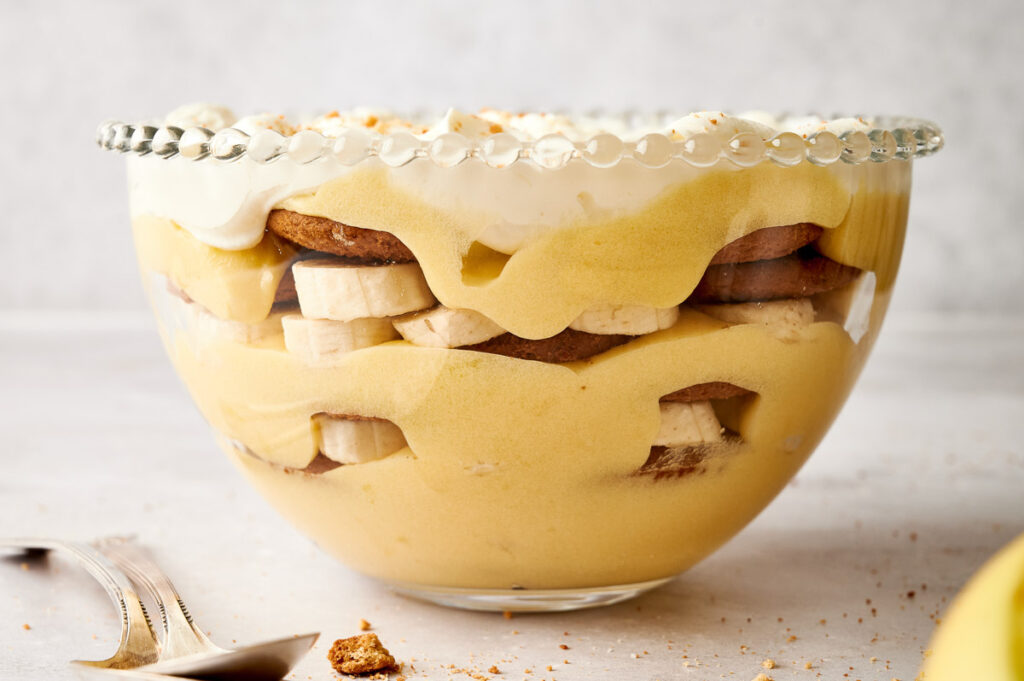
Creamy, cool, and layered in a glass bowl, this easy banana pudding recipe is the one I make when I want a dessert that looks like I fussed but really didn’t. It comes together from vanilla pudding mix, sweetened condensed milk, fresh banana slices, and vanilla wafers, all finished with a thick layer of whipped cream. Nothing about it is complicated, and that’s exactly why it earns its place at family gatherings and potlucks.
If you’ve only ever had the version scooped out of a plastic tub, a homemade banana pudding assembled a few hours ahead is a different thing entirely. The wafers soften into an almost cake-like layer, and the vanilla pudding sets around the bananas. The whole thing has the comfort of a Southern banana pudding without the cooked custard or baked meringue of the traditional version. This is the easy, no-bake take on that Southern classic.
This post contains affiliate links. As an Amazon Affiliate, if you purchase through those links, I earn a small commission. Thank you!
Why You’ll Love This Banana Pudding
- It’s genuinely a no-bake dessert, start to finish. No custard to cook on the stove, no oven to heat. It’s why I keep coming back to it in summer when the last thing I want is a hot kitchen. You mix, you layer, you chill.
- The layers do the heavy lifting for presentation. Built in a clear glass bowl or a trifle dish, the bands of vanilla wafers, banana slices, and pudding mixture show through the sides. It’s a dessert that looks like a centerpiece.
- The ingredient list is short and cheap. A packet of vanilla pudding mix, a can of sweetened condensed milk, whole milk, wafers, bananas, and cream. One of the reasons why banana pudding has stayed a classic dessert for so long.
- It’s a make-ahead dessert that’s all the better for a good chill. The flavors settle, and the wafers soften into the pudding as it sets. So, you can build it ahead of time and let the fridge do the rest of the work for you.
[adthrive-in-post-video-player video-id=”pwGKW3hQ” upload-date=”2025-06-06T04:57:56+00:00″ name=”Banana Pudding.mp4″ description=”This quick and easy banana pudding is a lifesaver when you need a delicious dessert on busy days. This dessert snack is perfect for busy weeknights or when you’re short on time because it is so easy to make with few ingredients only. ” player-type=”default” override-embed=”default”]
Ingredients You’ll Need
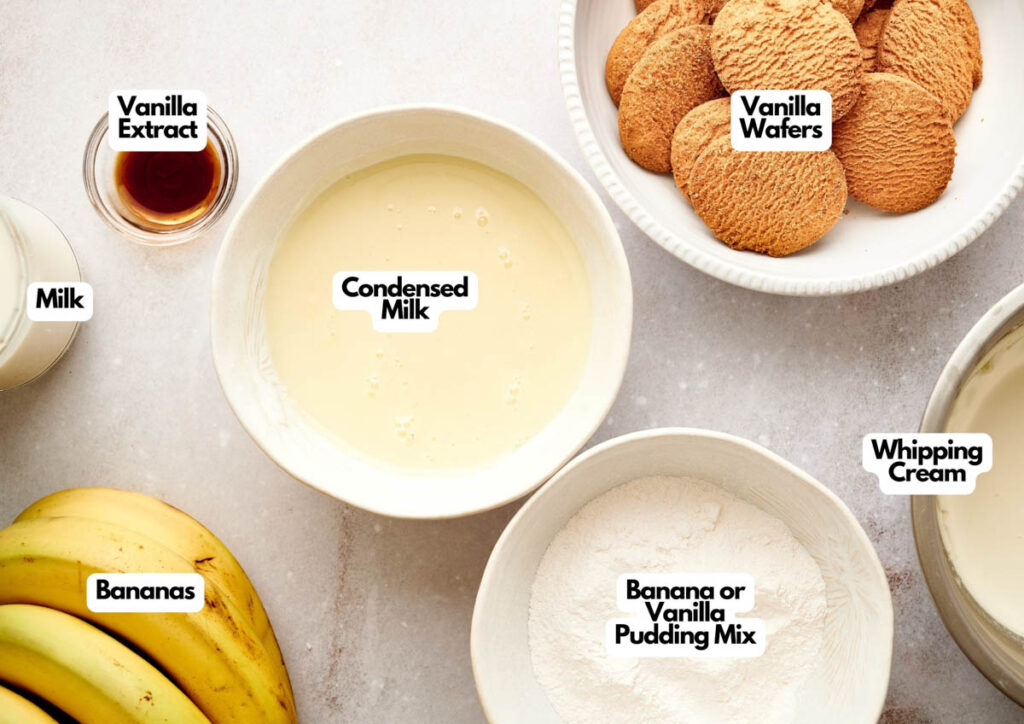
You’ll need all the ingredients shown in the photograph below.
Pudding mix. The recipe uses a 5-ounce packet of banana or instant vanilla pudding mix as the base. It’s what keeps this no-bake, since instant pudding sets without any cooking. Banana pudding mix pushes harder into that banana flavor. Instant vanilla pudding mix gives you a cleaner backdrop and lets the fresh bananas carry the flavor themselves. I’ve made it both ways and genuinely go back and forth depending on my mood.
Vanilla extract. Just a teaspoon of vanilla extract rounds out the pudding and keeps it from tasting flat. Use real vanilla extract if you have it; the difference shows in a simple no-bake pudding like this.
Sweetened condensed milk. This is what separates this pudding from a plain box-mix version. Whisked in with cold milk, the condensed milk gives the pudding mixture its richness and that thick, spoon-coating body. Don’t swap it for evaporated milk; they’re not interchangeable, and the pudding won’t set the same way.
Bananas. Skip the overly ripe ones for this. You want bananas that are just ripe, yellow with only small brown spots. This way, the sliced bananas hold their shape in the layers instead of going to mush. Overly ripe bananas are better saved for banana bread.
Vanilla wafers. Nilla wafers are the classic choice and what I use, but any crisp vanilla wafer works. They need to be crisp going in, because part of the appeal is how they soften against the pudding over a few hours in the fridge.
And if you’ve got bananas that have gone past just-ripe into soft and spotty, save them for baking instead of slicing them in here. My moist banana chocolate chip muffins are exactly where those overly ripe ones belong.
How to Make Banana Pudding with Step-by-Step Instructions
A complete printable recipe and the measurements in both US customary and metric are available in the recipe card below.
Make the Pudding Mixture
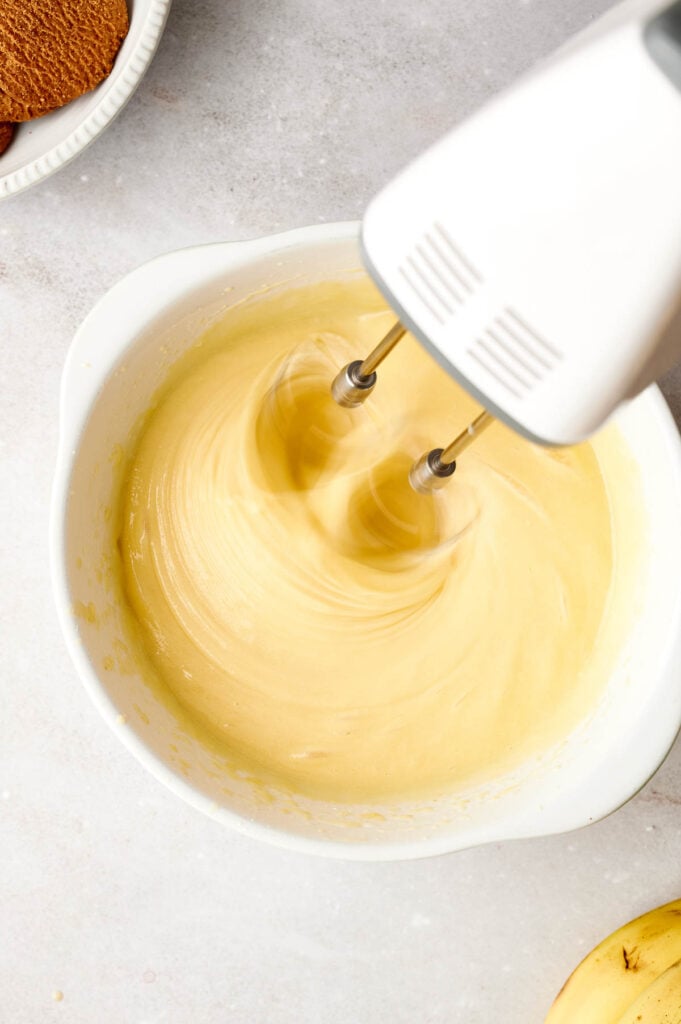
In a mixing bowl, whisk together cold whole milk, the instant pudding mix, sweetened condensed milk, and vanilla extract. Keep whisking until the mixture thickens into a smooth, silky base with no lumps.
Build the Layers
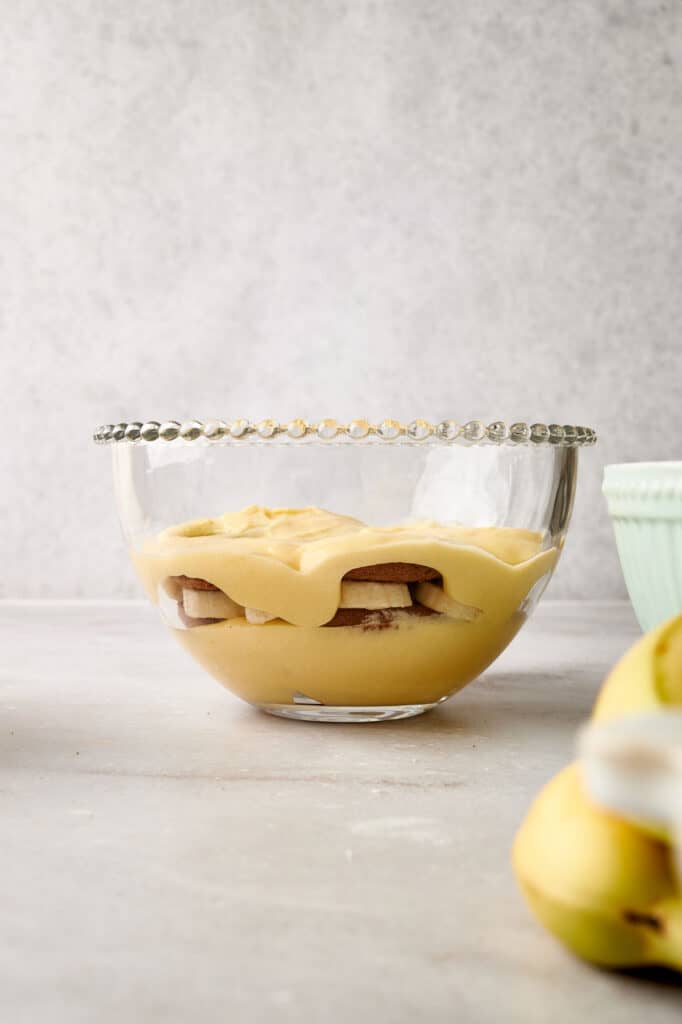
In a glass serving bowl or trifle dish, add a layer of vanilla wafers, then a layer of banana slices. Pour over some of the pudding mixture. Repeat the layers until everything is used up, making sure each layer of banana is fully covered.
SERIOUSLY GOOD
DESSERTS!

Dessert First is a collection of 61 RECIPES to show you that you can make beautiful, impressive desserts right in your own kitchen, no matter your skill level.
Immediate eBook download. No physical book available.
Includes ad-free recipes like:
∙ Lemon Pound Cake
∙ Key Lime Bars
∙ Boston Cream Pie
∙ No-Bake Chocolate Lasagna
∙ Raspberry Cheesecake
...and much more!

Whip the Cream
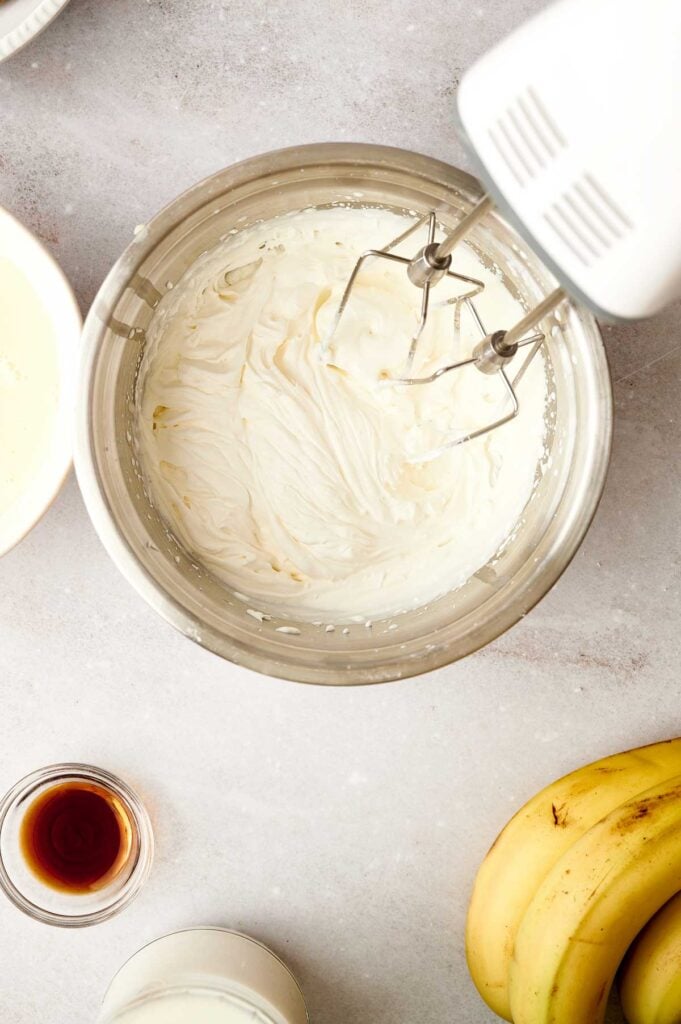
Beat the sweetened whipping cream until it holds stiff peaks. This is what gives the pudding its light, airy cap. So, stop as soon as the peaks hold their shape rather than overbeating.
Top and Chill
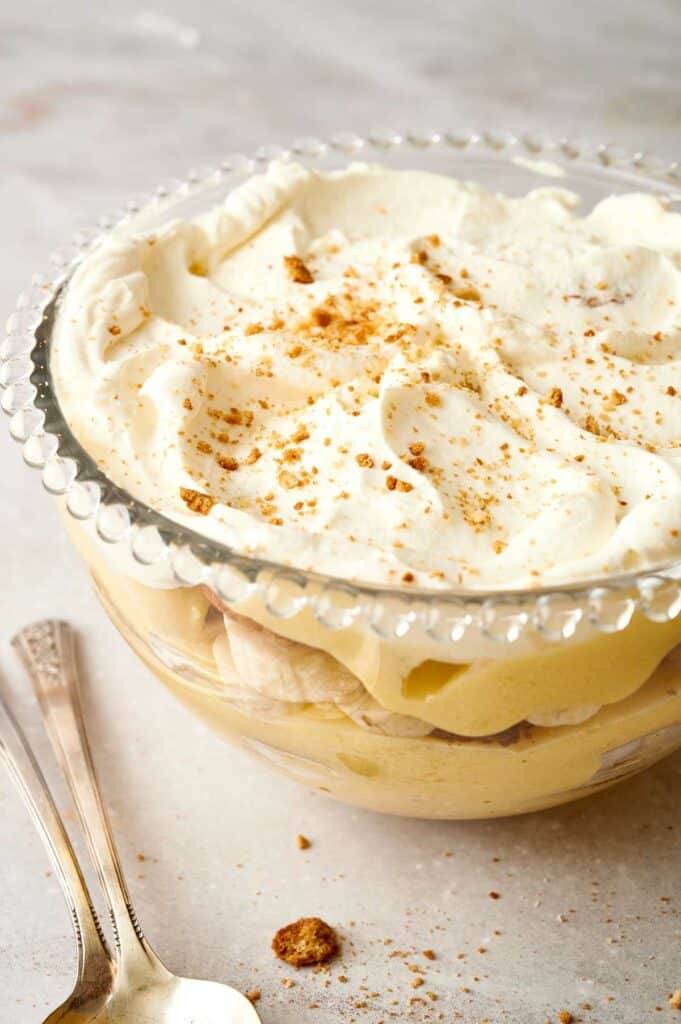
Spread the whipped cream over the top to cover the pudding completely, then finish with a scatter of crushed wafers. The one place people go wrong is rushing this last part; the banana pudding needs time in the fridge for the wafers to soften and the flavors to come together.
Expert Tips for Banana Pudding
Brush the banana slices with lemon juice. A light brush of lemon juice over the sliced bananas slows the browning without changing the flavor. It’s worth doing any time you’re layering the pudding ahead, since exposed banana is the first thing to turn brown.
Chill your bowl and beaters before whipping. Cold equipment helps heavy whipping cream reach stiff peaks faster and hold them longer. I put the bowl and beaters in the freezer while I mix the pudding, and the homemade whipped cream comes together with far less fuss.
Cover the bananas with pudding as you go. Browning happens where banana meets air, so making sure each layer of banana slices gets fully covered by the pudding mixture does as much for keeping them fresh as the lemon juice does.
Let it warm slightly before serving. Straight from the fridge, very cold desserts taste muted. Ten or fifteen minutes at room temperature before serving lets the banana pudding flavor come forward.

Ingredients
- 1 packet (5 ounces) banana pudding or instant vanilla pudding mix
- 1 Can (14 ounces) can sweetened condensed milk
- 2 cups cold milk
- 1 teaspoon vanilla extract
- 3 cups vanilla wafers
- 4 bananas thinly sliced
- 2 cups sweetened whipping cream

Video
Instructions
- Mix cold milk, vanilla pudding, condensed milk and vanilla extract in a bowl.1 packet (5 ounces) banana pudding, 1 Can (14 ounces) can sweetened condensed milk, 2 cups cold milk, 1 teaspoon vanilla extract
- Layer wafers, bananas and pudding mixture.3 cups vanilla wafers, 4 bananas
- Whip the cream until peaks form.2 cups sweetened whipping cream
- Top with the whipping cream and cookie crumbles.
Notes
- Bananas: Use just-ripe bananas, yellow with small brown spots, not overly ripe, so the slices hold their shape.
- Banana flavor: For a stronger banana taste with a vanilla mix base, stir a few drops of banana extract into the pudding mixture.
- Prevent browning: Brush banana slices lightly with lemon juice and cover each layer fully with pudding.
- Whipped cream: Chill the mixing bowl and beaters and keep the cream cold to reach stiff peaks.
- Cookie swap: Graham crackers or chocolate wafers work in place of vanilla wafers; keep them crisp going in.
- Storage: Fridge up to 3 days, plastic wrap pressed to the surface. Don’t freeze. Keep cold at potlucks; no more than 2 hours out (1 hour above 90°F).
Nutrition

Variations
Boost the banana flavor. If you want a more intense banana cream taste, a few drops of banana extract stirred into the pudding mixture push the banana flavor forward without overpowering the rest. This is the easiest way to make an instant vanilla pudding base taste more like a proper banana pudding.
Make it more decadent. For a richer, cheesecake-leaning pudding, beat a little cream cheese or mascarpone with some powdered sugar and fold it into the pudding mixture. It adds a tang and body that stands up well against the sweetness of the condensed milk.
Change up the cookie. Vanilla wafers are traditional, but graham crackers give you a honeyed, sturdier layer, and chocolate wafer cookies turn it into something closer to a banana-chocolate icebox dessert. Just keep them crisp going in so they hold texture against the pudding.
Use a shortcut topping. If you want to skip whipping cream altogether, a frozen whipped topping like Cool Whip spoons straight on and holds its shape in the layers longer than homemade whipped cream does. It’s lower in calories too, though it trades that for a more processed ingredient list. So, it comes down to whether you want convenience or the real thing. For an all-around lighter version, pair it with fat-free sweetened condensed milk and low-fat milk.
What to Serve with Banana Pudding
Banana pudding is satisfying on its own, but it sits happily in a bigger dessert spread. When I want a chocolate counterpoint to all that vanilla and banana, I put out a rich homemade chocolate pie alongside it, and the deeper cocoa flavor plays off the pudding without competing with it.
For something you can pick up between spoonfuls, I like setting out a plate of crackly chocolate crinkle cookies, since the crisp edge is a nice contrast to the soft pudding. If you’d rather balance the richness than double down on it, I serve it next to a bowl of fresh fruit salad with honey and lime. The bright, tangy fruit cuts straight through the creaminess and keeps the whole table from feeling heavy.
And for a warm-against-cold pairing, a small dish of caramelized fried bananas next to the chilled pudding is one of my favorite ways to round it out.
How to Store Banana Pudding
Banana pudding keeps in the fridge for up to 3 days. Press a piece of plastic wrap directly onto the surface of the pudding so it doesn’t form a skin. Then, cover the dish with a tight lid or a second layer of wrap. The wafers will keep softening as it sits, and the bananas will darken a little over time, so the banana pudding looks and tastes best on the first day.
Freezing isn’t recommended for banana pudding. The fresh bananas and the dairy topping suffer: the bananas turn watery and mushy once thawed, and the whipped cream loses its structure and weeps. For getting ahead, refrigerating is the way to go rather than the freezer.
Because this is a dairy dessert, it needs to stay cold if you’re taking it to a potluck or serving it outside in summer. Keep it in the fridge or a cooler with ice right up until serving. Don’t leave it out on the table for more than two hours, or more than one hour if it’s a hot day above 90°F.
On a warm afternoon, setting the trifle bowl or glass bowl inside a larger bowl of ice keeps it safely chilled while people go back for seconds.
To freshen your banana pudding that’s been in the fridge, add a few fresh banana slices and a scatter of crushed wafers over the top just before serving, and a dollop of the remaining whipped cream brings back that just-made look.
Banana Pudding FAQs
You can assemble it up to about a day ahead. It needs at least 4 hours in the fridge to set and soften the wafers, and an overnight chill is even better for the flavor, so making it the evening before you serve is ideal. It’s at its best on the first day, when the bananas are freshest, and the wafers are soft but still have a little structure. It stays good for a second day and keeps in the fridge for up to 3 days total; after the first day the bananas darken a little more, and the wafers may soften further, so the earlier you serve it the better it looks. If you want to prep further ahead than that, make the pudding base in advance, keep it covered in the fridge, and layer it with fresh bananas and wafers closer to serving so the fruit stays fresh.
Use just-ripe bananas rather than overly ripe ones, brush the slices lightly with lemon juice, and make sure each banana layer is fully covered by the pudding mixture so there’s no exposed fruit meeting the air. Covered and chilled that way, the slices stay yellow much longer.
Yes. Instant vanilla pudding mix gives you a cleaner base and lets the fresh bananas drive the flavor. If you want a stronger banana taste with the vanilla mix, add a few drops of banana extract to the homemade pudding.
It’s best not to. The fresh bananas and the whipped cream don’t survive the freezer well; the bananas go watery, and the cream loses its structure once thawed. Refrigerate rather than freeze, and if you need to prep ahead, use the staged approach in the make-ahead answer above.
More Dessert Recipes to Try
If you love banana pudding and this easy, layered, crowd-pleasing kind of dessert is your thing, here are a few more from my kitchen worth pulling up next.
For another no-bake dessert that comes together without the oven, my silky no-bake chocolate mousse is the one I make when I want something that feels a bit more grown-up but takes almost no effort.
When I’ve got a chocolate craving and a crowd to feed, I go for a rich slice of Mississippi mud pie, which stacks an Oreo crust, a fudgy brownie layer, and chocolate pudding under whipped cream.
For a fruit-forward dessert with a bit more occasion to it, I make my cinnamon roll apple pie when apples are in season, and I want the kitchen to smell like cinnamon.
And when I want something small and easy to grab for a dessert table, I set out a batch of my easy homemade chocolate truffles.