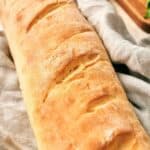
Homemade French Bread Recipe
Have you ever dreamt of baking the perfect loaf of French Bread right in your own kitchen? Imagine the aroma of freshly baked bread wafting through your home, making every corner feel cozy and inviting. Whether you’re looking for a quick and easy recipe for the holidays or just a simple treat to enjoy on a lazy Sunday afternoon, our homemade French bread recipe is just what you need.
This post contains affiliate links. As an Amazon Affiliate, if you purchase through those links, I earn a small commission. Thank you!
Why You Will Love Making This Easy French Bread Recipe
- First and foremost, there’s nothing quite like the taste of homemade bread. When you make French bread from scratch, you’re not just baking; you’re crafting an experience. The crispy crust, the soft interior, and the rich aroma – it’s a sensory delight that store-bought bread can hardly match.
- One of the best things about our homemade French bread recipe is its simplicity. You don’t need to be a seasoned baker or have a pantry full of exotic ingredients. With just a few basic items like all-purpose flour, warm water, and active dry yeast, you’re on your way to creating bread magic. And if you’re a beginner, don’t fret! Our step-by-step instructions ensure that you’ll have a golden brown, delicious loaf every time.
- French bread isn’t just for sandwiches. Want to make garlic bread for pasta night? Or how about some delightful French toast for breakfast? With your homemade loaf, the possibilities are endless. Plus, the pride you’ll feel when you tell your guests, “We made this bread ourselves!” is simply unbeatable.
- Whether it’s a family gathering, a dinner party with friends, or just a quiet evening at home, homemade French bread fits the bill. It’s the ideal accompaniment to a variety of dishes, from hearty soups to gourmet cheeses. And if you’re thinking of gifting, what’s better than a freshly baked loaf of love?
- Lastly, making your own bread can be quite economical. You’ll save money in the long run, especially if you’re a regular bread eater. Plus, by baking at home, you’re reducing the carbon footprint associated with transporting store-bought breads. It’s a win-win for your pocket and the planet!
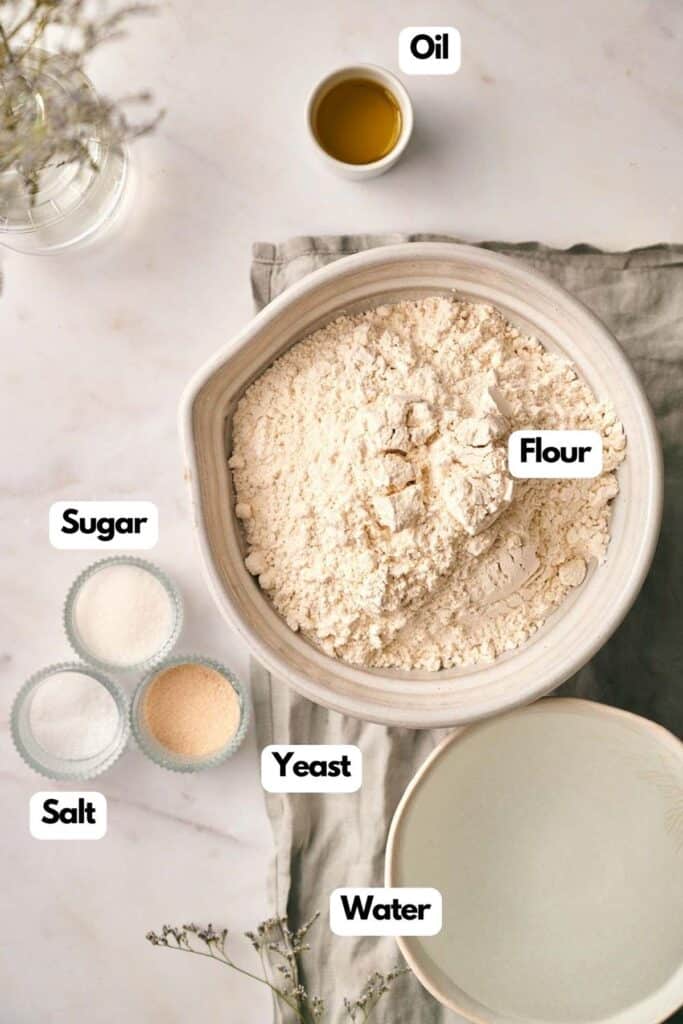
Ingredients you’ll need
You’ll need all the ingredients shown in the photograph below.
How to Make French Bread with Step-by-Step Instructions
A complete printable recipe and the measurements in both US customary and metric are available in the recipe card below.
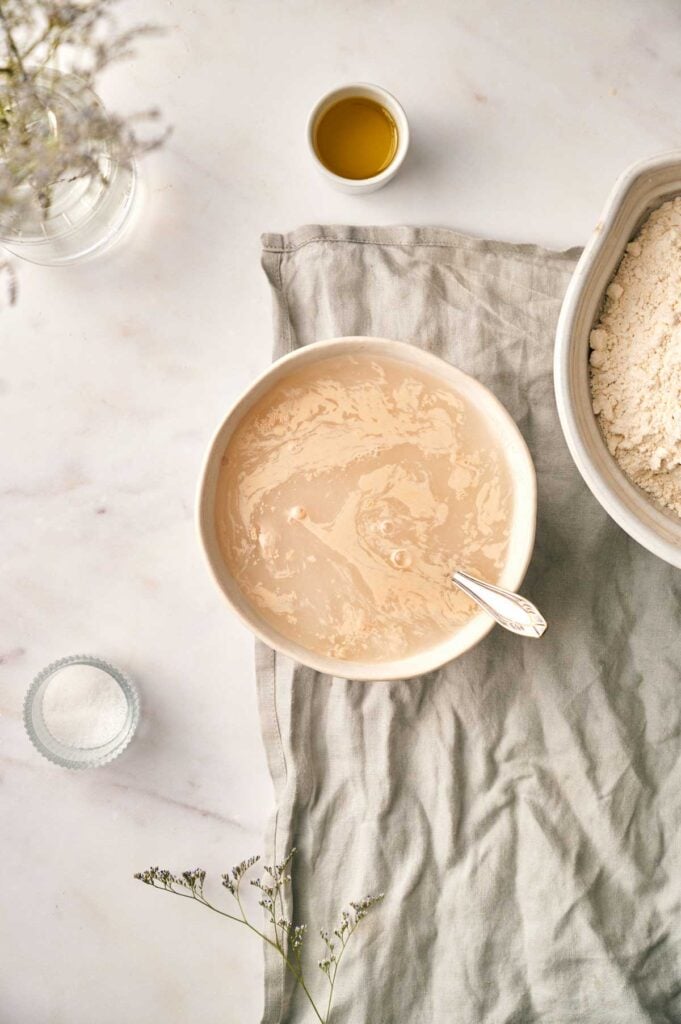
Kickstart with the Yeast Mixture
Begin by combining warm water, yeast, and a pinch of sugar in a small bowl.
This mixture is the heart of your bread, as the active dry yeast will help your dough rise, giving it that fluffy interior we all love. Let it sit for a bit until it starts to foam.
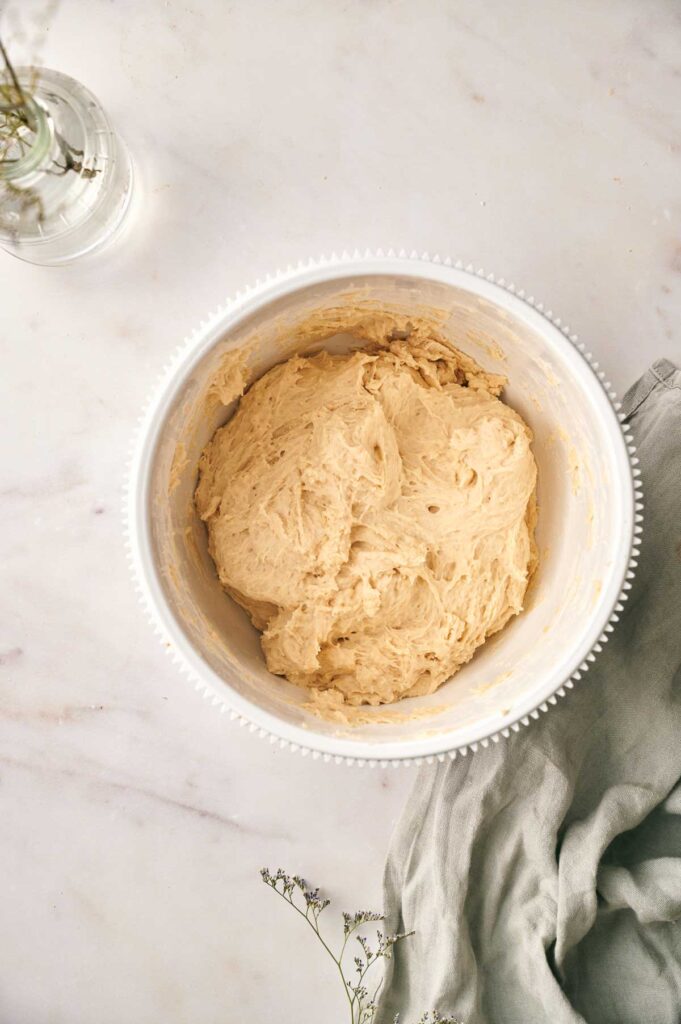
Mixing and Kneading
Once your yeast mixture is bubbly and alive, it’s time to get mixing. Using a stand mixer fitted with a dough hook attachment makes this process a breeze.
Start by adding 3 cups of all-purpose flour, a dash of salt, some olive oil, and the yeast mixture. Mix on medium speed and slowly introduce the remaining flour.
You’ll know it’s perfect when the dough forms a soft ball. If you don’t have a stand mixer, no worries! A bit of elbow grease and hand kneading will do the trick, just like when you learn how to make Flatbread.
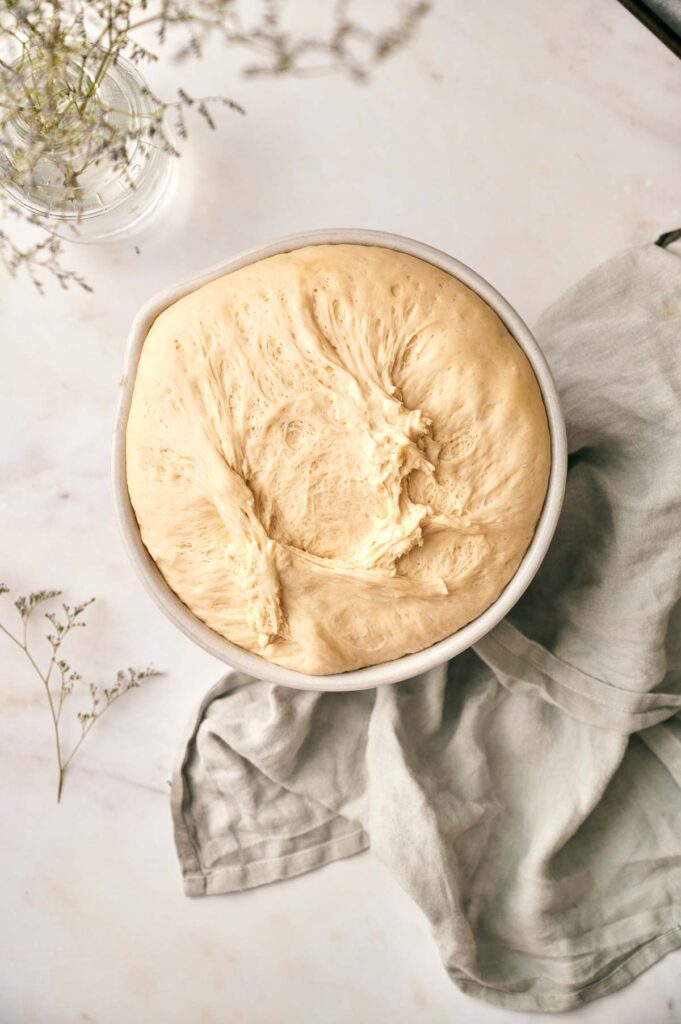
Let the Dough Rise and Shine
After kneading, lightly coat your dough ball with olive oil and place it in a large mixing bowl.
Cover it with a towel or some greased kitchen wrap, and let the dough rest and rise. Ideally, you’d want to wait for 60-90 minutes, but if you’re in a hurry, 30 minutes will do.
The dough should double in size, becoming airy and light.
Shaping and Prepping
Once risen, turn the dough onto a lightly floured surface. Divide it into two equal parts. Roll each part into a rectangle, pressing out any pesky air bubbles. If you enjoy rolling out dough, this fluffy Naan bread is another satisfying one to try.
Once shaped, place them seam-side down on a prepared baking sheet lined with parchment paper.
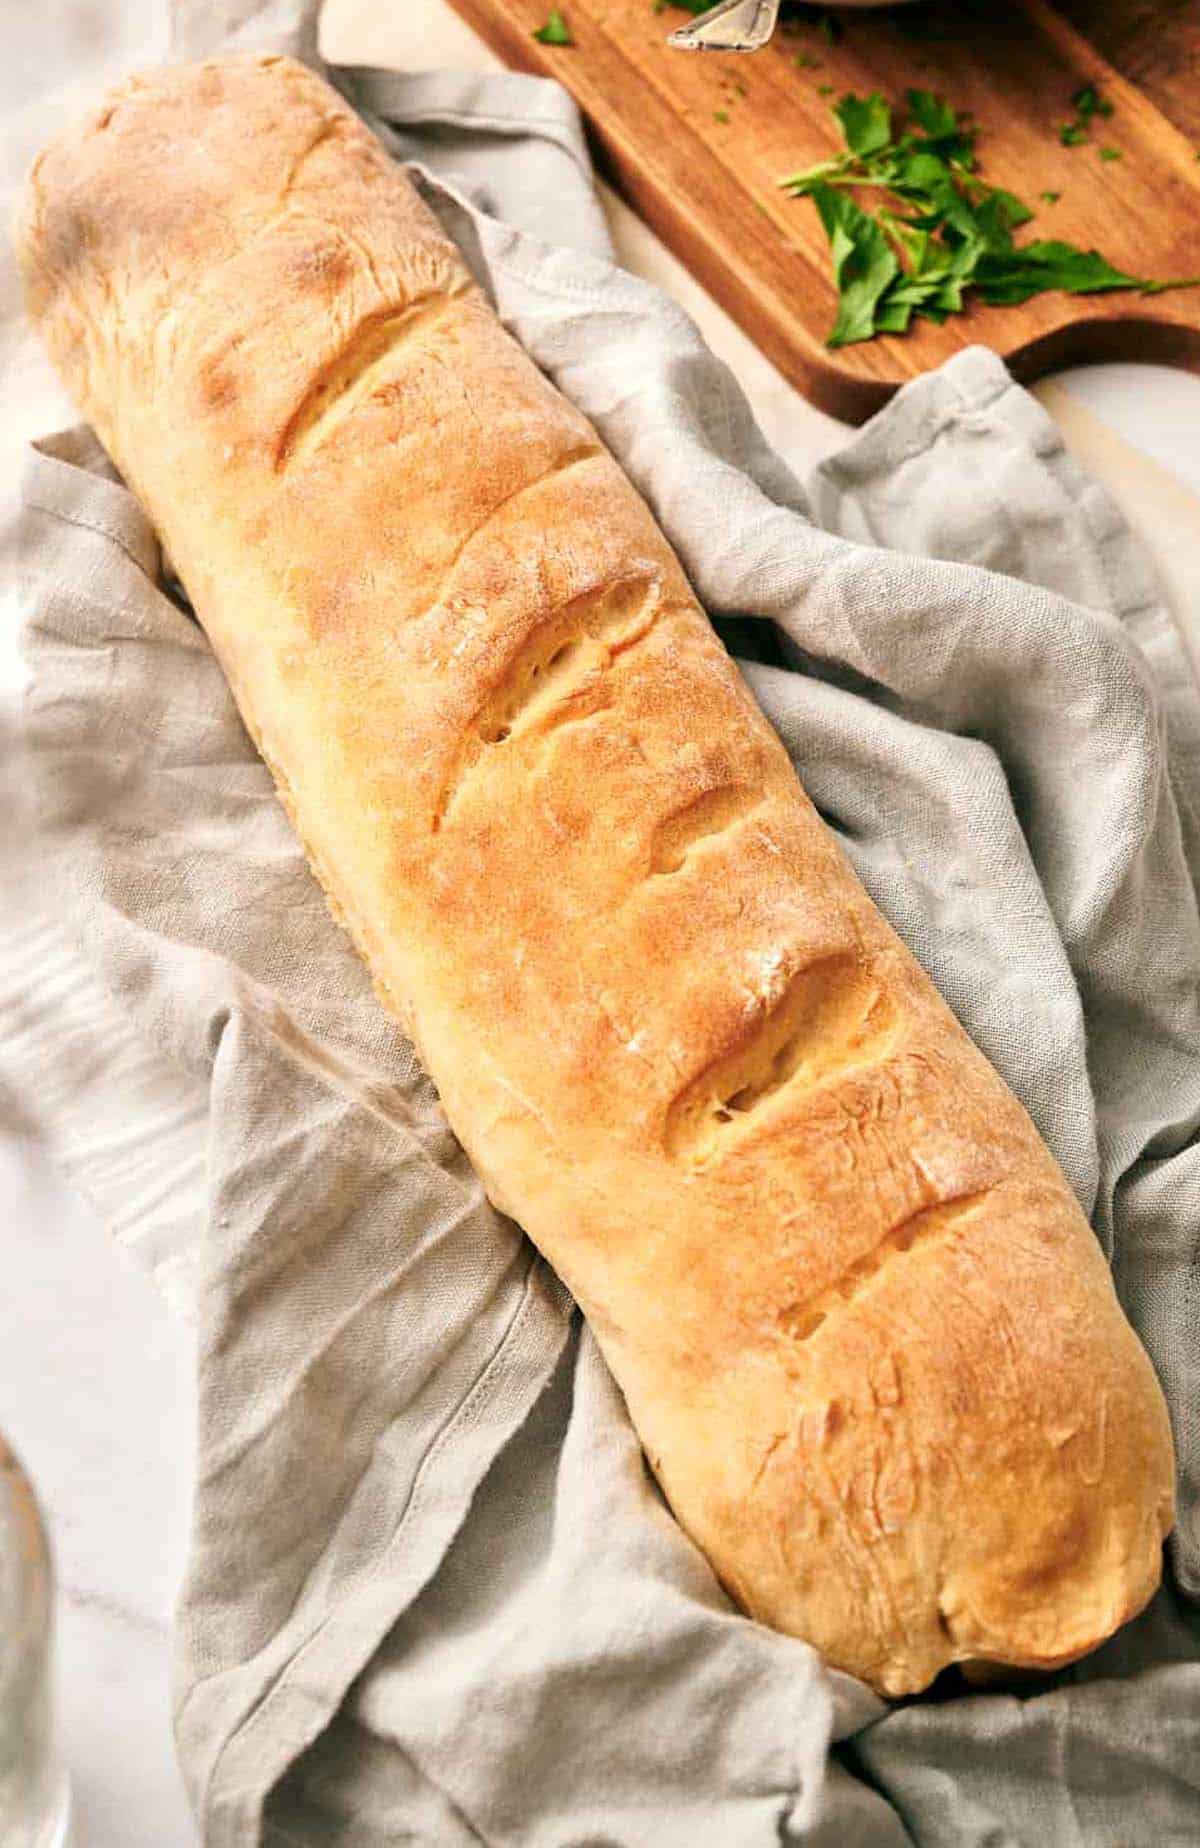
Remember those artistic diagonal cuts you see on loaves of French bread? Now’s the time to make them using a sharp knife.
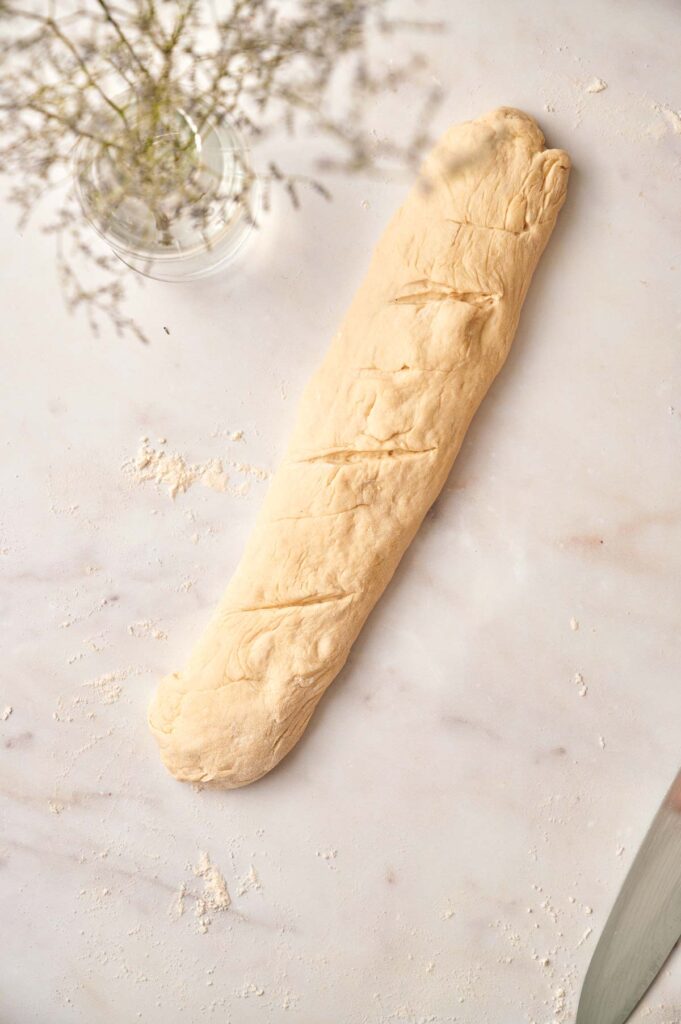
These cuts aren’t just for aesthetics; they help the bread expand while baking.
The Second Rise
Cover your shaped loaves with a kitchen towel or greased wrap and let them have a second rise.
This will take about 60 minutes, and the two loaves should double in size. This second rise ensures that your bread has a lovely texture inside.
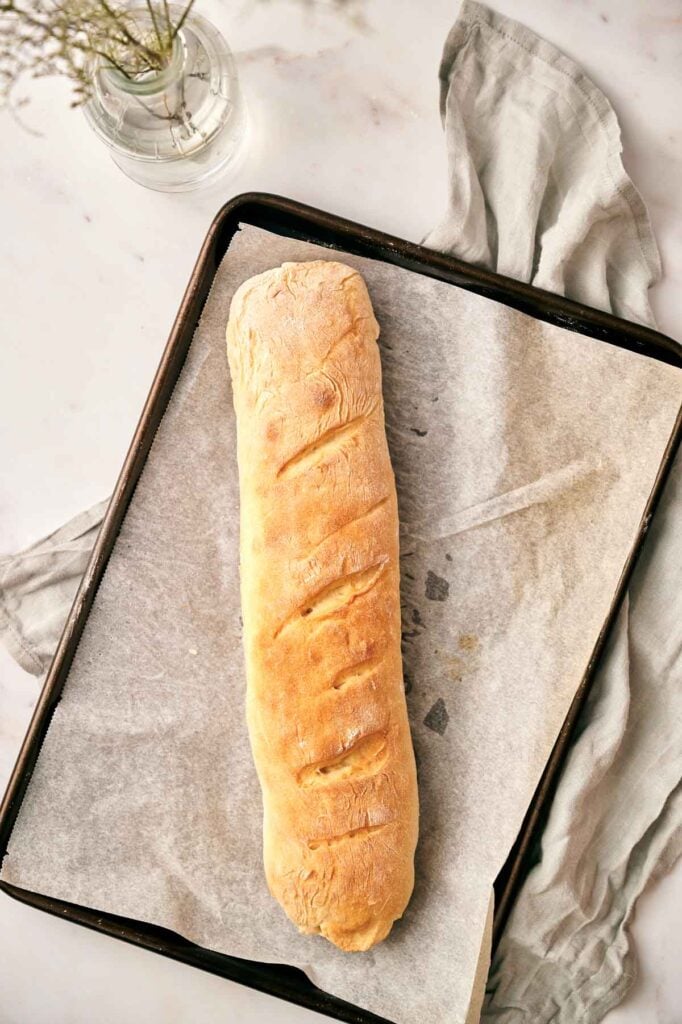
Baking to Perfection
Preheat oven to a hot 400°F (205°C) and ensure your oven rack is in the middle.
Optional: To make the bread shiny, you can brush loaves with an egg wash. Just whisk an egg and brush the mixture onto the loaves.
Then, slide in your two loaves of French bread and bake until they turn a beautiful golden brown, which should take around 16-22 minutes.
Tip: tap the bottom of your loaf; if it sounds hollow, it’s done!
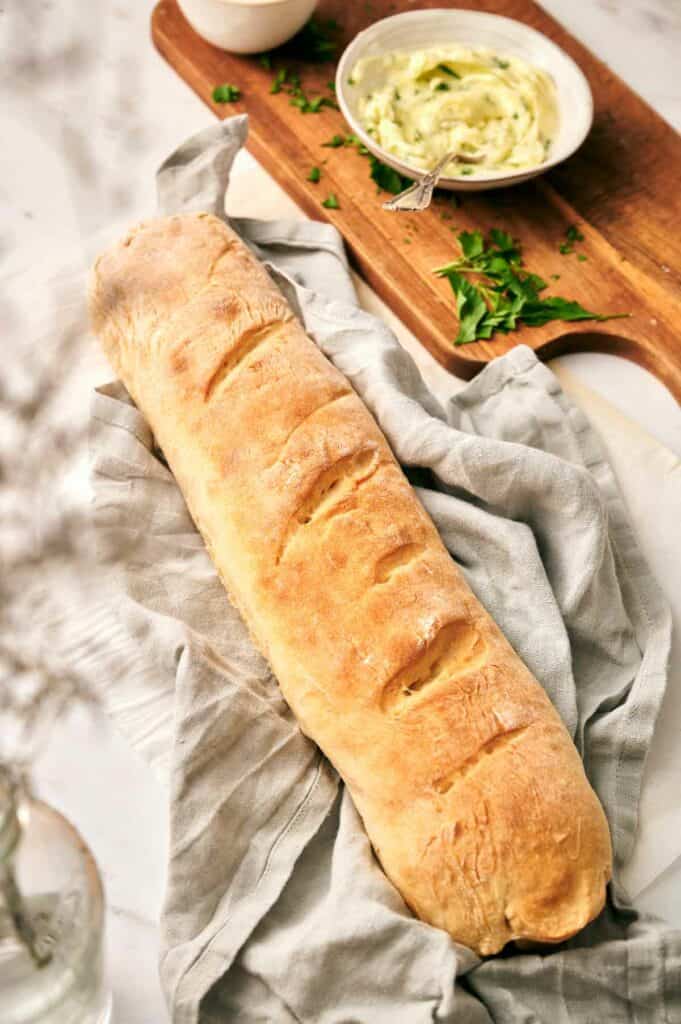
The Finishing Touch
Once out of the oven, and if you’re in the mood for an extra touch of richness, brush the tops of the baked loaves with some melted butter.
This gives the bread a glossy finish and adds a hint of buttery goodness.
Ingredients
For the French Bread
- 2¼ cups Warm water
- 1 tbsp Yeast
- 2 tbsp Sugar
- 5½ cups Flour
- 2¼ tsp Salt
- 2 tbsp Olive oil
Instructions
- Add warm water, yeast, and sugar to a small bowl and leave until it begins to foam.2¼ cups Warm water, 1 tbsp Yeast, 2 tbsp Sugar
- Using a stand mixer fitted with a dough hook, add 3 cups of flour, salt, oil, and the yeast mixture and mix on medium speed; slowly add 2½ – 3 more cups of flour, and the dough will start to form and become a soft ball.5½ cups Flour , 2¼ tsp Salt, 2 tbsp Olive oil
- Lightly rub olive oil over the dough ball and place it into a large mixing bowl, cover with a towel or greased kitchen wrap, and leave to rise for a minimum of 30 minutes but, ideally, 60 – 90 minutes.
- Line a large baking sheet with parchment paper.
- Turn the dough out on to a lightly floured surface, divide it in two, and set one half aside. Roll the dough into a rectangle shape, approx. 14 -16 inches long, be sure to press out any air bubbles. Pinch to seal and smooth the seam placing the dough seam side down on your baking sheet. Repeat the process with the second loaf.
- Using a VERY sharp knife, make diagonal cuts to the top of each loaf. Cover the loaves with a kitchen towel or greased kitchen wrap and leave until they have doubled in size approx. 60 minutes.
- Preheat the oven to 400°F/205°C and ensure your oven rack is on the middle shelf. Bake the bread until it is golden brown on top, approx. 16 -22 minutes. When it's ready, you should be able to hear a hollow sound when you knock on the bottom of the loaf.
- Remove from the oven,;if you prefer, brush the top of the loaves with melted butter. Slice and serve while the French bread is still warm.
Notes
- Flour: While our recipe primarily uses all-purpose flour, you can also experiment with bread flour or even a mix of whole wheat flour.
- Yeast: Always ensure that your active dry yeast is fresh. An expired or old yeast might not give the desired rise to your bread, leading to a denser loaf. If you’re unsure about the freshness, simply check the foaming when you mix it with warm water and sugar. No foam means the yeast is inactive, and it’s time to get a new batch. Also, instant yeast can be a direct substitute for active dry yeast. However, with rapid rise yeast doesn’t need to be proofed like active dry yeast; you can mix it directly with your flour.
- Temperature: The water you use to activate the yeast should be warm but not hot. Ideally, it should be around 100°F to 110°F (37°C to 43°C). Too hot, and you risk killing the yeast; too cold, and the yeast won’t activate. Also, when letting your dough rise, find a warm spot in your home. This encourages the yeast to work faster, giving you a fluffier bread.
- Baking on a Stone or Cast Iron: If you have a baking stone or a cast iron skillet, you can use them to bake your French bread. They retain heat well and can give your bread a crispier crust. Just make sure to preheat them in the oven before placing your loaves on them.
- The Ice Cube Trick: For an extra crispy crust, try placing a few ice cubes in a separate baking tray at the bottom of the oven when you start baking. The steam from the melting ice cubes creates a humid environment in the oven, which results in a crusty French bread exterior.
- How do I know if I’ve kneaded the bread dough enough? A well-kneaded dough will be smooth and elastic. A simple test is the “windowpane test”: take a small piece of dough and stretch it between your fingers. If it forms a thin, translucent membrane without tearing, it’s ready.
- Storage: The best way to store your freshly baked French bread if you plan to eat it within a day or two is at room temperature. Simply wrap the bread in a cloth or place it inside a paper bag. This method helps maintain the crispy crust while preventing the whole loaf of bread from drying out. Avoid plastic bags as they can make the crust go soft!
- Freezing: Before freezing, ensure the bread has cooled completely. Then, wrap it tightly in plastic wrap, followed by a layer of aluminum foil. When you’re ready to eat, thaw the bread at room temperature and pop it in a hot oven for a few minutes to revive that crispy crust.
Nutrition
Recipe Notes and Expert Tips
- Flour: While our recipe primarily uses all-purpose flour, you can also experiment with bread flour or even a mix of whole wheat flour. Bread flour has a higher protein content, which can give your French bread a chewier texture. If you’re going for a slightly healthier version, mixing in some whole wheat flour can add a nutty flavor and a bit more fiber.
- Yeast: Always ensure that your active dry yeast is fresh. An expired or old yeast might not give the desired rise to your bread, leading to a denser loaf. If you’re unsure about the freshness, simply check the foaming when you mix it with warm water and sugar. No foam means the yeast is inactive, and it’s time to get a new batch. Also, instant yeast can be a direct substitute for active dry yeast. However, with rapid rise yeast doesn’t need to be proofed like active dry yeast; you can mix it directly with your flour.
- Temperature: The water you use to activate the yeast should be warm but not hot. Ideally, it should be around 100°F to 110°F (37°C to 43°C). Too hot, and you risk killing the yeast; too cold, and the yeast won’t activate. Also, when letting your dough rise, find a warm spot in your home. This encourages the yeast to work faster, giving you a fluffier bread.
- Baking on a Stone or Cast Iron: If you have a baking stone or a cast iron skillet, you can use them to bake your French bread. They retain heat well and can give your bread a crispier crust. Just make sure to preheat them in the oven before placing your loaves on them.
- The Ice Cube Trick: For an extra crispy crust, try placing a few ice cubes in a separate baking tray at the bottom of the oven when you start baking. The steam from the melting ice cubes creates a humid environment in the oven, which results in a crusty French bread exterior.
- How do I know if I’ve kneaded the bread dough enough? A well-kneaded dough will be smooth and elastic. A simple test is the “windowpane test”: take a small piece of dough and stretch it between your fingers. If it forms a thin, translucent membrane without tearing, it’s ready.
How to Store Leftover French Bread
French bread stores well, and there are different ways to ensure it lasts a little longer.
Room Temperature Storage
The best way to store your freshly baked French bread if you plan to eat it within a day or two is at room temperature.
Simply wrap the bread in a cloth or place it inside a paper bag. This method helps maintain the crispy crust while preventing the whole loaf of bread from drying out.
Avoid plastic bags as they can make the crust go soft!
Freezing for Longer Shelf Life
Before freezing, ensure the bread has cooled completely. Then, wrap it tightly in plastic wrap, followed by a layer of aluminum foil.
When you’re ready to eat, thaw the bread at room temperature and pop it in a hot oven for a few minutes to revive that crispy crust.
What to Serve with Homemade French Bread
If you’re anything like me, you’ll find it impossible to break off bits of bread and pop them in your mouth, but if you can find a little self-control (it’s difficult), then there are many ways to enjoy your homecooked bread.
Dips and Spreads Galore
One of the joys of a perfectly baked loaf of French bread is the variety of dips and spreads it can be paired with.
From a simple olive oil and balsamic vinegar mix to more elaborate spreads like hummus, avocado sauce, or a spicy cheese dip, the options are endless.
We even made French Bread
Soups and Stews
There’s something incredibly comforting about dunking a slice of warm French bread into a bowl of steaming soup or stew.
Whether it’s a rich spicy tomato soup, a creamy parsnip soup, or a hearty vegetable stew, the bread acts as the perfect sponge, soaking up all those delicious flavors.
Plus, it adds a delightful crunchy contrast to the soft textures of the soup.
Cheese Boards and Charcuterie
While we’re all about vegetarian delights, a cheese board is an excellent companion for French bread.
From baked goat cheese to a classic cheese ball, the bread complements a range of cheeses. Add some olives, pickles, and maybe a dollop of fig jam or honey, and you’ve got yourself a gourmet treat.
For those who enjoy vegan cheeses, there are plenty of delicious options available that pair wonderfully with the bread.
Salads and Light Bites
If you’re looking for a lighter accompaniment, a fresh salad is a great choice.
The french bread loaf can be toasted and added as croutons or simply served on the side.
From a classic Caprese Salad or Waldorf Salad to a tasty Pizza Salad, the bread adds a fulfilling touch to your greens.
This was a completely bogas story. There was no mention of anything to do with a bread machine! WHY IN THE WORLD WOULDYOU TITLE IT THAT WAY?
I’m not sure I understand, there isn’t any mention of a bread machine in the title? It’s ‘Homemade French Bread Recipe’, sorry you found it confusing.