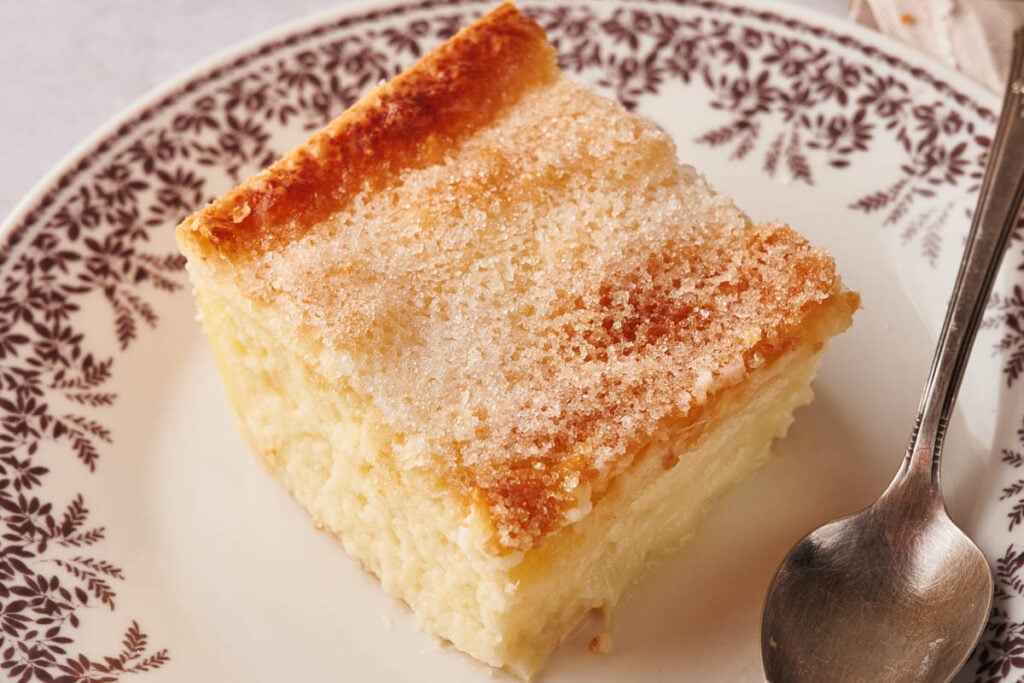
The Best Easy Sopapilla Cheesecake Recipe

Looking for a dessert that’s a total crowd-pleaser? Meet the Sopapilla Cheesecake! It’s quick and simple to whip up, making it perfect for any occasion. Imagine the fluffiness of crescent rolls combined with rich, creamy cheesecake goodness. Sounds amazing, right? Let’s get baking!
This post contains affiliate links. As an Amazon Affiliate, if you purchase through those links, I earn a small commission. Thank you!
Why You Will Love Making Sopapilla Cheesecake
- This recipe is a dream for both experienced and newbie bakers alike. No complex techniques here – just simple steps that lead to a truly decadent dessert. You don’t need to be a professional pastry chef to pull this off. Plus, with pre-made crescent roll dough, half the work is already done for you!
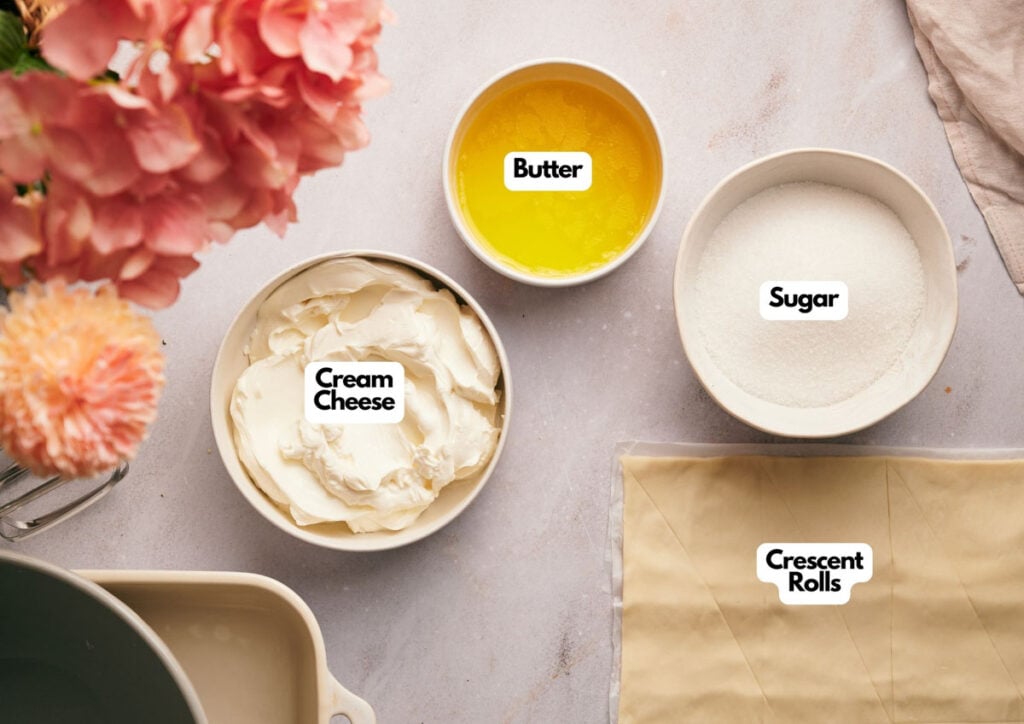
- With the ingredients, we’re talking about 4 ingredients that are likely already in your kitchen – cream cheese, sugar, melted butter, and crescent dough. No running to the store at the last minute for a rare ingredient you’ll only use once.
- Whether it’s a family dinner, a festive Cinco de Mayo celebration, or just a Tuesday night, this Sopapilla Cheesecake is sure to be a hit become one of your favorite desserts. It’s an easy dessert recipe that makes you look like a culinary genius. Your friends and family will be asking for it again and again!
- Golden brown on top, with a sweet and creamy cheesecake layer – this delicious dessert not only tastes incredible, it looks it too. It’s the perfect ending to any meal and is sure to impress your guests.
Ingredients you’ll need
You’ll need all the ingredients shown in the photograph below.
How to Make Sopapilla Cheesecake with Step-by-Step Instructions
A complete printable recipe and the measurements in both US customary and metric are available in the recipe card below.
Starting with the Crescent Roll Layer
Preheat your oven to 350°F (175°C). Lightly grease a 9″ x 13″ baking dish (nonstick cooking spray is great), and then take one can of crescent roll dough and stretch it out in the dish.
Press it down so it covers the bottom of the dish, and gently seal those perforations.
The Cheesecake Filling
Next, it’s time for that irresistible creamy layer. In a medium bowl, beat cream cheese and 1 cup of sugar until it’s nice and smooth.
We like to use a hand-held electric mixer for this; however, a food processor or stand mixer will work just as well.
Spread this cream cheese mixture evenly over the crescent roll layer in your dish.
SERIOUSLY GOOD
DESSERTS!

Dessert First is a collection of 61 RECIPES to show you that you can make beautiful, impressive desserts right in your own kitchen, no matter your skill level.
Immediate eBook download. No physical book available.
Includes ad-free recipes like:
∙ Lemon Pound Cake
∙ Key Lime Bars
∙ Boston Cream Pie
∙ No-Bake Chocolate Lasagna
∙ Raspberry Cheesecake
...and much more!
Topping it Off
Now, unroll your second can of dough, and place a second layer of crescent dough gently on top of the cream cheese layer.
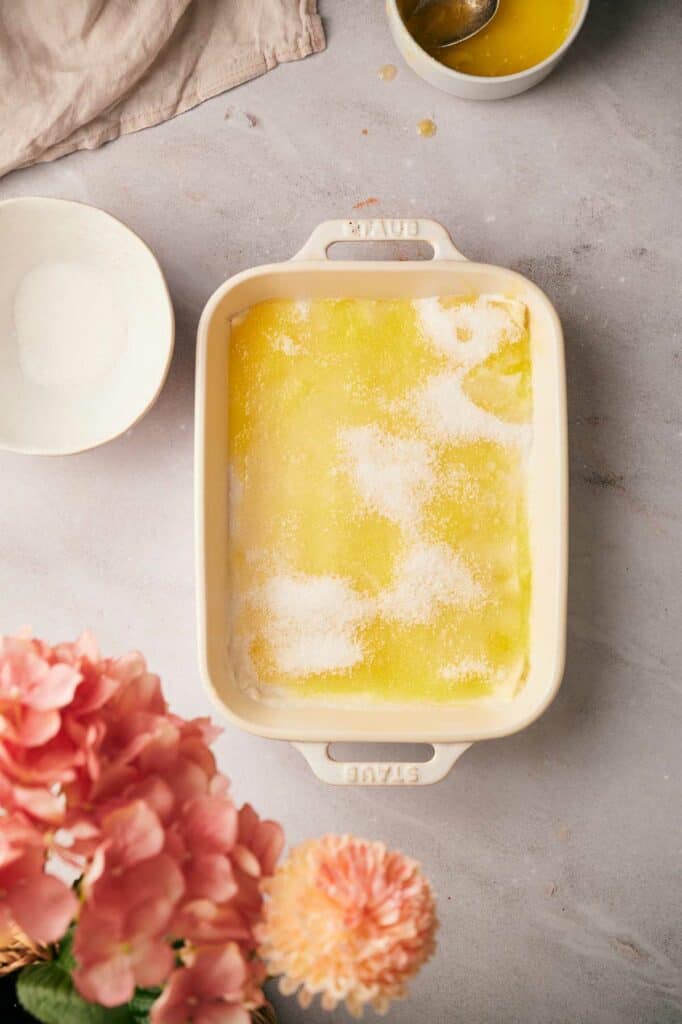
Pour melted butter evenly over the top of the dough, then sprinkle the remaining sugar.
Baking to Perfection
Pop that prepared baking dish into your preheated oven, and bake for about 30-35 minutes.
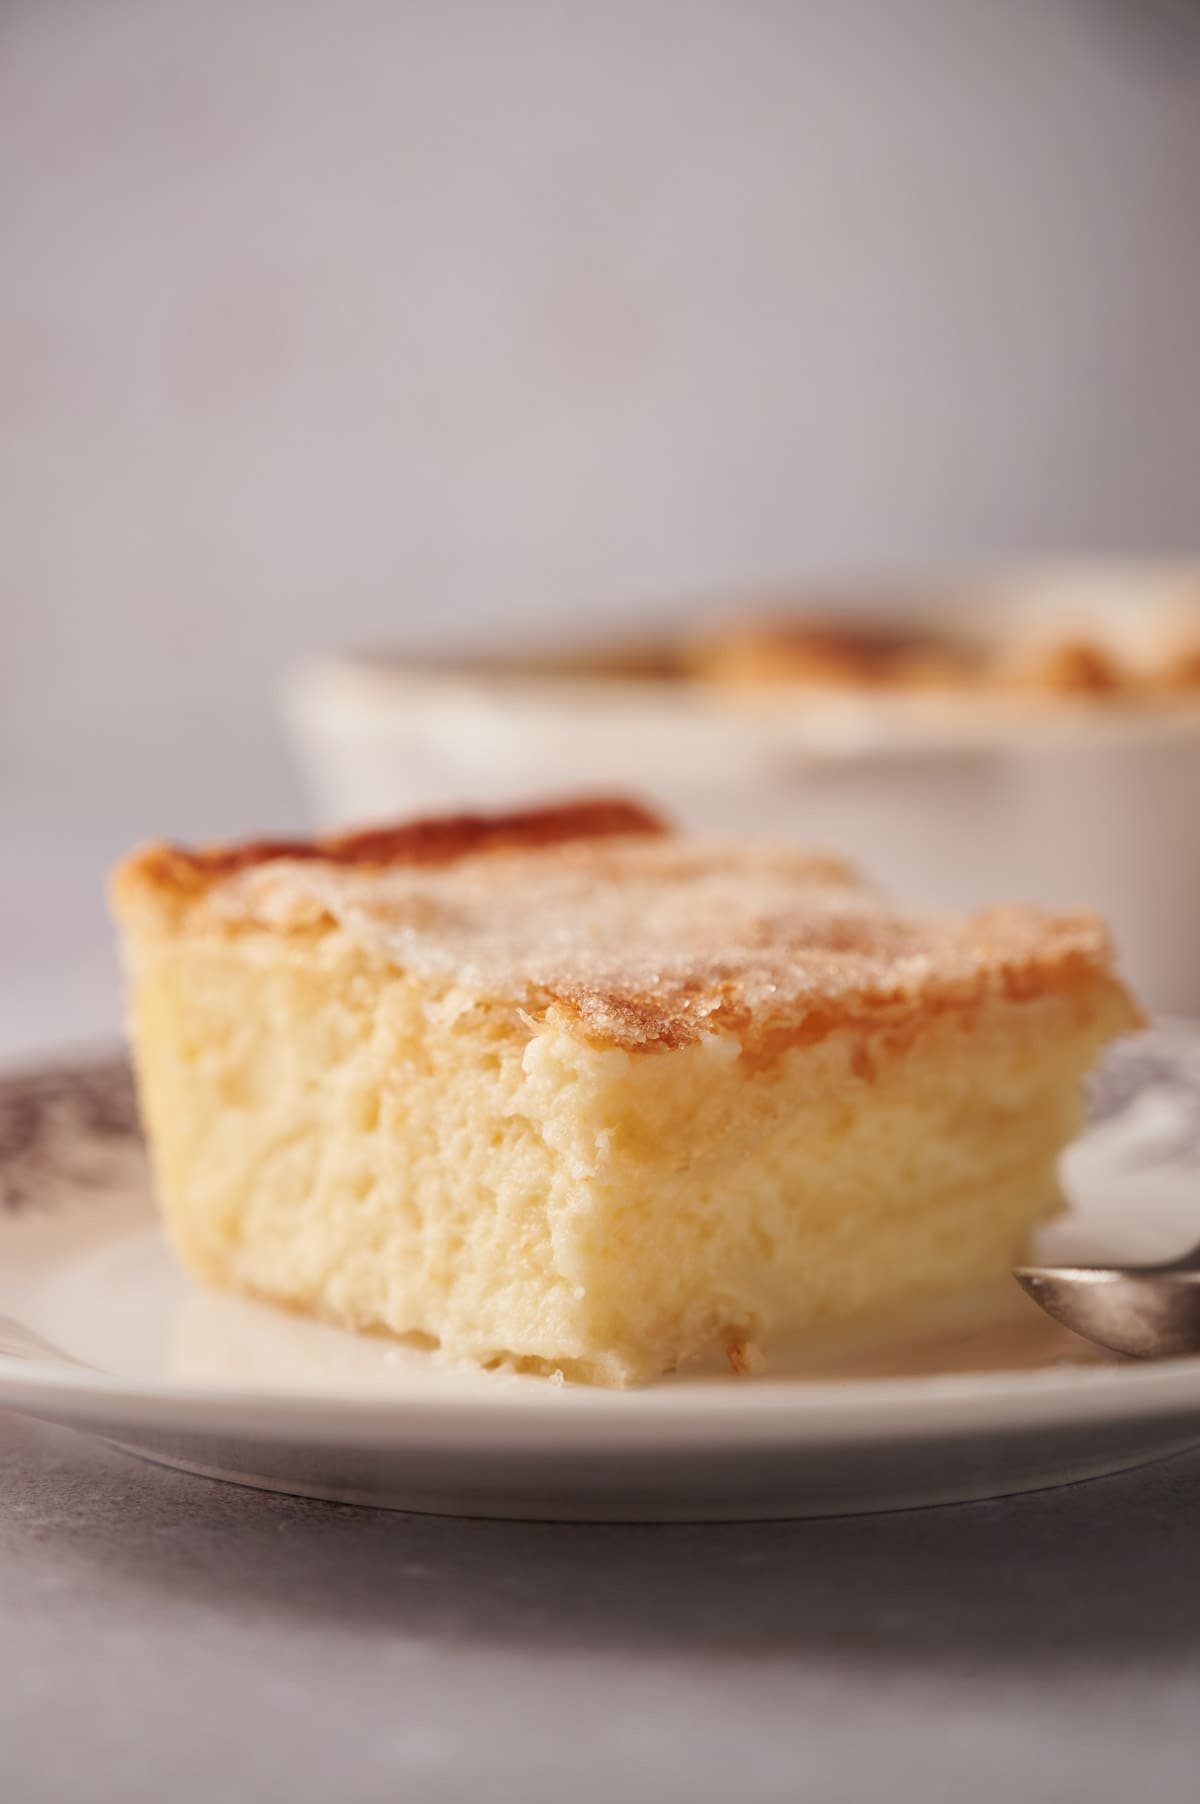
You’re looking for a beautiful golden brown top and a center that has set when gently shaken.
Cool, Cut, and Enjoy!
After baking, let your cheesecake cool completely on a wire rack, then chill it in the fridge for at least 2 hours.
Cut it into squares, and it’s ready to serve. For a little extra magic, add a drizzle of honey over it before serving.
Voila! A spectacular dessert that’s as easy as pie (well, cheesecake).
Ingredients
- 2 cans 8 ounces Pillsbury Cresent Rolls
- 16 ounces cream cheese softened
- 1½ cups sugar divided
- ½ cup butter melted

Video
Instructions
- Preheat your oven to 350°F/175°C.
- Very lightly grease a 9" x 13" baking dish and unroll 1 can of dough, stretch the dough so that it covers the bottom of the dish, and firmly press the perforations to seal the dough.2 cans 8 ounces Pillsbury Cresent Rolls
- Using a food processor or handheld electric mixer, beat the cream cheese and 1 cup of sugar on medium speed until it's smooth. Spread the cream cheese mixture over the dough.16 ounces cream cheese, 1½ cups sugar
- Unroll the second can of dough, press the perforations to seal them, and place it on the cream cheese layer. Pour melted butter evenly over the top of the dough and sprinkle the remaining sugar over the top.½ cup butter
- Place in the oven and bake until the bars have set when the dish is shaken approximately 30 – 35 minutes. Remove from the oven and leave to cool on a wire rack, then transfer to the fridge to chill for a minimum of 2 hours.1½ cups sugar
- Cut into rows, serve, and drizzle with optional honey.
Notes
- Choose the Right Cream Cheese: Always opt for full-fat cream cheese. This ensures the cheesecake mixture turns out rich and creamy. The softened cream cheese that has sat at room temperature will blend more smoothly, giving you that desired creamy cheesecake filling.
- The Crescent Roll Dough: If you can, grab the crescent roll dough sheets. They’re easier to work with as they come without the perforations. However, if you only have the regular crescent rolls, don’t worry! Just make sure to press the perforations together well.
- Can I Use a Different Type of Dough? Absolutely! If you can’t find crescent roll dough, puff pastry is a great alternative. It will give your Sopapilla Cheesecake a flakier, more delicate crust. Just roll it out to fit your baking dish.
- Patience is Key: Yes, we know it’s hard to wait, especially when your kitchen smells heavenly! But let the Sopapilla Cheesecake Bars cool completely before cutting. This allows the flavors to meld and the bars to set, ensuring the perfect slice every time.
- Optional Toppings: While drizzling honey is our go-to choice, don’t hesitate to get creative. Perhaps a sprinkle of sliced almonds for a crunch or even a dollop of whipped heavy cream.
- Cinnamon Sugar: For that classic sopapilla flavor, mix cinnamon into the sugar for the topping to make cinnamon sugar. We suggest a good balance, typically around 1 tablespoon of ground cinnamon to a quarter cup of granulated sugar. Feel free to adjust the cinnamon sugar mixture to your liking!
- Storage: Make sure it has cooled completely and then place the Sopapilla Cheesecake Bars in an airtight container. They’ll keep nicely in the refrigerator for up to 5 days.
- Freeze: Yes, you can even freeze sopapilla cheesecake! Wrap the individual slices tightly in plastic wrap and then in aluminum foil to prevent freezer burn. Label them with the date so you remember when you made this delightful dessert. When the craving hits, just thaw in the fridge overnight and enjoy. They can be frozen for up to 3 months.
- Reviving the Crunch: If you find the top layer has lost some of its crunch after refrigeration, just pop the bars into a preheated oven or air fryer at 350°F (175°C) for about 5-10 minutes. You’ll bring them back to life, making them just as irresistible as they were fresh from the oven.
Nutrition
SERIOUSLY GOOD
DESSERTS!
Dessert First is a collection of 61 RECIPES to show you that you can make beautiful, impressive desserts right in your own kitchen, no matter your skill level.
Immediate eBook download. No physical book available.
Includes ad-free recipes like:
∙ Lemon Pound Cake
∙ Key Lime Bars
∙ Boston Cream Pie
∙ No-Bake Chocolate Lasagna
∙ Raspberry Cheesecake
...and much more!
Recipe Notes and Expert Tips
- Choose the Right Cream Cheese: Always opt for full-fat cream cheese. This ensures the cheesecake mixture turns out rich and creamy. The softened cream cheese that has sat at room temperature will blend more smoothly, giving you that desired creamy cheesecake filling.
- The Crescent Roll Dough: If you can, grab the crescent roll dough sheets. They’re easier to work with as they come without the perforations. However, if you only have the regular crescent rolls, don’t worry! Just make sure to press the perforations together well.
- Can I Use a Different Type of Dough? Absolutely! If you can’t find crescent roll dough, puff pastry is a great alternative. It will give your Sopapilla Cheesecake a flakier, more delicate crust (and what’s not to love about layers of flaky pastry?). Just roll it out to fit your baking dish.
- Patience is Key: Yes, we know it’s hard to wait, especially when your kitchen smells heavenly! But let the Sopapilla Cheesecake Bars cool completely before cutting. This allows the flavors to meld and the bars to set, ensuring the perfect slice every time.
- Optional Toppings: While drizzling honey is our go-to choice, don’t hesitate to get creative. Perhaps a sprinkle of sliced almonds for a crunch or even a dollop of whipped heavy cream.
- Cinnamon Sugar: For that classic sopapilla flavor, mix cinnamon into the sugar for the topping to make buttery cinnamon sugar. We suggest a good balance, typically around 1 tablespoon of ground cinnamon to a quarter cup of granulated sugar. Feel free to adjust the cinnamon sugar mixture to your liking!
How to Store Leftovers
Fridge First
Make sure it has cooled completely, and then place the Sopapilla Cheesecake Bars in an airtight container. They’ll keep nicely in the refrigerator for up to 5 days.
Freeze for Later
Yes, you can even freeze sopapilla cheesecake! Wrap the individual slices tightly in plastic wrap and then in aluminum foil to prevent freezer burn.
Label them with the date so you remember when you made this delightful dessert. When the craving hits, just thaw in the fridge overnight and enjoy.
They can be frozen for up to 3 months.
Reviving the Crunch
If you find the top layer has lost some of its crunch after refrigeration, just pop the bars into a preheated oven or air fryer at 350°F (175°C) for about 5-10 minutes.
You’ll bring them back to life, making them just as irresistible as they were fresh from the oven.
What to Serve with Sopapilla Cheesecake
There are so many dishes you could serve with Sopapilla cheesecake.
A Dollop of Whipped Cream
While our recipe is a star on its own, a fluffy cloud of freshly whipped cream can add a light, airy contrast to the rich and creamy cheesecake layer.
Trust us; it’s a match made in dessert heaven!
A Scoop of Ice Cream
What’s better than one dessert? Two, of course! Pair a warm slice of Sopapilla Cheesecake with a scoop of vanilla ice cream.
The cold creaminess of the ice cream harmonizes with the warm, cinnamon-spiced cheesecake in a way that’s utterly irresistible.
Fresh Fruit for a Refreshing Twist
If you’re looking to add a burst of freshness, consider serving the cheesecake with a side of fruit salad or fresh berries.
The tartness of the berries cuts through the sweetness of the cheesecake, creating a balanced and vibrant flavor profile.
A Cup of Coffee or Tea
For a simpler route, nothing beats winding down at the end of the day with a slice of this Sopapilla Cheesecake and a warm cup of your favorite coffee or tea.
The robust, deep flavors of the coffee or the calming notes of the tea are the perfect companions to this sweet dessert.
Perfect for Cinco de Mayo
This dessert is a fantastic choice for Cinco de Mayo celebrations or any festive occasion. It complements a variety of traditional Mexican dishes beautifully.
Try our flavorful Birria Tacos or a hearty Burrito Bowl. Or maybe you’re in the mood for a classic Veggie Burrito or a cheesy Air Fryer Quesadilla.
And let’s not forget the sides – imagine savoring a delectable Air Fryer Elote (that’s Mexican Corn for the uninitiated!) and our moreish Chipotle Black Beans.
If it’s a vegetarian Mexican feast you’re looking for, we definitely have you covered!
Here in high altitude Santa Fe NM, baking is a challenge. Followed the recipe exactly. The bottom crust never baked. However, the filling and topping did turn out. I’ll try making this again only I’ll try blind baking the bottom crust according to the crescent roll instructions. Then I’ll add the filling, top it with another layer of crescent dough, drizzle on the melted butter and top it with cinnamon sugar. Then bake it as the recipe indicates. it should turn out great!