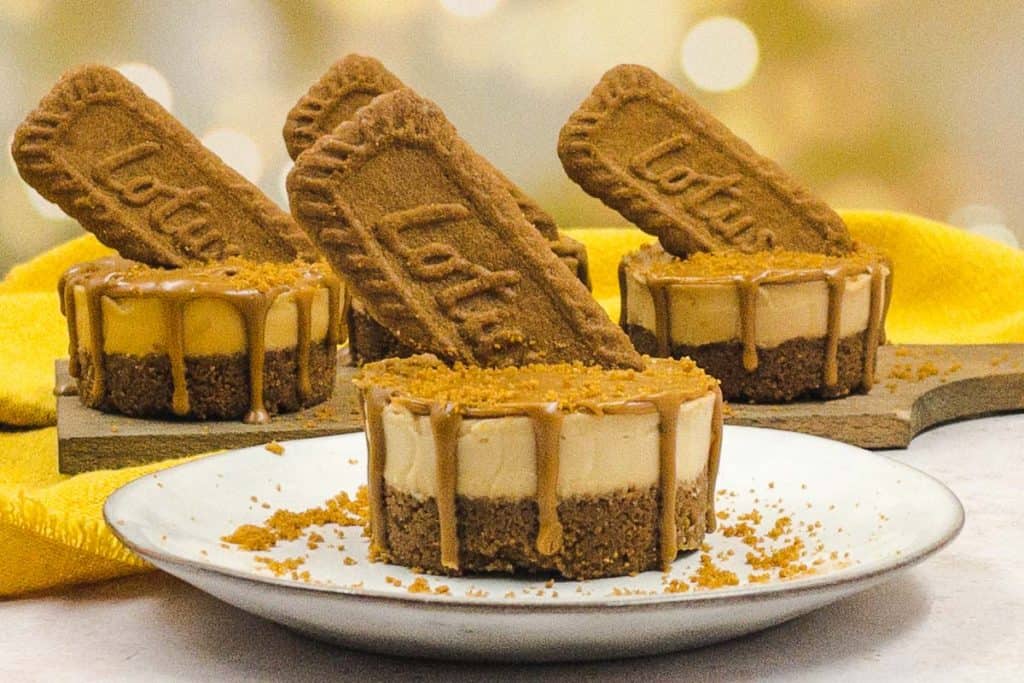
No-Bake Mini Biscoff Cheesecake Recipe
Sensational mini cheesecakes packed full of creamy Biscoff cheesecake filling, topped with Biscoff spread and fine biscuit crumbs, these not only look stunning, but they taste out of this world! There’s something quite special about serving people with their own individual mini Biscoff cheesecake, the look of delight on their faces makes it all worthwhile!
Why you’ll love these delicious mini Biscoff cheesecakes
- They are the perfect party size and great for Valentine’s Day, Mother’s Day, Easter, and Christmas.
- This is a no-bake Biscoff cheesecake recipe, which means it’s super easy to make!
- They are just the right size, not too small and not too large.
- They are 100% vegetarian.
What is Biscoff?
Biscoff is most known for its biscuits.
These tasty Belgium biscuits have a slight caramel flavour, and they are delicious!
Luckily Biscoff now doesn’t just make biscuits, you can also buy Biscoff spread (cookie butter) which is an important ingredient of our mini cheesecakes.
If you haven’t tried Biscoff then you are missing out!
How to melt Biscoff spread
It’s easy to melt Biscoff spread (cookie butter), you can either melt it in the microwave in a microwave-proof dish for approximately 15 – 25 seconds or go old school like we do and use a bain-marie.
What equipment will I need to make these mini cheesecakes?
You’ll need a food processor to blitz the Biscoff biscuits, and you’ll need a muffin tin (cupcake tray) that has removable bases so that you can remove your cheesecakes effortlessly.
How to make mini Biscoff cheesecakes with step-by-step instructions.
It’s easy to make our mini cheesecakes if you follow our simple instructions.
A full printable recipe and the measurements in both US customary and metric are available in the recipe card below.
For the mini Biscoff cheesecake bases
Add your Biscoff biscuits to a food processor and blitz them until they become fine biscuit crumbs.
Transfer the crushed biscuits to a mixing bowl, add your melted butter and stir until it’s fully combined.

Place the biscuit crumb mixture into your prepared muffin tin, put an even amount in each section, and press firmly down to create the buttery Biscoff biscuit base.
Place the muffin tray in the fridge to chill.
SERIOUSLY GOOD
DESSERTS!

Dessert First is a collection of 61 RECIPES to show you that you can make beautiful, impressive desserts right in your own kitchen, no matter your skill level.
Immediate eBook download. No physical book available.
Includes ad-free recipes like:
∙ Lemon Pound Cake
∙ Key Lime Bars
∙ Boston Cream Pie
∙ No-Bake Chocolate Lasagna
∙ Raspberry Cheesecake
...and much more!
For the cheesecake filling
While the biscuit base is chilling, make the cheesecake filling.
In a large bowl, add the cream cheese, double cream, icing sugar, vanilla extract, and Biscoff spread, and, using an electric whisk, whisk on the lowest setting, you don’t want to rush this.
Whisk until soft peaks have formed.
Now, transfer the cheesecake mixture to the muffin tin (cupcake tray), evenly distribute it amongst the cups, and smooth the top, so it’s an even surface.
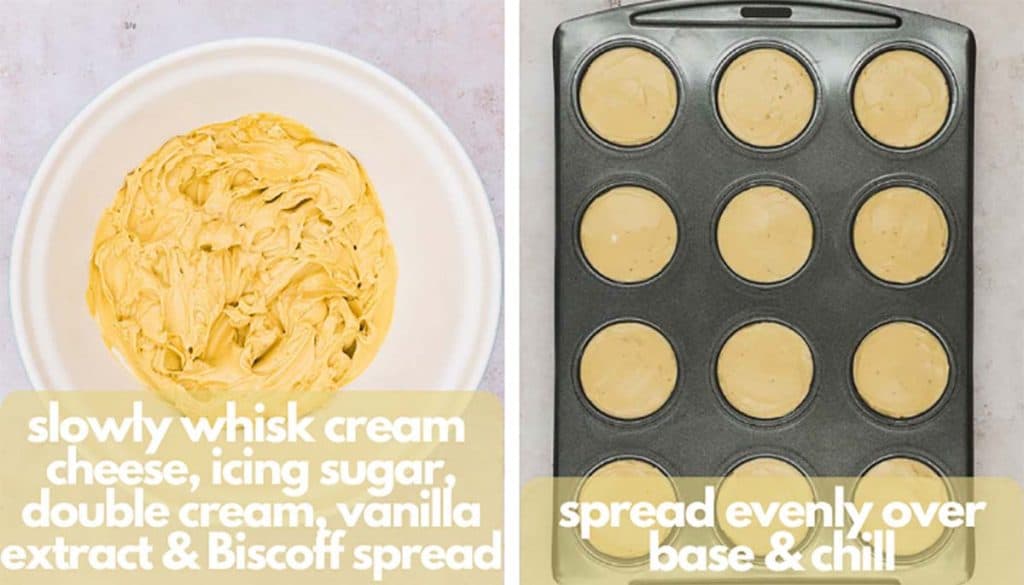
Place the tray in the fridge and leave to chill for a minimum of 5 hours but preferably overnight, so they set firmly.
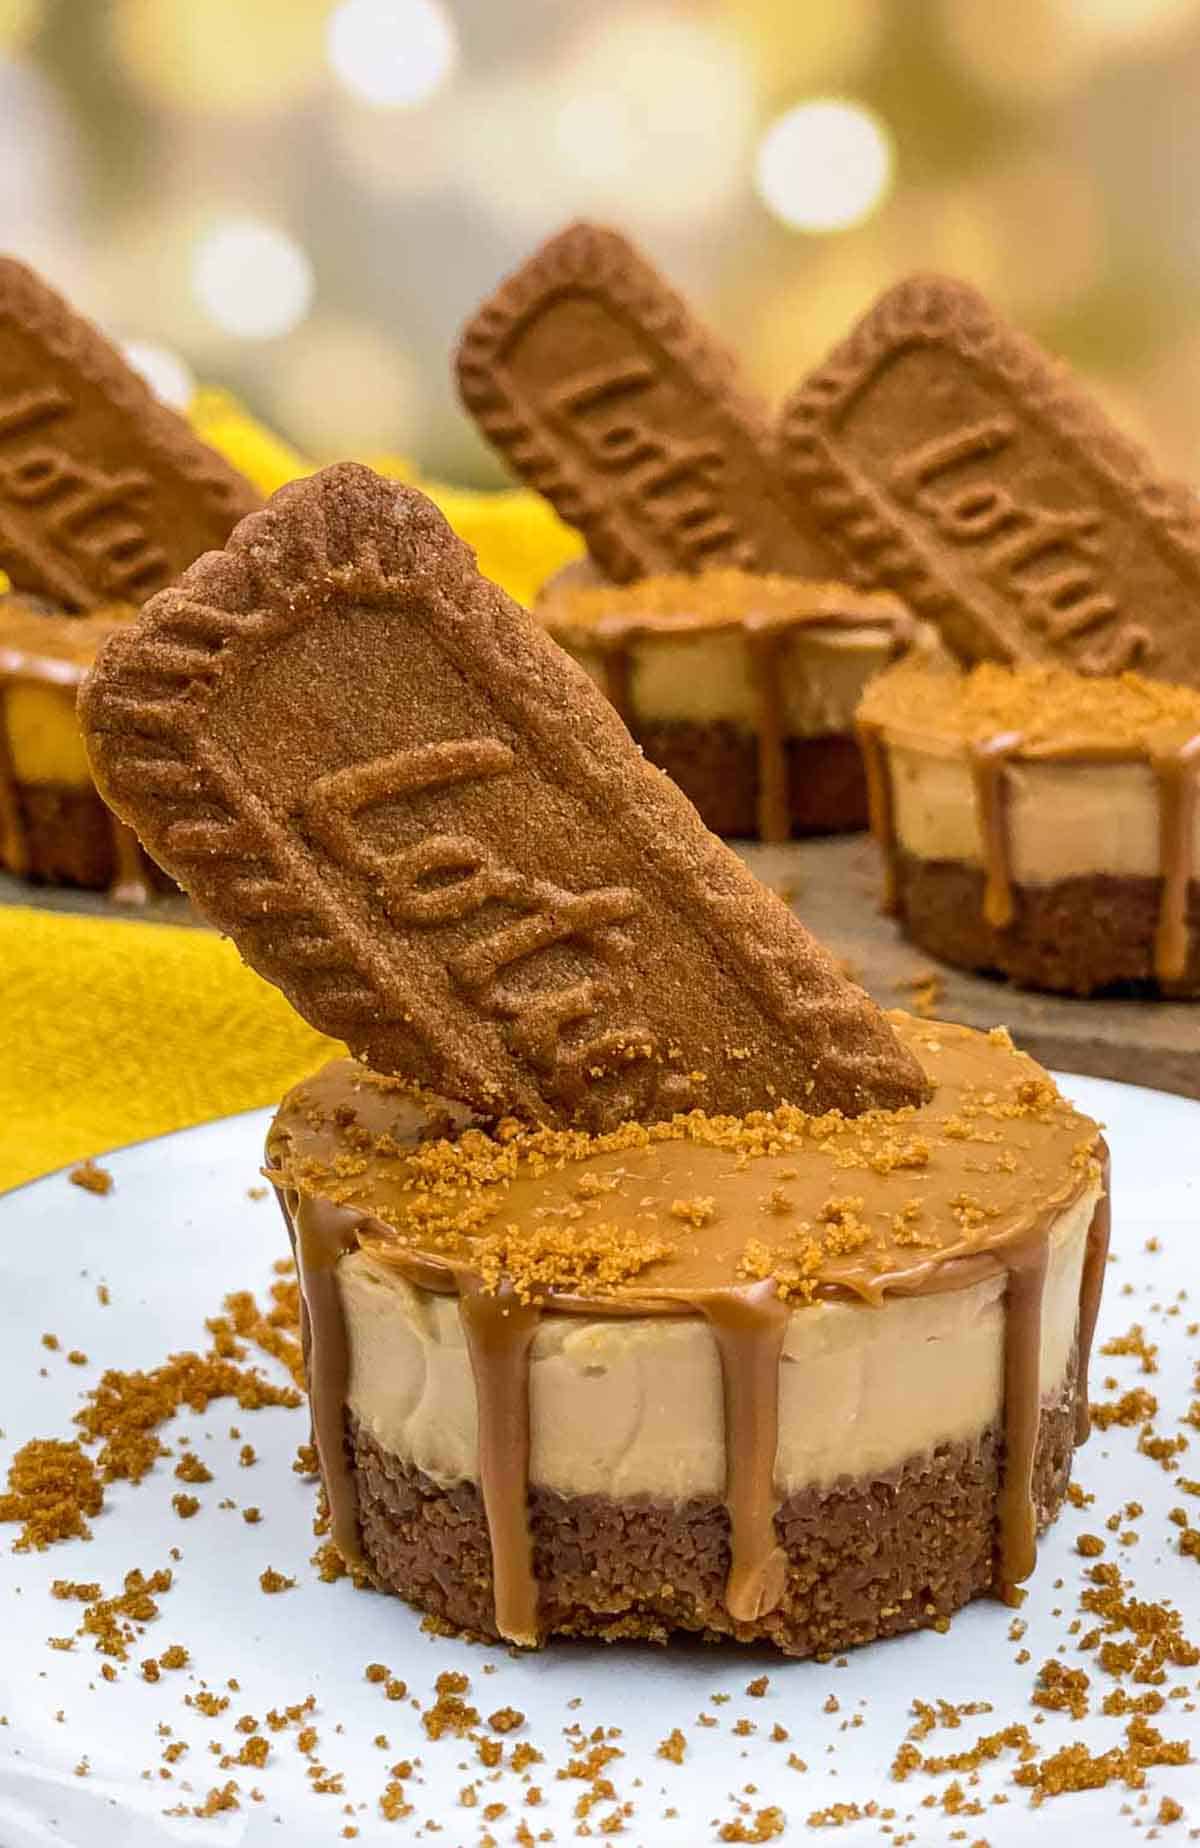
Before you serve your mini cheesecakes, you can decorate them any way you’d like.
We used melted Biscoff spread and spread it evenly over the top, drizzled some down the sides, sprinkled Biscoff biscuit crumbs over, and then place half a Biscoff biscuit on top!
Serve and enjoy your mini Biscoff cheesecakes!
Equipment
- Muffin tray with removable bases
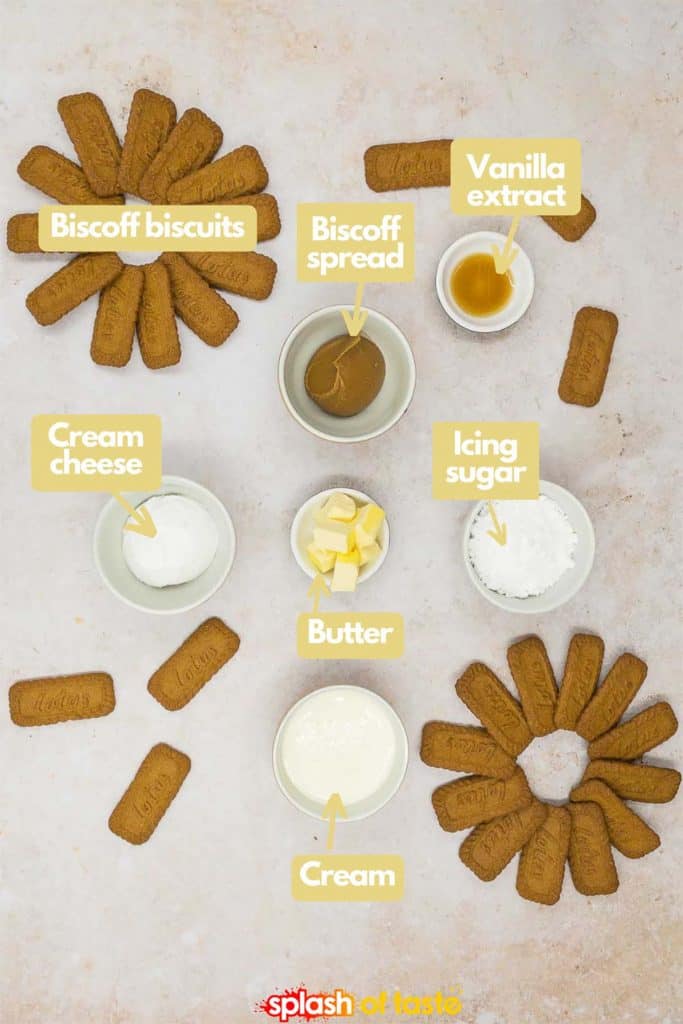
Ingredients
For the Biscoff biscuit base
- 1 cup Lotus Biscoff biscuits
- ¼ cup unsalted butter
For the cheesecake filling
- 8 ounces full fat cream cheese
- ⅔ cup double cream (heavy cream)
- ¼ cup icing sugar
- ½ teaspoon vanilla extract
- ½ cup Lotus Biscoff spread we used smooth, but you can use crunchy, you'll need extra for the optional topping
Instructions
For the Biscoff biscuit base
- Add your Biscoff biscuits to a food processor and blitz them until they become fine biscuit crumbs. Transfer the crushed biscuits to a mixing bowl, add your melted butter and stir until it's fully combined. Place the biscuit crumb mixture into your prepared muffin tin, put an even amount in each section, and press firmly down to create the buttery Biscoff biscuit base. Place the muffin tray in the fridge to chill1 cup Lotus Biscoff biscuits, ¼ cup unsalted butter
For the cheesecake filling
- While the biscuit bases are chilling, make the cheesecake filling. In a large bowl, add the cream cheese, double cream, icing sugar, vanilla extract, and Biscoff spread, and, using an electric whisk, whisk on the lowest setting, you don't want to rush this. Whisk until soft peaks have formed8 ounces full fat cream cheese, ¼ cup icing sugar, ⅔ cup double cream (heavy cream), ½ teaspoon vanilla extract, ½ cup Lotus Biscoff spread
- Now, transfer the cheesecake mixture to the muffin tin (cupcake tray), evenly distribute it amongst the cups, and smooth the top, so it's an even surface. Place the tray in the fridge and leave to chill for a minimum of 5 hours but preferably overnight, so they set firmly
- Before you serve your mini cheesecakes, you can decorate them any way you'd like. We used melted Biscoff spread and spread it evenly over the top, drizzled some down the sides, sprinkled Biscoff biscuit crumbs over, and then place half a Biscoff biscuit on top! Serve and enjoy your mini Biscoff cheesecakes!
Notes
- Keep the cheesecakes consistent!
By weighing your biscuit crumbs into 6 equal parts, you’ll ensure 6 perfect mini Biscoff cheesecakes! - Keep it full fat.
Don’t use light cream cheese, this won’t hold up in your cheesecake, you need full fat cream cheese only - No food processor?
Place the Biscoff biscuits in a sandwich bag, seal it and then bash them until they become fine crumbs - How to store your cheesecakes
Store in the fridge for up to 3 days, or freeze for up to 3 months
Nutrition
SERIOUSLY GOOD
DESSERTS!
Dessert First is a collection of 61 RECIPES to show you that you can make beautiful, impressive desserts right in your own kitchen, no matter your skill level.
Immediate eBook download. No physical book available.
Includes ad-free recipes like:
∙ Lemon Pound Cake
∙ Key Lime Bars
∙ Boston Cream Pie
∙ No-Bake Chocolate Lasagna
∙ Raspberry Cheesecake
...and much more!
Recipe notes and expert tips
- Keep the cheesecakes consistent!
By weighing your biscuit crumbs into 6 equal parts, you’ll ensure 6 perfect mini Biscoff cheesecakes! - Keep it full fat.
Don’t use light cream cheese, this won’t hold up in your cheesecake, you need full fat cream cheese only. - No food processor?
Place the Biscoff biscuits in a sandwich bag, seal it and then bash them until they become fine crumbs. - How to store your cheesecakes
Store in the fridge for up to 3 days, or freeze for up to 3 months.
Decorate your mini cheesecakes the way you want!
We used melted Biscoff spread (cookie butter) for the topping, sprinkled biscuit crumbs, and added a Biscoff biscuit.
But you could add whipped cream, whipped cream cheesecake filling on the top (that’s a little too sweet for us on top of the cheesecake but some people love it).
You could melt the Biscoff spread and then use a piping bag to create zig-zags all over the cheesecakes.
How to store mini Biscoff cheesecake
Your Biscoff cheesecakes will keep in the fridge for up to 3 days, they’ll also freeze for up to 3 months, defrost them overnight in the fridge before serving.
- Keep the cheesecakes consistent!
By weighing your biscuit crumbs into 6 equal parts, you’ll ensure 6 perfect mini Biscoff cheesecakes! - Keep it full fat.
Don’t use light cream cheese, this won’t hold up in your cheesecake, you need full fat cream cheese only. - No food processor?
Place the Biscoff biscuits in a sandwich bag, seal it and then bash them until they become fine crumbs. - How to store your cheesecakes
Store in the fridge for up to 3 days, or freeze for up to 3 months.
Other cheesecake recipes you’ll enjoy
If you like these tasty cheesecakes, then why not give these tasty recipes a try? Oreo cheesecake, Malteser cheesecake, Biscoff cheesecake, Mini egg cheesecake, easy no-bake Strawberry Cheesecake, or creme brulee cheesecake.
Looking for something different? Try these keto blueberry muffins, Carbquik pancakes, apple pie cinnamon rolls, or these instant pot brownies! And for a special occasion try a dairy-free birthday cake or try these puff pastry pinwheels, just sub out the meat for vegan meat!
We hope that you enjoy making and eating our mini Biscoff cheesecakes and would love to hear how you got on making them.
Leave a comment below and feel free to ask any questions you may have.