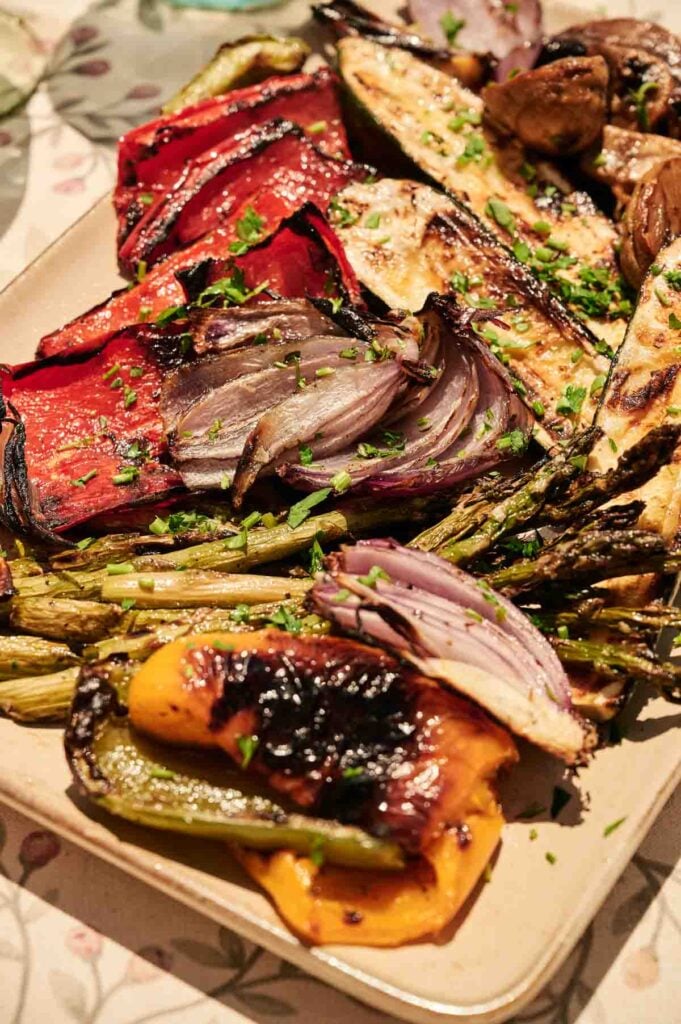
Grilled Vegetables

Grilled Vegetables are one of those recipes with a hint of sweetness that balances the whole spread. They’re simple to pull together, no complicated steps—just fresh produce, a hot grill, and a few pantry staples. A drizzle of balsamic and a sprinkle of oregano take the whole thing up a notch, and once you get the hang of it, this will be your go-to way to use up whatever’s in your veggie drawer.
This post contains affiliate links. As an Amazon Affiliate, if you purchase through those links, I earn a commission. Thank you!
I like having a few go-to dishes—like this grilled vegetables recipe—that work no matter the occasion, whether for summer cookouts, family dinners, weekend barbecues, or backyard hangouts. They’re easy to scale up, and I can prep everything ahead of time so I’m not tied to the kitchen once people arrive. If I’ve got leftovers, they go straight into lunch wraps or salads the next day. You can also freeze them, just expect them to soften up a bit.
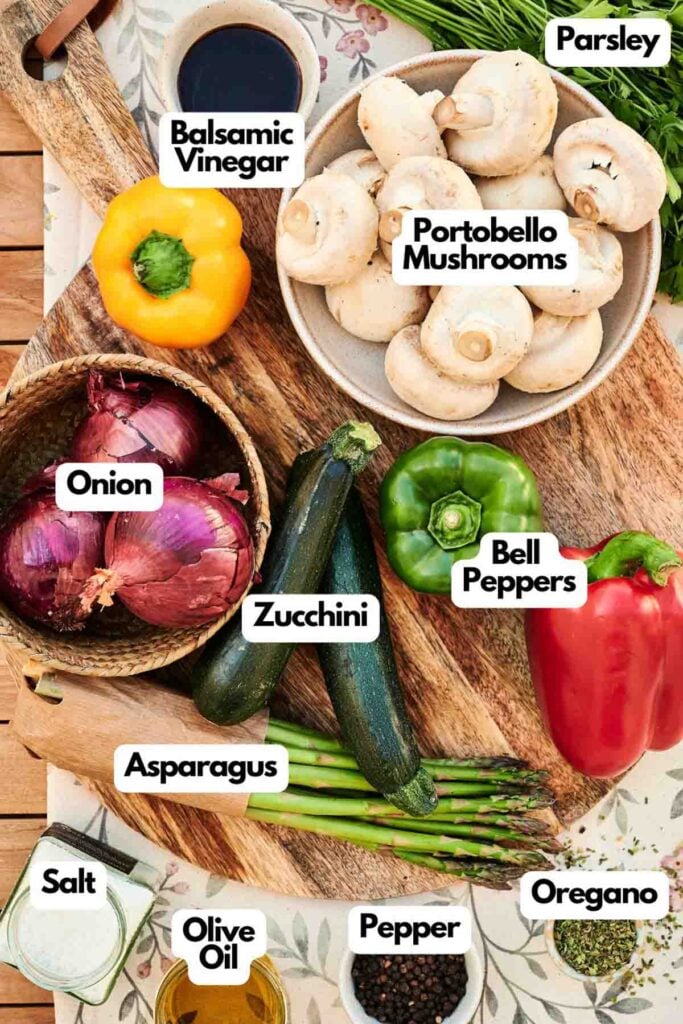
Ingredients You’ll Need
You’ll need all the ingredients shown in the photograph below.
How to Make Grilled Vegetables with Step-By-Step Instructions
Scroll down for the full recipe card containing a full printable recipe and measurements in both US customary and metric units.
You’ll get great results if you follow my easy steps—just give your grill a little patience and let the heat do most of the work.
When it comes to the grill, I’ve been sticking with my Weber Gas Grill. It preheats fast, cooks evenly, and has enough space for a full tray of veggies—no weird cold spots. If I’ve got more time (or want that smoky flavor), I’ll use the Weber Charcoal Grill. It’s a classic for a reason and honestly just feels more fun to cook on when we’ve got friends over.
Prep the Vegetables
Start by slicing the zucchini on a diagonal so it doesn’t slip through the grates. Cut the red onion into thick rounds to keep them from falling apart.
Red bell peppers should be cut into large chunks, asparagus trimmed, and portobello caps cleaned with the gills gently scraped out. This shape and size will help everything cook evenly and hold up on the grill.
Season Everything Well
Transfer all the vegetables to a large mixing bowl; I use this one as it doesn’t slide around or a rimmed sheet tray. Drizzle with olive oil and sprinkle generously with salt and black pepper.
Use your hands or tongs, I usually grab my locking tongs here—they make it easy to coat everything without getting olive oil all over your hands., to toss until every piece looks glossy and coated. This quick toss helps everything cook evenly and brings out more flavor on the grill.
Preheat the Grill
Give your grill a solid 20-minute head start so it’s fully heated. If you’re using charcoal, push the coals to one side to create a hot zone and a cooler one.
For gas, crank all burners to high and bring the temp up to 400°F. That heat is key for getting those beautiful grill marks and locking in the smoky flavor.
If your grill doesn’t have a thermometer—or it’s not super accurate—I highly recommend grabbing a grill surface thermometer. It takes the guesswork out of whether the grates are actually hot enough.
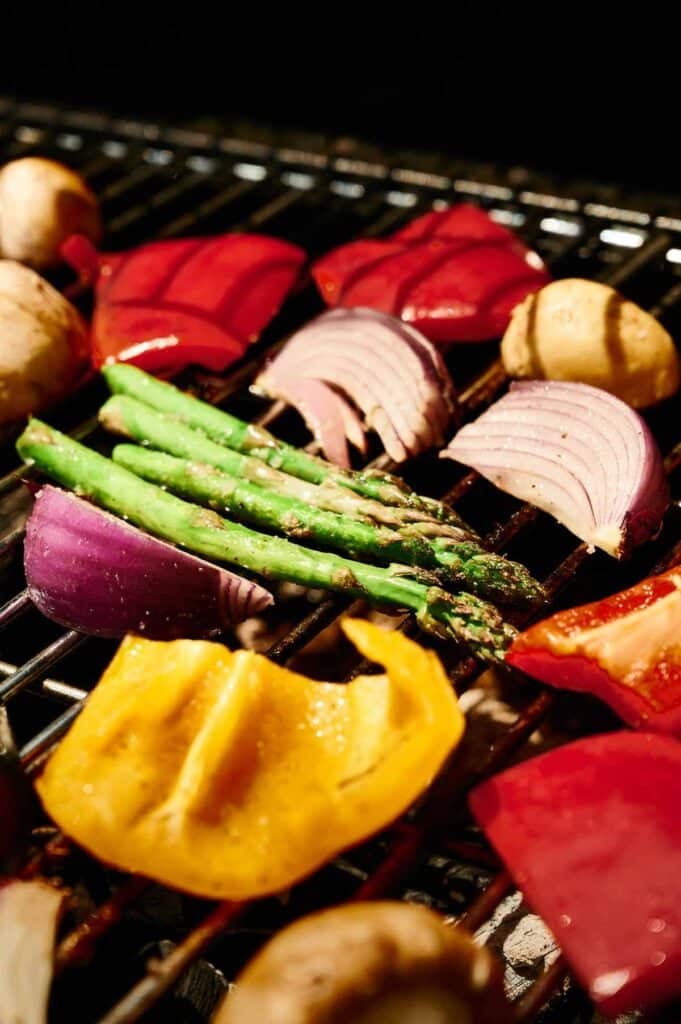
Grill the Vegetables
Grill zucchini, onions, and bell peppers over the hottest part of the grates to get a good sear and those dark grill marks that add flavor. Cook them for about 3 to 4 minutes per side until you get those dark sear marks, then slide them to the cooler side to finish softening.
Add asparagus and portobello mushrooms to a medium-heat zone or the center of the grill. They cook faster than other veggies and can burn easily, so moderate heat helps them stay tender while still picking up a bit of char. Flip them once or twice to keep things even.
If you’ve got a smaller grill or you’re cooking a big batch, a nonstick grill basket is a game changer. It keeps smaller pieces from slipping through and makes flipping easier when you’re juggling multiple veggies.
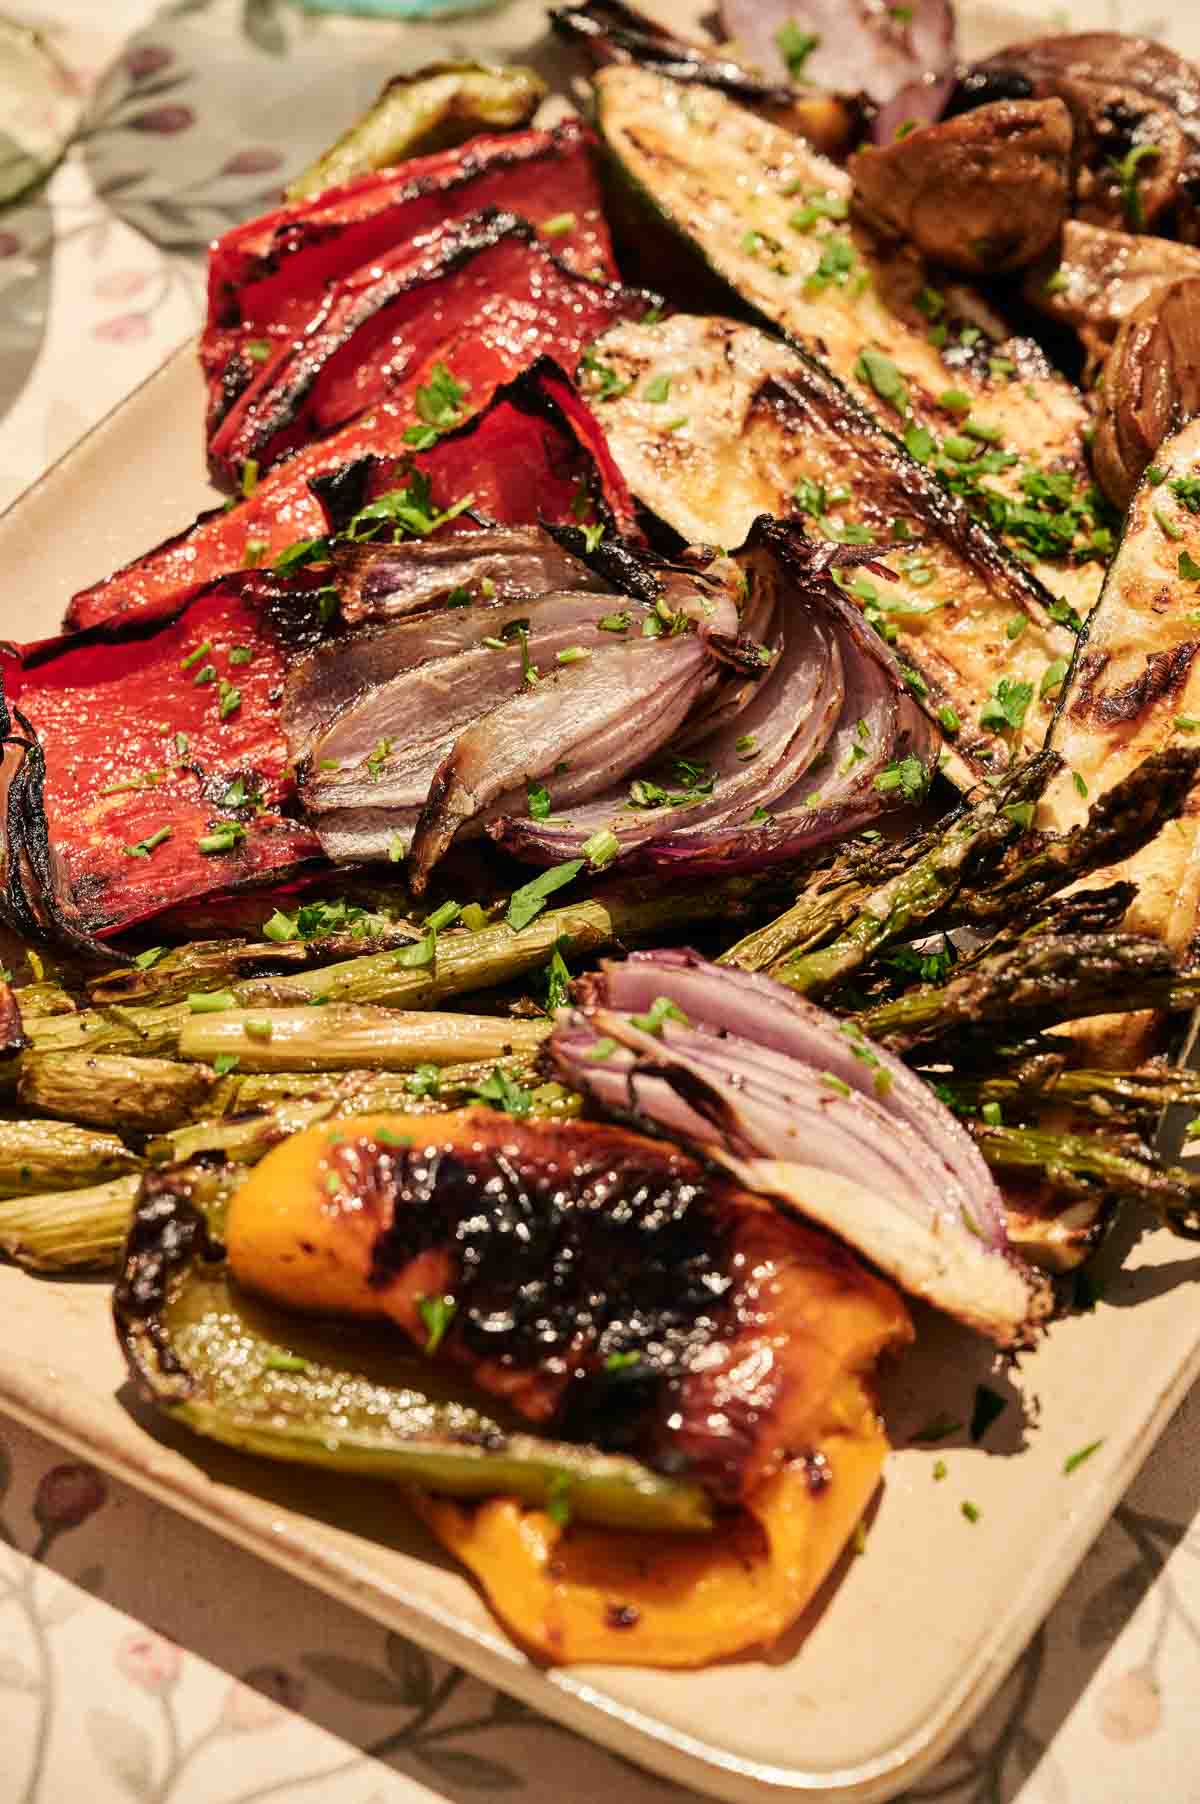
Finish and Garnish
As each vegetable becomes tender and caramelized, move it to a platter. You’ll notice some are done earlier than others, so keep an eye out. Let the peppers cool, then peel off any overly charred skin—it can taste bitter and papery, so remove it for a sweeter, smoother bite.
Just before serving, drizzle everything with balsamic vinegar, sprinkle with dried oregano and chopped parsley, and finish with a light touch of flaky salt if you want a little extra pop. Enjoy!
Ingredients
- 1 zucchini sliced thick on a bias
- 1 red onion sliced in ½ inch thick slices
- 3 bell peppers cut in thirds
- 1 bunch asparagus
- 2 large portobello mushrooms caps cleaned and gills removed
- ¼ cup extra virgin olive oil
- 1 tablespoon salt
- 1 teaspoon coarse black pepper
- 1 tablespoon balsamic vinegar
- 1 teaspoon dried oregano
- Fresh parsley for garnish

Video
Instructions
- In a large bowl or rimmed sheet tray, toss all the vegetables with olive oil, salt, and pepper until evenly coated.¼ cup extra virgin olive oil, 1 tablespoon salt, 1 teaspoon coarse black pepper
- Preheat the Grill (at least 20 minutes before cooking): For charcoal grills: Arrange coals to one side for indirect heat. For gas grills: Turn all burners to high and preheat to 400°F (200°C).
- Place zucchini, red onion slices, and bell peppers over the hottest part of the grill. Grill 3–4 minutes per side until nicely charred, then move to the cooler side to finish cooking.1 zucchini, 1 red onion, 3 bell peppers
- Add asparagus and mushrooms to medium heat zones or the center of the grill. Cook until tender, flipping as needed.1 bunch asparagus, 2 large portobello mushrooms
- Remove vegetables as they become tender and caramelized. For the bell peppers, peel off any overly charred skin after grilling.
- Arrange the grilled vegetables on a large platter. Drizzle with balsamic vinegar, sprinkle with oregano and chopped fresh parsley, and add a pinch of finishing salt if desired.1 tablespoon balsamic vinegar, 1 teaspoon dried oregano, Fresh parsley
Notes
- Cut Smart: Keep your veggie pieces large and even so they don’t fall through the grates or cook too fast. Uneven shapes = uneven cooking.
- Use a Tray or Bowl: Tossing everything in a large bowl or on a rimmed baking sheet makes cleanup easier and helps coat the vegetables evenly with oil and seasoning.
- Get Your Grill Hot: A well-preheated grill will help you get that quick char without overcooking the insides. Don’t rush this part.
- Mind the Zones: Start with firmer vegetables like peppers and onions over high heat, then slide them over to a cooler area to finish gently.
- Give It Space: Cook in batches if needed so you don’t overcrowd the grill. Give each piece room to breathe so it sears rather than steams.
- Flip With Care: Let the vegetables sit long enough to sear before flipping—if they’re sticking, they’re not ready yet.
- Peel If Needed: If any of the pepper skin gets too black, just peel it off gently. It’ll taste cleaner and more pleasant that way.
- Finish with Freshness: Balsamic vinegar and fresh parsley bring brightness to the smoky flavors. Don’t skip them—they make a big difference.
Nutrition
Recipe Notes and Expert Tips
I’ve made grilled veggies a hundred different ways, and these tips always help things go smoother from start to finish:
- Cut Smart: Keep your veggie pieces large and even so they don’t fall through the grates or cook too fast. Uneven shapes = uneven cooking.
- Use a Tray or Bowl: Tossing everything in a large bowl or on a rimmed baking sheet makes cleanup easier and helps coat the vegetables evenly with oil and seasoning.
- Get Your Grill Hot: A well-preheated grill will help you get that quick char without overcooking the insides. Don’t rush this part.
- Mind the Zones: Start with firmer vegetables like peppers and onions over high heat, then slide them over to a cooler area to finish gently.
- Give It Space: Cook in batches if needed so you don’t overcrowd the grill. Give each piece room to breathe so it sears rather than steams.
- Flip With Care: Let the vegetables sit long enough to sear before flipping—if they’re sticking, they’re not ready yet.
- Peel If Needed: If any of the pepper skin gets too black, just peel it off gently. It’ll taste cleaner and more pleasant that way.
- Finish with Freshness: Balsamic vinegar and fresh parsley bring brightness to the smoky flavors. Don’t skip them—they make a big difference.
How to Store Leftovers
Once the vegetables have cooled to room temperature, store them in an airtight container in the fridge for up to 4 days. I use these glass food containers with a lid; they stack well, and you can see what’s inside.
They reheat well in a skillet, microwave, oven, or grill pan, or you can enjoy them cold in wraps, grain bowls, or tossed into a salad.
You can also freeze them for up to 3 months, though freezing is not ideal, as their textures often turn soft once thawed. So, they’re best enjoyed fresh or straight from the fridge.
What to Serve With Grilled Vegetables
Serve grilled vegetables alongside veggie burgers, crispy tofu, corn on the cob, veggie skewers, baked sweet potatoes, cherry tomatoes, or yellow squash casserole for a full spread.
They’re great over pesto pasta salads, tucked into wraps with hummus, or layered onto flatbreads with roasted carrots or eggplant.
You can even mix them into grain bowls with broccoli, green beans, and cauliflower, or turn the leftovers into a hearty sandwich filling the next day.
More Easy Recipes for You to Try at Home
I’ve got plenty of other fresh and veggie-packed recipes that are just as flavorful and easy as these grilled vegetables.