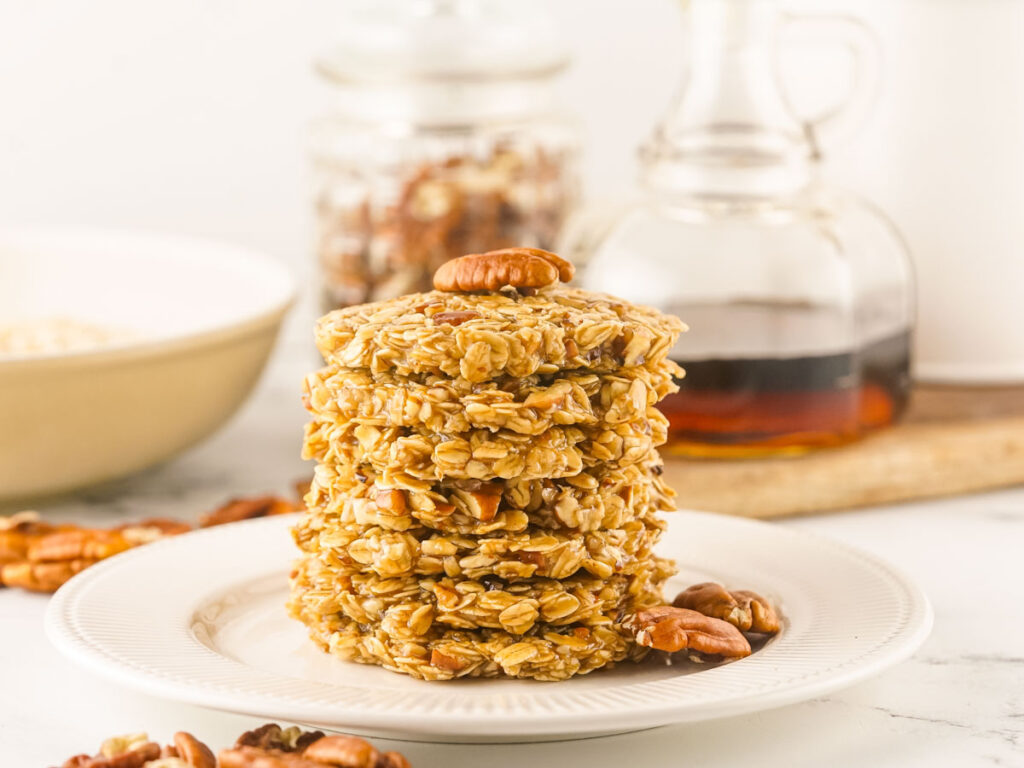
Easy No Bake Maple Pecan Cookies

Let’s be honest, sometimes you just need a quick and easy sweet treat. No mess, no fuss. If that sounds like you, then these no bake maple pecan cookies are perfect. They’re great for when you’re craving something delicious without the hassle of baking. Plus, the combination of maple syrup and pecans is a classic for a reason – it’s simply irresistible.
Why You’ll Love These No Bake Maple Pecan Cookies Recipe
- Minimal mess? No oven required! This recipe is all about mixing and chilling, keeping your kitchen cool and cleanup a breeze.
- Pantry staples only? There’s a good chance you already have everything you need for this recipe. No need for a special grocery run.
- Craving control? Feeling adventurous? Play around with different mix-ins like chocolate chips, dried fruit, or even white chocolate chunks!
- Perfect for all skill levels? Baking novice or seasoned pro, these cookies are achievable for anyone. Simple steps and minimal ingredients make them ideal for beginners.
- Kid-friendly fun? Get the little ones involved in mixing and decorating! It’s a great way to spend quality time together and create delicious memories.
- The ultimate flavor combo? Warm maple syrup paired with crunchy pecans – it’s a classic for a reason! These cookies deliver an awesome taste sensation in every bite.
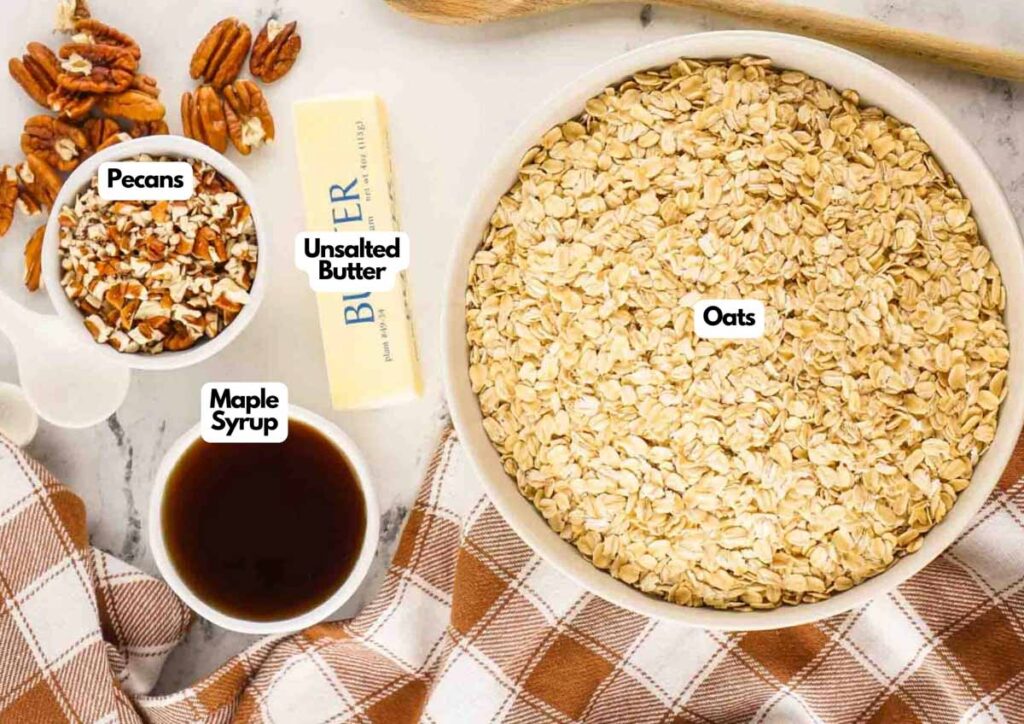
Ingredients You’ll Need
You’ll need all the ingredients in the photograph below.
How to Make No Bake Maple Pecan Cookies with Step-By-Step Instructions
A complete printable recipe and the measurements in both US customary and metric are available in the recipe card below.
Line a baking sheet with parchment paper.
Combine the Dry Ingredients
In a large bowl, toss together the oats and chopped pecans until evenly distributed. Slice the butter into ½ tablespoon portions.
Making the Perfect Maple Syrup Mixture: (This is the most important step!)
Combine the maple syrup and butter in a saucepan over medium-high heat. Stir constantly until the mixture comes to a rolling boil.
SERIOUSLY GOOD
DESSERTS!

Dessert First is a collection of 61 RECIPES to show you that you can make beautiful, impressive desserts right in your own kitchen, no matter your skill level.
Immediate eBook download. No physical book available.
Includes ad-free recipes like:
∙ Lemon Pound Cake
∙ Key Lime Bars
∙ Boston Cream Pie
∙ No-Bake Chocolate Lasagna
∙ Raspberry Cheesecake
...and much more!
Keep stirring and cook until the mixture reaches 240°F (115°C) on a candy thermometer. This will take about 10 minutes.
Pro-Tip: Don’t skip the thermometer! The correct temperature is crucial for the cookies to set properly.
Time to Mix!
As soon as the syrup reaches temperature, remove it from the heat and immediately pour it over the oat mixture. Very quickly, stir the mixture until everything is evenly coated. Don’t let the syrup settle at the bottom or pool in any areas.
Shaping and Setting
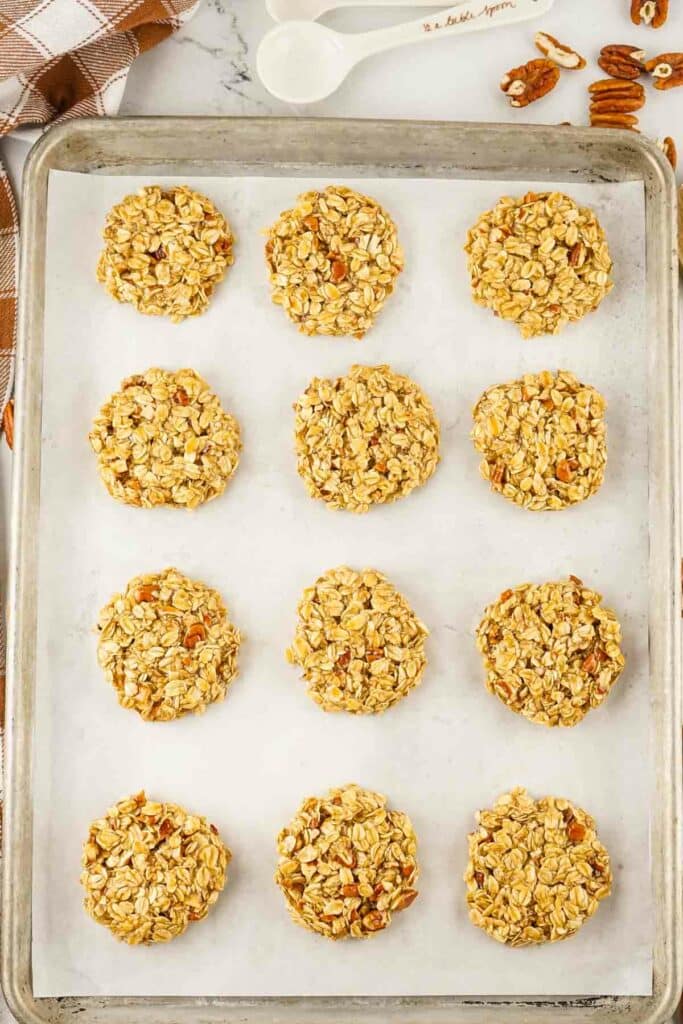
Using a 1.9-inch cookie scoop (or smaller if you prefer), scoop out the batter onto the prepared baking sheet. Aim for about two dozen cookies.
Lightly spray a flat, round-bottomed measuring cup or similar item with non-stick cooking spray. Use it to gently flatten each cookie. You can wear a glove to shape the edges for a uniform look. Allow the cookies to sit undisturbed for 1 hour.
Flip It!
After 1 hour, use a gloved hand to carefully flip each cookie. They will still be slightly sticky, but that’s okay! Let the cookies set for another hour after flipping.
Once the cookies are completely set, decorate them with a whole pecan half.

Equipment
Ingredients
- 4 cups old fashioned oats
- 1 cup finely chopped pecans
- 2 ½ cups maple syrup
- 1 stick unsalted butter ½ cup
Instructions
- Prepare your parchment paper.
- Place the oatmeal and chopped pecans in a large mixing bowl and toss until fully combined. Set aside.4 cups old fashioned oats, 1 cup finely chopped pecans
- Slice the butter into portions of 2 tablespoons each. Place the sliced butter and syrup in a medium saucepan.1 stick unsalted butter, 2 ½ cups maple syrup
- Cook on medium-high heat over the stove, constantly stirring until the mixture reaches 240°F (115°C) on a candy thermometer (this takes about 10 minutes). This step is the most important as the cookies will not be successful without the correct temperature being reached.
- As soon as the syrup mixture comes to temperature, pour it over the oat mixture you set aside.
- Quickly stir extremely well so that the syrup mixture is evenly distributed and not settle into any pockets or on the bottom.
- Using a 1.9-inch cookie scoop (or smaller if you prefer), scoop out about 2 dozen cookies onto the parchment paper.
- Immediately spray a flat, round-bottomed measuring cup or other similarly sized item, with nonstick cooking spray and use it to flatten each one of the cookie stacks. I tend to use a gloved hand to shape the edges to be more uniform for a pretty presentation after flattening.
- Once you have finished flattening and shaping your cookies, leave them to sit for an hour. At the one-hour mark, use a gloved hand to flip them. They will still be slightly tacky and that’s ok! Allow them to sit for another hour after being flipped. Top with a whole pecan, and enjoy!
Notes
- Airtight Container is King: The key to maintaining freshness is keeping moisture out. Invest in an airtight container or a sealable plastic bag for optimal storage.
- Room Temperature or Fridge? Both work! If you plan on devouring the cookies within a few days, room temperature storage is perfectly fine. But for a longer shelf life (up to a week), consider storing them in the refrigerator.
- Fridge Factor: If you choose the fridge route, be aware that the cookies might firm up a bit. To counteract this, simply let them sit at room temperature for a few minutes before enjoying.
- Freezing for the Future: Planning a future cookie emergency? No problem! Leftovers can be frozen for up to 3 months. Just make sure they’re completely cool before placing them in a freezer-safe container. Thaw them in the refrigerator overnight when the craving strikes.
Nutrition
SERIOUSLY GOOD
DESSERTS!
Dessert First is a collection of 61 RECIPES to show you that you can make beautiful, impressive desserts right in your own kitchen, no matter your skill level.
Immediate eBook download. No physical book available.
Includes ad-free recipes like:
∙ Lemon Pound Cake
∙ Key Lime Bars
∙ Boston Cream Pie
∙ No-Bake Chocolate Lasagna
∙ Raspberry Cheesecake
...and much more!
Recipe Notes and Expert Tips
- Oatmeal: Rolled oats are the classic choice, but feel free to experiment with quick oats for a slightly softer texture. For a gluten-free option, use certified gluten-free rolled oats.
- Nutty Adventures: While pecans are the star of the show, walnuts, almonds, or even a mix of chopped nuts add a delightful twist. For nut allergies, consider sunflower seeds, chopped dried fruit like cranberries or cherries, or even mini vegan chocolate chips.
- Maple Magic: Pure maple syrup is irreplaceable here, but for a richer flavor, try using a darker grade maple syrup.
- Temperature is Key: Don’t skip the candy thermometer! Reaching 240°F (115°C) ensures your cookies set properly. If you don’t have a thermometer, watch for a rolling boil and a slight thickening of the syrup mixture.
- Speedy Stirring is Crucial: Once the hot syrup hits the oat mixture, work quickly to distribute it evenly. This prevents clumping and uneven setting.
- Flatten with Care: When shaping your cookies, use a gentle touch. A light press with the measuring cup is enough – over-flattening can make them too dense.
- Chilling Out: Patience is a virtue! Don’t be tempted to dig in before the cookies are fully set. Let them cool completely for the perfect chewy texture.
- Leftover cookie dough? Press it into a greased baking pan for a delicious no-bake granola bar!
How to Store No Bake Maple Pecan Cookies
Made a giant batch of these delicious no-bake cookies and wondering how to keep the rest fresh? Don’t worry about a stale fate for your creations! Here’s how to store leftover no-bake maple pecan cookies to ensure they stay just as chewy and delightful for days to come.
- Airtight Container is King: The key to maintaining freshness is keeping moisture out. Invest in an airtight container or a sealable plastic bag for optimal storage.
- Room Temperature or Fridge? Both work! If you plan on devouring the cookies within a few days, room temperature storage is perfectly fine. But for a longer shelf life (up to a week), consider storing them in the refrigerator.
- Fridge Factor: If you choose the fridge route, be aware that the cookies might firm up a bit. To counteract this, simply let them sit at room temperature for a few minutes before enjoying.
- Freezing for the Future: Planning a future cookie emergency? No problem! Leftovers can be frozen for up to 3 months. Just make sure they’re completely cool before placing them in a freezer-safe container. Thaw them in the refrigerator overnight when the craving strikes.
More Easy Recipes for You to Try at Home
Want to try your hand at more cookies? We’ve got a great selection for you!
