
Melt in Your Mouth Peanut Butter Cookies
 Add Preferred Source
These Melt in Your Mouth Peanut Butter Cookies stay soft and chewy in the middle instead of baking out thin and greasy, and the hour-long chill is the one step I’d never want you to skip. Firming the dough first stops the cookies from spreading, so the centers set thick and tender. I use crunchy peanut butter for a little texture, though creamy works just as well. Pull them while the edges are barely golden, and the centers still look soft; they firm into chewy cookies as they cool.

This post contains affiliate links. As an Amazon Affiliate, if you purchase through those links, I earn a small commission. Thank you!
Why You’ll Love This Recipe
- The dough takes a few minutes and uses pantry staples, then it chills in the fridge while you get on with something else.
- Crunchy peanut butter keeps them from tasting flatly sweet. You get real peanut texture in every bite.
- They hold their soft, chewy middle for days in an airtight tub, so a batch is worth making ahead.
Ingredients You’ll Need
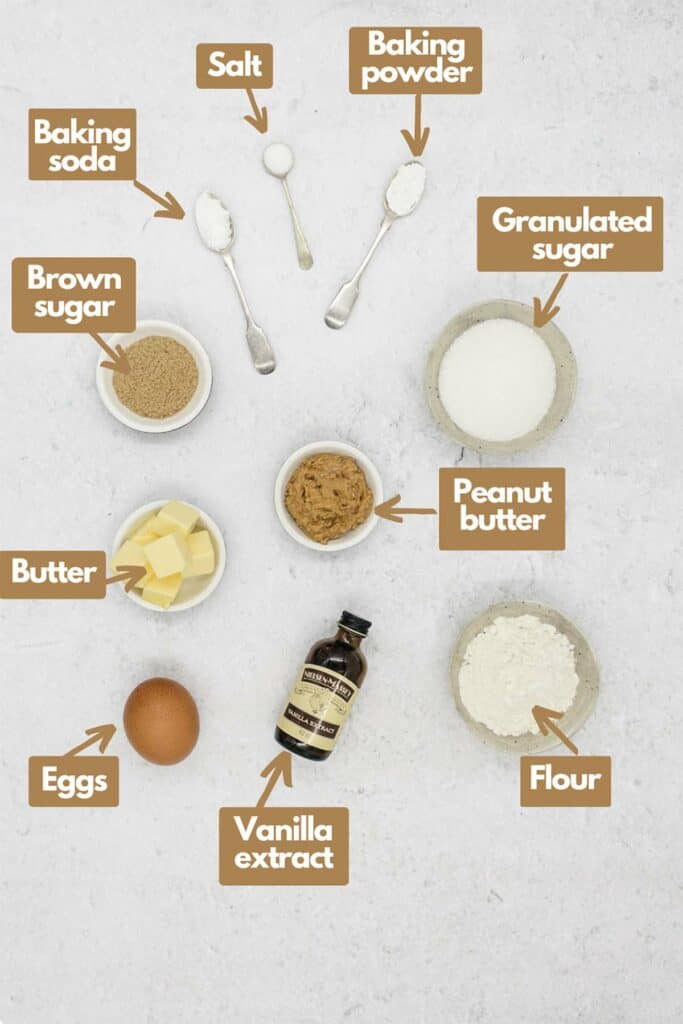
You’ll need all the ingredients shown in the photograph below.
- Crunchy peanut butter. What I use here, because the little bits of peanut give the cookies texture and a more roasted flavor. Creamy works if that’s what you have, and the cookies turn out a touch smoother.
- Light brown sugar. It does more than sweeten. The molasses in it holds moisture, which keeps the middles soft and gives a slight chew, so I use it alongside the granulated sugar rather than all white.
- Unsalted butter. It lets me control the salt. Soften it properly first, because firm butter leaves streaks through the dough instead of blending in.
- All-purpose flour. The one to measure carefully. Too much is the quickest way to a dry, crumbly cookie, so this isn’t the place to pack the cup.
How to Make Peanut Butter Cookies
A complete printable recipe and the measurements in both US customary and metric are available in the recipe card below.
Make the Dough
Cream the softened butter and peanut butter with both sugars until the mix is light, then beat in the egg and vanilla. Whisk the flour, baking soda, baking powder, and salt in a separate bowl, then mix the dry into the wet until it comes together. The dough will be soft.
Chill the Dough
Chill the dough in the fridge for about an hour before you shape it. This firms up the butter so the cookies hold their shape instead of spreading into thin, greasy disks. It’s the same step I rely on for my White Chocolate Macadamia Nut Cookies, and it makes the same difference here.
Shape and Bake
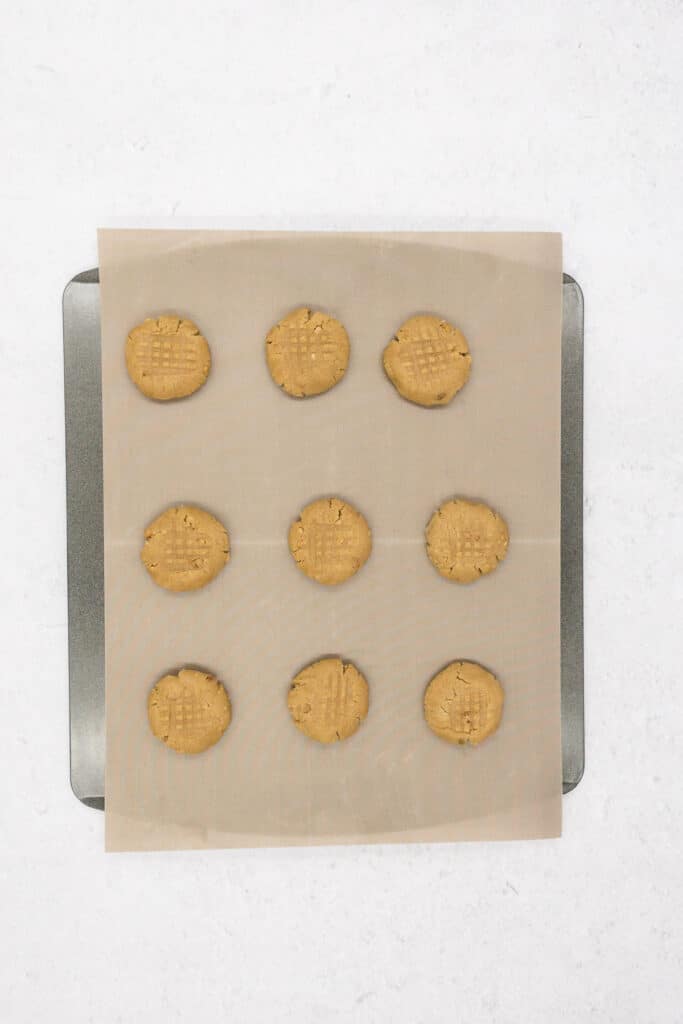
Roll the chilled dough into even balls, about 1 to 1½ tablespoons each, and space them out on a lined sheet, around 2 inches apart, then flatten each one. For the classic criss-cross look, press a fork across the top twice. Bake for about 10 minutes at 350°F (180°C) until the edges are just starting to brown.
Cool and Set
Let the cookies sit on the sheet for a few minutes before you move them to a rack. They look underbaked when they come out, and that’s what you want. They firm up as they cool into a soft, chewy cookie.
To get ahead, you can keep the dough in the fridge for a day or two, or roll it into balls and freeze them. Bake frozen balls straight from the freezer with an extra minute or two.
This is the classic plain version. If you want chocolate in them, my Peanut Butter Chocolate Chip Cookies take the same idea into a bigger, brown-sugar-heavy batch with chocolate chips stirred through.
Recipe Notes and Expert Tips
- Pull them early. The cookies should look soft and a little underbaked in the center when you take them out. They keep cooking on the hot sheet and set as they cool, so a tray that looks done in the oven is already overbaked. It’s the same early pull that keeps my Soft and Chewy Chocolate Chip Cookies from drying out.
- Weigh or spoon the flour. Too much flour is the usual reason these go dry. If you don’t have a scale, spoon it into the measuring cup and level it off rather than dipping the cup into the bag.
- Bring the butter and egg to room temperature. Leave both out for about half an hour before you start. A cold egg can seize the creamed mix, and the butter needs to be soft enough to beat smooth.
- Keep the balls the same size. Equal balls, flattened to the same thickness, finish together. Mixed sizes mean some are dry before the rest are done.
Recipe Variations
- Swap the crunchy peanut butter for creamy, and you get a smoother cookie with the same soft middle. It comes down to whether you want the peanut texture.
- For a chocolate version, press a few chocolate chips into the tops before they bake. It’s a small change that nudges them sweeter.
How to Store Leftovers
Store the cooled cookies in an airtight container at room temperature, where they’ll stay soft for up to five days. A slice of sandwich bread in the tub helps keep them from drying out.
To freeze baked cookies, layer them between parchment in a freezer bag or tub and freeze for up to three months. Thaw them at room temperature, or warm one for a few seconds in the microwave if you like them soft.
What to Serve With Peanut Butter Cookies
These don’t need much alongside them. A cold glass of milk is the obvious partner, and they’re good with coffee when I want something to cut the sugar. For something more of an occasion, sandwich a scoop of vanilla ice cream between two of them.
If I’m putting out a plate of cookies for people, I set these next to my Oatmeal Chocolate Chip Cookies so there’s a chewier option with a bit more texture in the mix.
FAQs
Usually it’s too much flour or too long in the oven. Measure the flour by weight if you can, and take the cookies out while the centers still look soft, since they keep setting as they cool. Both of those do more than any added liquid would.
Yes, if you want them to hold their shape. Warm dough spreads fast and bakes into thin, greasy cookies, while an hour in the fridge firms the butter so they stay thick and soft. It’s the step I’d least want you to skip.
A standard shelf-stable jar, crunchy or creamy, works best. Natural peanut butter that separates and needs stirring tends to make the cookies spread and turn oily, so I’d keep it for toast and use a regular jar here.
More Easy Cookie Recipes to Try at Home
If you’re into cookies, here are four more from the site worth a go.
- Double Chocolate Chip Cookies. Go for this one when only chocolate will do, with crunchy edges around a soft, fudgy center.
- Glazed Lemon Cookies. I make these when I want something soft and bright instead of rich.
- Sugar Cookies Without Butter. This is the one if you’re out of butter, or you just want a plainer, soft cookie.
- Chocolate Crinkle Cookies. These need a few hours of chilling, but the cracked, fudgy result looks far harder to pull off than it is.
Ingredients
- ½ cup unsalted butter softened
- ½ cup crunchy peanut butter
- ½ cup granulated sugar
- ½ cup light brown sugar packed
- 1¼ cups all-purpose flour
- ¾ teaspoon baking soda
- ½ teaspoon baking powder
- ¼ teaspoon salt
- 1 large egg
- ½ teaspoon vanilla extract
Instructions
- Preheat the oven to 350°F (180°C). Using a stand mixer or handheld electric mixer, cream butter, peanut butter, granulated sugar, and light brown sugar together in a mixing bowl. Then add the egg and vanilla extract.½ cup unsalted butter, ½ cup crunchy peanut butter, ½ cup granulated sugar, ½ cup light brown sugar, 1 large egg, ½ teaspoon vanilla extract
- Then in a separate bowl, mix flour, baking soda, baking powder, and salt together. Then add the dry ingredients to the wet ingredients and mix until fluffy. Place the dough in the fridge for an hour1¼ cups all-purpose flour, ¾ teaspoon baking soda, ½ teaspoon baking powder, ¼ teaspoon salt
- Scoop or roll the dough into balls, approx. 1- 1½ tablespoons large, and place them on your prepared baking sheet, around 2 inches apart. Flatten the balls until they are approx. 1½ inches thick. Bake until the cookies begin to brown, approx. 10 minutes
- Remove from the oven and leave for a few minutes, then transfer the cookies to a cooling rack. Enjoy your cookies!
Notes
Nutrition

The title really is true! My youngest son said “Mom these are the best cookies you have EVER made” and he was deadly serious! They have out ranked chocolate cookies, so you know they are good.
All 5 kids loved them, they are sad they can’t take them to school because of the nuts, so I said they will have to be afterschool snacks. Now they expect them as soon as they walk in the door 😉
Oh, that has brightened my day, how lovely to hear that they really love them!