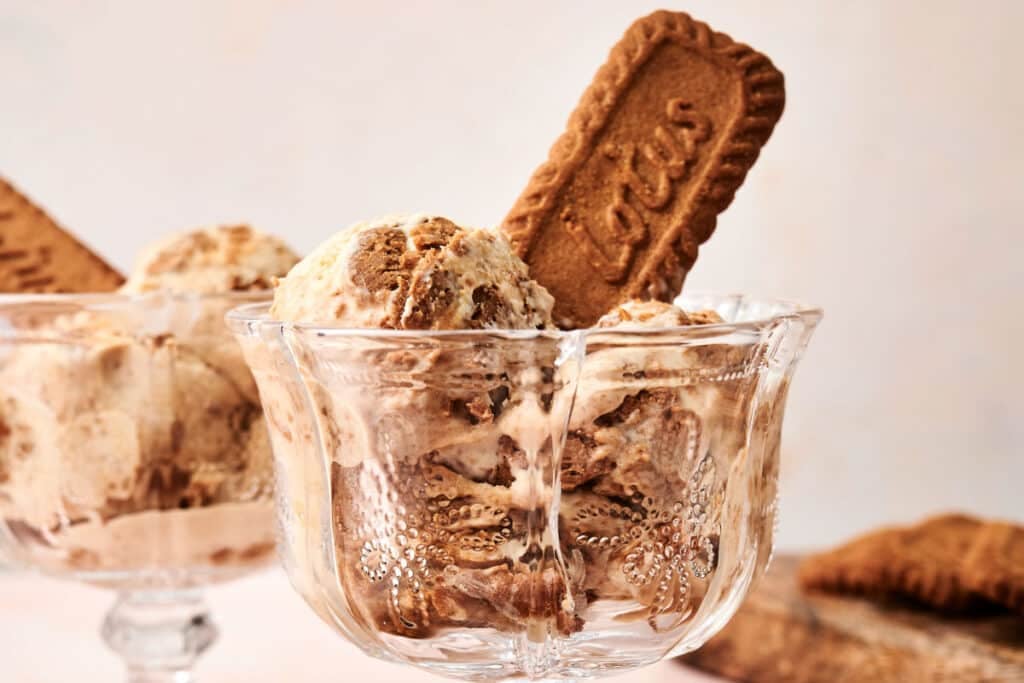
Biscoff Ice Cream Recipe

If you love the rich, spiced flavor of Biscoff cookies, this Biscoff Ice Cream recipe is going to become one of your favorites. It has a creamy vanilla base with swirls of cookie butter and crunchy cookie crumbles for a texture and flavor that keeps every bite interesting. You don’t need anything fancy—just a handful of ingredients and a churn in your ice cream maker. Whether you serve it in a bowl or a cone, it’s the kind of treat that feels effortlessly special.
This post contains affiliate links. As an Amazon Affiliate, if you purchase through those links, I earn a commission. Thank you!
Making this ice cream full of Biscoff flavor is perfect when the weather heats up and we’ve got backyard barbecues or just a lazy summer afternoon to enjoy. It’s easy to whip up ahead of time and store in the freezer, so when everyone’s ready for something cold and sweet, you don’t have to fuss with last-minute desserts—just scoop and serve. It’s one of those simple things that make summer get-togethers feel even more relaxed and fun.
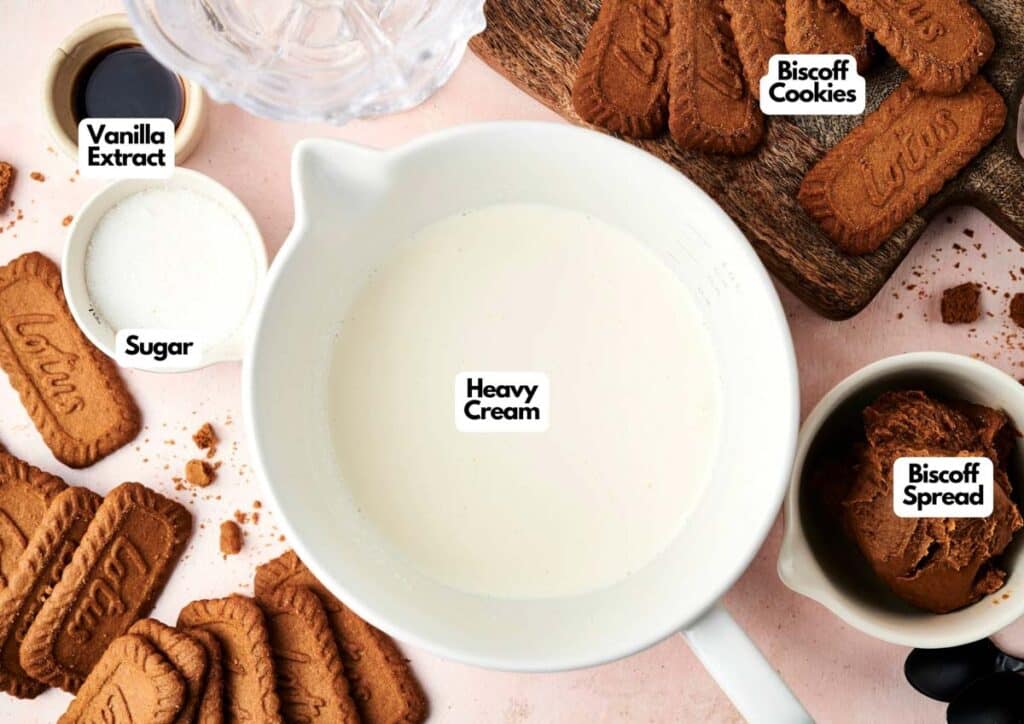
Ingredients You’ll Need
You’ll need all the ingredients shown in the photograph below.
How to Make Biscoff Ice Cream with Step-By-Step Instructions
Scroll down for the full recipe card containing a full printable recipe and measurements in both US customary and metric units.
You’ll find making this Biscoff ice cream really fuss-free and satisfying if you follow my clear, simple steps.
Whisk the Base Ingredients
Grab a large mixing bowl and whisk together the heavy cream, vanilla extract, sugar, and half of the Biscoff spread. I swear using a sturdy silicone whisk makes such a difference. It doesn’t leave streaky metal marks in the bowl and is way easier to clean than a regular balloon whisk.
Whisk for about 2 minutes until the sugar is completely dissolved. If your Biscoff spread is being annoyingly thick (it happens), just warm it for 10 seconds in a silicone bowl, and it pours like a dream.
It’s completely fine if you see a few streaks of cookie butter—they’ll give the ice cream even more flavor and texture.
SERIOUSLY GOOD
DESSERTS!

Dessert First is a collection of 61 RECIPES to show you that you can make beautiful, impressive desserts right in your own kitchen, no matter your skill level.
Immediate eBook download. No physical book available.
Includes ad-free recipes like:
∙ Lemon Pound Cake
∙ Key Lime Bars
∙ Boston Cream Pie
∙ No-Bake Chocolate Lasagna
∙ Raspberry Cheesecake
...and much more!
Churn the Ice Cream
Pour the mixture into your ice cream maker, making sure to scrape the bowl well, as some Biscoff spread may settle at the bottom.
Churn it according to your machine’s instructions, usually around 25 minutes, until it thickens to a soft-serve consistency. My ice cream maker isn’t the fanciest model, but I’ve had it for years, and it never lets me down.

Add the Cookie Crumbles and Swirl
Once it’s churned, transfer the soft ice cream to a freezer-safe container (these are great, easy to stack, and easy to clean) or baking dish. Gently fold in the crumbled Biscoff cookies and drizzle the rest of the Biscoff spread across the top.
Give it a few light swirls with a spoon so you get those gorgeous ribbons of cookie butter running through every scoop.
Freeze Until Firm
Cover your container tightly and pop it into the freezer. Let it freeze for about 2-4 hours until the ice cream is firm enough to scoop easily.
After that, use a scoop like this one, it’s heavy, handles well, and you can throw it in the dishwasher after.
Scop it into bowls (I love these ice cream glassses, they look great on the table) or cones, and sprinkle with extra Biscoff cookie crumbles on top for that perfect combo of cold cream and crunch. Serve and enjoy!

Equipment
Ingredients
- 3 cups heavy cream
- 1 cup Biscoff spread divided
- ½ cup sugar
- 1 teaspoon pure vanilla extract
- 8-10 Biscoff cookies crumbled
Video
Instructions
- In a large bowl, whisk together the heavy cream, half of the Biscoff spread, sugar, and vanilla extract for about 2 minutes, until the sugar dissolves. (Don’t worry if a few streaks of Biscoff remain!)3 cups heavy cream, 1 cup Biscoff spread, ½ cup sugar, 1 teaspoon pure vanilla extract
- Pour the mixture into your prepared ice cream maker. Make sure to scrape the bowl well—some Biscoff spread may settle at the bottom!
- Churn according to your machine’s instructions, usually about 25 minutes, until it reaches a soft-serve consistency.
- Transfer the churned ice cream into a baking dish or freezer-safe container. Gently fold in the crumbled cookies and drizzle in the remaining Biscoff spread. Swirl and mix lightly for ribbons of cookie butter throughout.8-10 Biscoff cookies
- Cover and freeze for 2–4 hours, or until firm.
- Scoop into bowls or cones and sprinkle with extra Biscoff cookie crumbles for the ultimate finish!
Notes
- Whisk Thoroughly: Take your time whisking the heavy cream and sugar so the sugar dissolves completely. It’s key for a smooth texture.
- Warm Up the Biscoff: If your cookie butter feels too thick, microwave it for a few seconds to make it easier to blend and drizzle.
- Scrape the Bowl: When pouring the base into the machine, make sure to scrape every last bit from the bowl so you get all the flavor.
- Keep an Eye on Churning: Stop churning once you hit that soft-serve texture. Overchurning can make the final ice cream less creamy.
- Use a Shallow Container: Freezing in a shallow dish helps the ice cream firm up faster and more evenly.
- Fold Gently: When you add the cookies and swirl the extra spread, mix just enough to get pretty streaks without overworking it.
- Let It Soften a Bit Before Serving: After freezing, let the ice cream sit on the counter for 5–10 minutes so it scoops more easily and tastes even creamier.
- Save Extra Crumbles for Topping: Keep a few crumbles aside and sprinkle them over the top when serving for that extra crunch and flavor pop.
Nutrition
SERIOUSLY GOOD
DESSERTS!
Dessert First is a collection of 61 RECIPES to show you that you can make beautiful, impressive desserts right in your own kitchen, no matter your skill level.
Immediate eBook download. No physical book available.
Includes ad-free recipes like:
∙ Lemon Pound Cake
∙ Key Lime Bars
∙ Boston Cream Pie
∙ No-Bake Chocolate Lasagna
∙ Raspberry Cheesecake
...and much more!
Recipe Notes and Expert Tips
I’ve put together a few tips that really help in perfecting this homemade Biscoff ice cream so that yours can turn out great, too.
- Whisk Thoroughly: Take your time whisking the heavy cream and sugar so the sugar dissolves completely. It’s key for a smooth texture.
- Warm Up the Biscoff: If your cookie butter feels too thick, microwave it for a few seconds to make it easier to blend and drizzle.
- Scrape the Bowl: When pouring the base into the machine, make sure to scrape every last bit from the bowl so you get all the flavor.
- Keep an Eye on Churning: Stop churning once you hit that soft-serve texture. Overchurning can make the final ice cream less creamy.
- Use a Shallow Container: Freezing in a shallow dish helps the ice cream firm up faster and more evenly.
- Fold Gently: When you add the cookies and swirl the extra spread, mix just enough to get pretty streaks without overworking it.
- Let It Soften a Bit Before Serving: After freezing, let the ice cream sit on the counter for 5–10 minutes so it scoops more easily and tastes even creamier.
- Save Extra Crumbles for Topping: Keep a few crumbles aside and sprinkle them over the top when serving for that extra crunch and flavor pop.
How to Store Leftovers
To keep your Biscoff ice cream fresh, transfer it to an airtight, freezer-safe container if you initially put it in a baking dish. These are great as they are stackable and super easy to clean.
Press a piece of plastic wrap or parchment paper directly against the surface before sealing the lid to help prevent ice crystals.
It will last for up to a month (though good luck trying to make it last that long), though it’s best enjoyed within the first week when it’s at its creamiest.
What to Serve With Biscoff Ice Cream
There’s a lot you can do with this ice cream beyond just scooping it into a bowl or a cone—add a handful of crushed Biscoff cookies or drizzle some extra warmed Biscoff spread over the top. If you’re out of Biscoff spread, try a caramel glaze or a chocolate sauce!
If you want to get even fancier, pair it with fresh berries for a pop of tartness, sandwich a scoop between two chewy cookies, or serve it alongside a warm brownie for a total showstopper dessert.
More Easy Recipes for You to Try at Home
If you love deliciously indulgent desserts, then take a look at someof my favorites.
