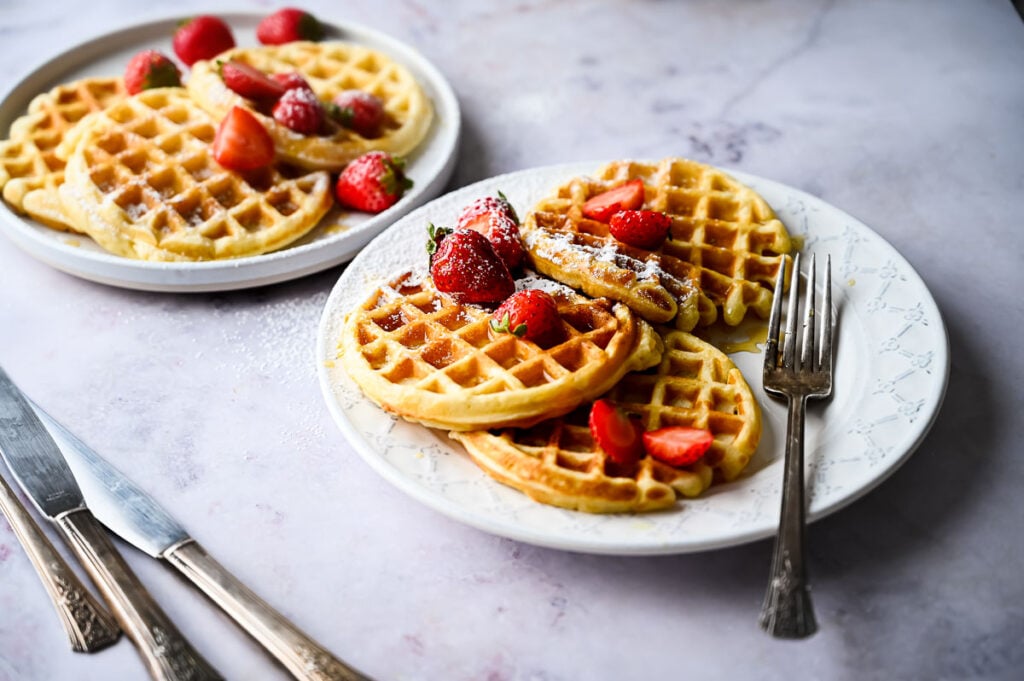
Waffles

I can never make just a few Waffles because they disappear so fast. The outside gets perfectly golden and crispy while the inside stays light and fluffy. Butter and vanilla create rich flavor that makes every bite taste incredible even before adding toppings. Fresh off the iron with maple syrup dripping down, they’re pure breakfast perfection.
This post contains affiliate links. As an Amazon Affiliate, if you purchase through those links, I earn a commission. Thank you!
I make these for weekend breakfasts, Mother’s Day brunch, and holiday mornings when I want something cozy and comforting. They’re kid-friendly and everyone loves choosing their own toppings. Perfect for making in batches and keeping warm while you finish cooking. They keep in the fridge for up to 3 days or freeze for up to 3 months.
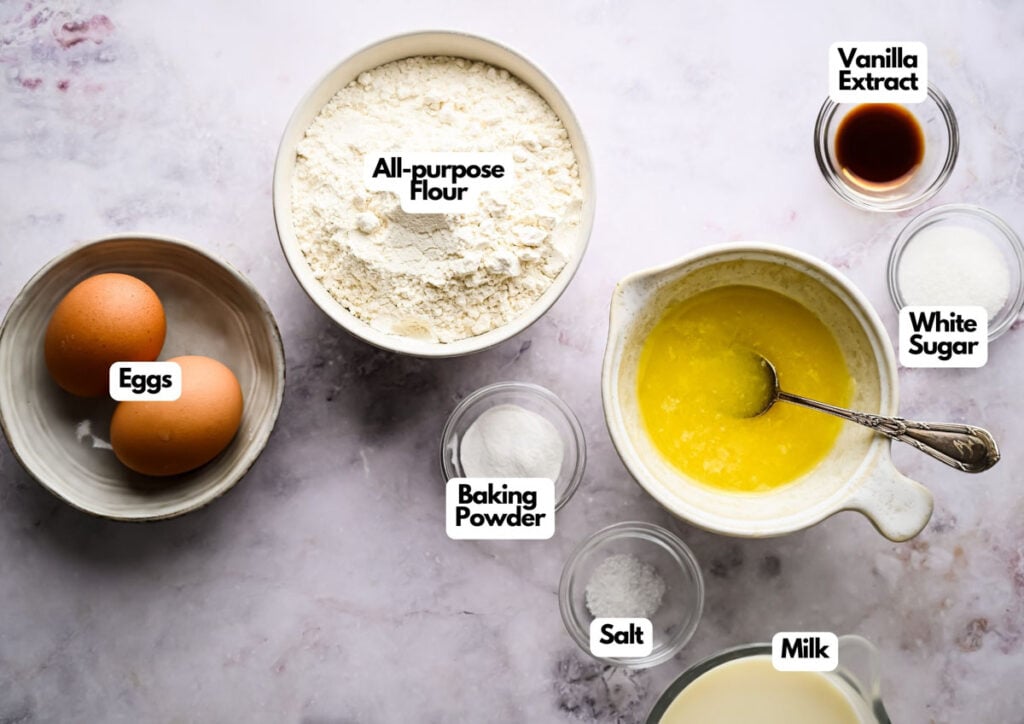
Ingredients You’ll Need
You’ll need all the ingredients shown in the photograph below.
How to Make Waffles with Step-By-Step Instructions
Scroll down for the full recipe card containing a full printable recipe and measurements in both US customary and metric units.
Making waffles from scratch is easier than you think, and you’ll taste the difference immediately.
Preheat the Waffle Iron
Start by preheating your waffle maker according to the manufacturer’s instructions. Most take about 5 minutes to heat fully, so get it going before you mix the batter. A hot waffle iron gives you those crispy golden exteriors.
Prepare the Dry and Wet Ingredients
In a large bowl, whisk together the flour, baking powder, sugar, and salt until evenly distributed. In a separate bowl, whisk your eggs with a wire whisk until they’re light and fluffy, then add the vanilla extract. This aerates the eggs and helps create a lighter waffle texture.
If you want extra-fluffy waffles with more airiness and rise, beat the egg whites until soft peaks form, then gently fold them into the batter right before cooking. The egg yolks go into the wet mixture as usual.
Combine Wet and Dry Ingredients
Add your egg mixture into the flour mixture, then gently stir in the melted butter and milk. Salted butter adds a nice savory balance to the sweetness, while unsalted butter gives you more control over the salt level. Either works beautifully.
Mix until smooth but don’t overdo it. Overmixing develops the gluten and makes waffles tough instead of tender. Use a silicone spatula to scrape down the sides and make sure everything incorporates evenly.
Let the Batter Rest
Let the mixture rest for 5 minutes. This allows the baking powder to activate and the flour to hydrate fully, which creates fluffier waffles with better texture.
If your batter seems too thick after resting, thin it with a tablespoon or two of warm milk and whisk gently until it reaches a pourable consistency that still coats the back of a spoon.
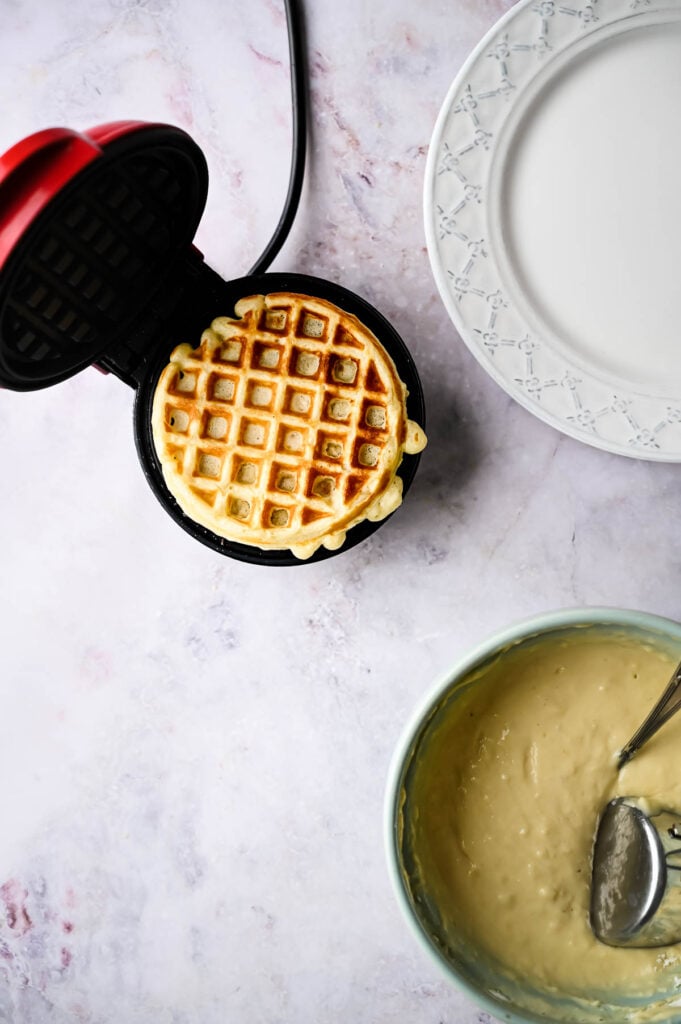
Cook the Waffles
Pour the waffle batter onto the preheated waffle iron and cook until they’re golden brown. Most waffle irons have an indicator light that tells you when they’re done. Once the first waffle is cooked, keep it warm in a low oven and continue working on the rest.
A light grease or coat of cooking spray after and before each waffle not only makes sure that nothing ever sticks, but also helps create those golden, crispy edges that make these waffles super satisfying.
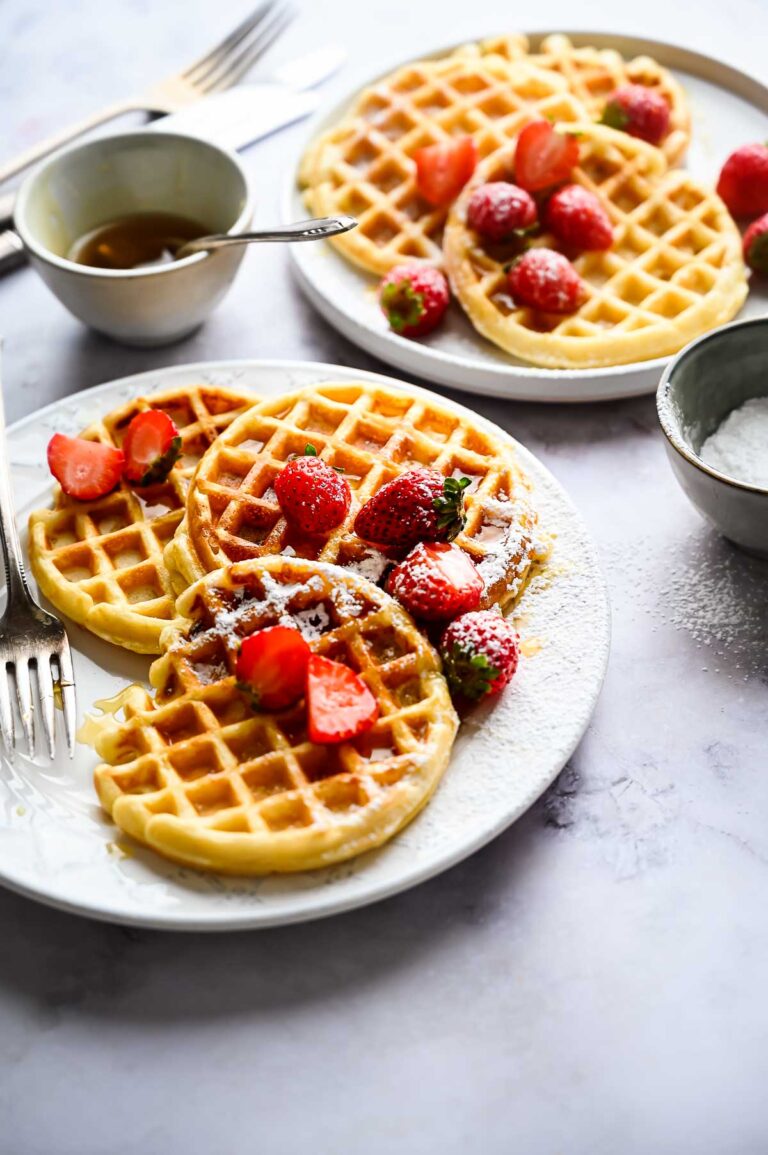
Serve with Toppings
Serve immediately with maple syrup, fresh strawberries, a light dusting of powdered sugar, butter, whipped cream, or your favorite toppings. Enjoy!
Waffles travel well to tailgates, game day parties, and potlucks if you pack them properly. Let them cool completely first, then wrap them individually in beeswax wrap so they’re easy to grab, and stack them in an airtight container.
They stay crisp and taste freshly made at room temp for up to 2 hours. If you’re heading somewhere without reheating options, wrap the container in a kitchen towel and tuck it inside an insulated carrier to help retain some warmth. Pack any toppings separately.
Ingredients
- 2 cups All purpose flour
- 4 tsps Baking powder
- 1 tbsp White sugar
- ¼ tsp Salt
- 2 Eggs
- 1 tsp Vanilla extract
- ½ cup Butter melted
- 1¾ cup Milk
Instructions
- Preheat your waffle iron machine according to the manufactures instructions
- In a mixing bowl, whisk flour, baking powder, sugar, and salt. Then, in a separate bowl whisk your eggs until they are light and fluffy, then add vanilla extract.2 cups All purpose flour, 4 tsps Baking powder, 1 tbsp White sugar, ¼ tsp Salt, 2 Eggs, 1 tsp Vanilla extract
- Next, add your egg mixture into the flour mixture, add the melted butter and milk and whisk until smooth but be careful not to over whisk½ cup Butter, 1¾ cup Milk
- Let the mixture rest for 5 minutes and then pour the mixture onto the hot iron and cook until golden brown. When cooked serve immediately and serve with maple syrup, butter, whipped cream, or your favorite toppings
Notes
Nutrition
How to Store Leftovers
Let the waffles cool completely on a wire cooling rack before storing so they don’t get soggy from trapped steam. Stack them in an airtight container with parchment paper between each one and keep them in the fridge for up to 3 days.
For freezing, place them in a single layer on a freezer-safe sheet pan for about an hour, then transfer to a freezer bag or container, where they can freeze for up to 3 months.
Reheat in the oven, toaster oven, or air fryer straight from frozen until they’re warm and crispy again. The microwave works in a pinch but won’t give you that crunchy texture.
What to Serve With Waffles
These pair beautifully with fresh berries, sliced bananas, or a dollop of Greek yogurt for something lighter. Maple syrup and butter are classics, but you can also try whipped cream, chocolate chips, peanut butter, or Nutella.
For a more filling breakfast or brunch spread, set them out with cinnamon rolls, buttery muffins, or fluffy pancakes. If you want savory options, serve them alongside scrambled eggs, hash browns, or a fresh fruit salad.
Fried eggs with runny yolks are amazing on top, and a side of crispy vegan bacon adds nice salty contrast to the sweet waffles. A tall glass of smoothie or orange juice rounds out the meal.
More Easy Recipes for You to Try at Home
I think you’ll also love these other easy breakfast recipes.
