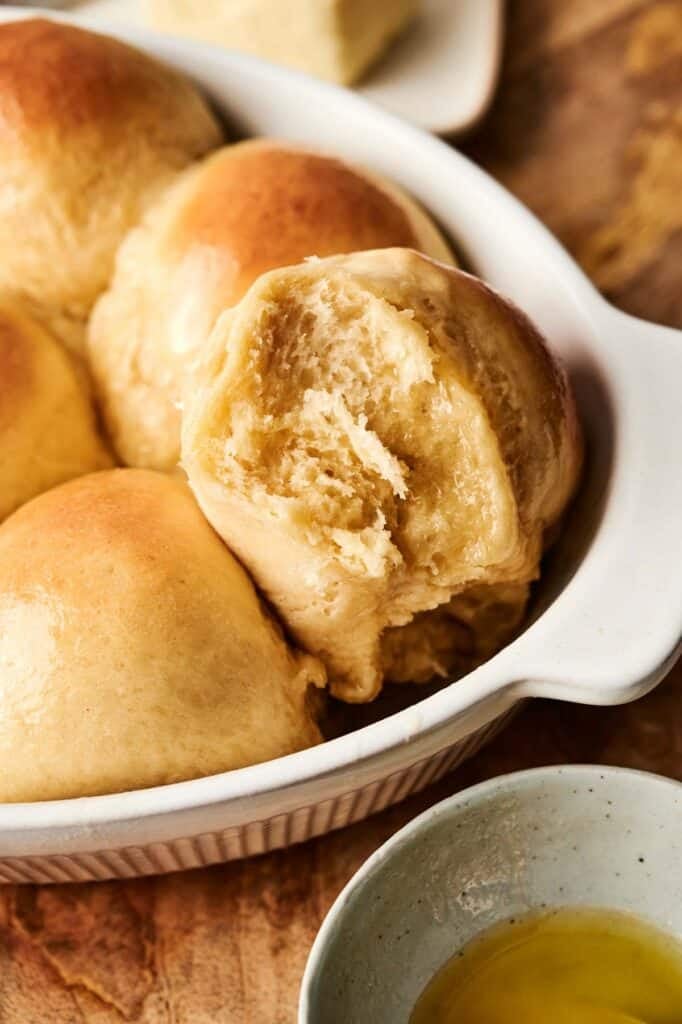
Dinner Roll Recipe
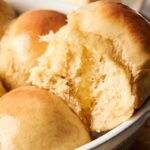
Soft, fluffy, and golden brown, this homemade dinner roll recipe is a must-have for family meals. Made with simple ingredients like all-purpose flour, yeast, and butter, they’re perfect for Thanksgiving, Christmas, or a cozy Sunday dinner. Brushed with honey butter for a subtle sweetness, they’re as beautiful as they are delicious.
This post contains affiliate links. As an Amazon Affiliate, if you purchase through those links, I earn a small commission. Thank you!
I love how versatile these rolls are—they’re amazing fresh from the oven but still hold up beautifully when reheated. They’re my go-to for holiday meals, and they always get rave reviews from family and friends. Plus, they freeze like a dream, so I can enjoy them whenever I want!
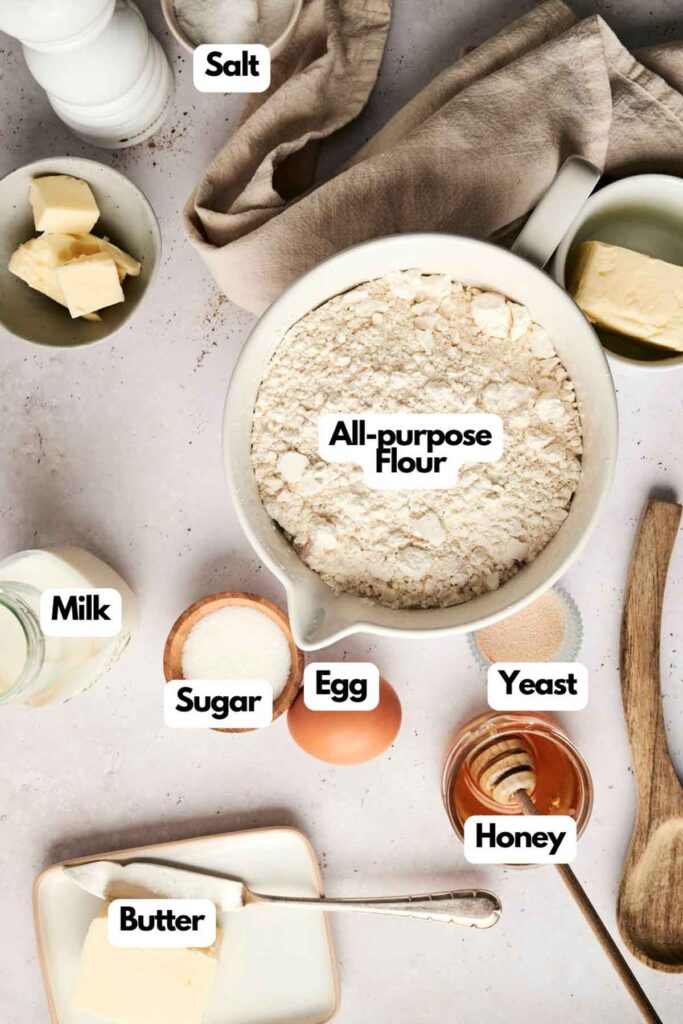
Ingredients You’ll Need
You’ll need all the ingredients in the photograph below.
How to Make Dinner Rolls
A complete printable recipe and the measurements in both US customary and metric are available in the recipe card below.
I’m here to guide you through creating the softest, fluffiest dinner rolls from scratch. Follow these easy steps, and you’ll have golden perfection in no time.
Activate the Yeast
In the bowl of your stand mixer, whisk together warm milk, yeast, and sugar. Let it sit for 5 minutes until the mixture looks frothy.
Mix the Ingredients
Add the egg, softened butter, salt, and 1 cup of flour. Use the dough hook or paddle attachment on low speed for 30 seconds to combine. Scrape down the sides of the bowl, then add the rest of the flour. Mix on medium speed until the dough pulls away from the sides, about 2 minutes.
Knead the Dough
Keep kneading with the mixer for 5 more minutes or switch to a floured surface and knead by hand for 5 minutes. If the dough feels sticky, sprinkle in flour a teaspoon at a time, but keep it soft and slightly tacky for the best texture.
Let the Dough Rise
Transfer the dough to a greased bowl and turn it to coat. Cover with plastic wrap or a clean kitchen towel and let it rise in a warm spot for 1-2 hours, or until it doubles in size.
Shape the Rolls
Punch down the risen dough and divide it into 14-16 equal pieces. Roll each piece into a smooth ball and arrange them in a greased baking dish, cast-iron skillet, or on a lined baking sheet.
Second Rise
Cover the shaped rolls with plastic wrap or a towel and let them rise again for about 1 hour, or until puffy.
Bake to Golden Perfection
Preheat your oven to 350°F (180°C) and bake the rolls for 20-25 minutes on the lower rack. Rotate the pan halfway through for even browning. If they darken too quickly, cover them loosely with foil.
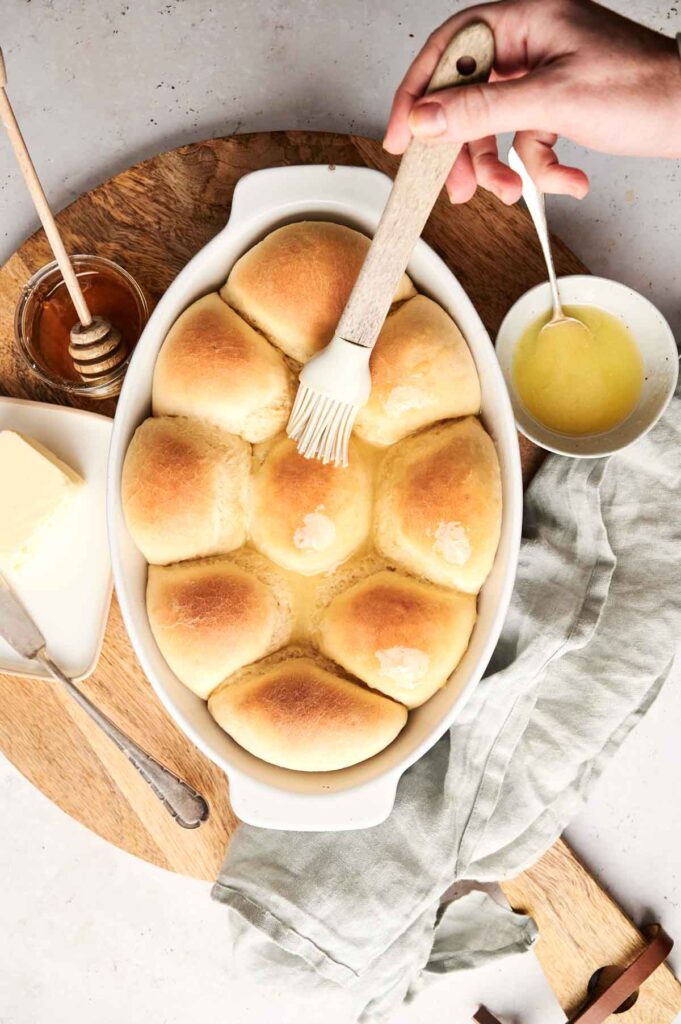
Add a Buttery Finish
Once out of the oven, brush the rolls with melted butter mixed with honey for a shiny, golden finish. Let them cool slightly, then serve warm.

Ingredients
- 1 cup whole milk warmed
- 2 ¼ teaspoons yeast 1 pack
- 2 tablespoons sugar
- 1 large egg
- ¼ cup unsalted butter softened to room temperature and cut into 4 pieces
- 1 teaspoon salt
- 3 cups all-purpose flour
- 2 tablespoons melted unsalted butter mixed with 1 tablespoon honey
Instructions
- In the bowl of your stand mixer, whisk warm milk, yeast and sugar. Cover and let sit for 5 minutes.1 cup whole milk, 2 ¼ teaspoons yeast, 2 tablespoons sugar
- Add the egg, butter, salt, and 1 cup of flour. Using the dough hook or paddle attachment, mix at a low speed for 30 seconds. Scrape the bowl sides, then add the remaining flour. Beat on medium speed until the dough comes together and pulls away from the sides, about 2 minutes. If the dough is too wet to knead, add flour 1 tablespoon at a time until it’s workable, soft, and slightly sticky.1 large egg, ¼ cup unsalted butter, 1 teaspoon salt, 3 cups all-purpose flour
- Continue kneading in the mixer for another 5 minutes, or knead by hand on a floured surface for 5 minutes. If the dough gets too sticky, sprinkle 1 teaspoon of flour at a time, but avoid adding too much to keep it soft.
- Grease a large bowl and place the dough inside, turning to coat it with oil. Cover with plastic wrap, foil, or a towel and let it rise in a warm place for 1-2 hours, or until doubled in size.
- Grease a 9×13-inch baking pan. Alternatively, use a cast-iron skillet or a lined baking sheet.
- Once the dough has risen, punch it down and divide it into 14-16 equal pieces. Shape each into a smooth ball and arrange in the prepared pan.
- Cover the shaped rolls with plastic wrap, foil, or a towel and let them rise until puffy, about 1 hour.
- Preheat the oven to 350°F (180°C) with the rack in the lower position. Bake the rolls for 20-25 minutes or until golden brown, rotating the pan halfway through. If they brown too quickly, tent with foil. Remove from the oven, brush with honey butter if desired, and let cool for a few minutes before serving.2 tablespoons melted unsalted butter mixed with 1 tablespoon honey
Notes
- Warm liquids are key: Make sure your milk is warm (not hot) to activate the yeast without killing it. Think baby bathwater warm.
- Don’t skip the rise times: Letting the dough properly rise is what makes the rolls soft and fluffy. Be patient—it’s worth it!
- Check your flour: Measuring flour accurately is essential. Use a kitchen scale for the best results, or spoon and level your flour into the measuring cup.
- Keep an eye on the oven: Oven temperatures vary, so check your rolls a couple of minutes early to avoid over-baking.
- Customize the flavor: Sprinkle a little garlic powder, rosemary, or parsley into the dough for a savory twist.
- Make ahead: After shaping the rolls, cover them tightly and refrigerate overnight. Let them come to room temperature and rise for about an hour before baking.
- No stand-mixer: You can mix and knead the dough by hand. It’ll take a bit more elbow grease but works just as well.
Storage Instructions
- Room temp: Let them cool completely before storing. Place them in an airtight container or a resealable bag and keep them at room temperature for up to 3 days.
- Freeze: For longer storage, freeze them for up to 3 months.
- Reheat: Reheat in the oven at 325°F (160°C) until warmed through, or microwave for a quick fix.
Nutrition
Recipe Notes and Tips
I’ve learned a few tricks over the years to make sure these dinner rolls turn out perfect every time:
- Warm liquids are key: Make sure your milk is warm (not hot) to activate the yeast without killing it. Think baby bathwater warm.
- Don’t skip the rise times: Letting the dough properly rise is what makes the rolls soft and fluffy. Be patient—it’s worth it!
- Check your flour: Measuring flour accurately is essential. Use a kitchen scale for the best results, or spoon and level your flour into the measuring cup.
- Keep an eye on the oven: Oven temperatures vary, so check your rolls a couple of minutes early to avoid over-baking.
- Customize the flavor: Sprinkle a little garlic powder, rosemary, or parsley into the dough for a savory twist.
- Make ahead: After shaping the rolls, cover them tightly and refrigerate overnight. Let them come to room temperature and rise for about an hour before baking.
- No stand-mixer: You can mix and knead the dough by hand. It’ll take a bit more elbow grease but works just as well.
How to Store Leftover Dinner Rolls
Let them cool completely before storing. Place them in an airtight container or a resealable bag and keep them at room temperature for up to 3 days.
For longer storage, freeze them for up to 3 months. Reheat in the oven at 325°F (160°C) until warmed through, or microwave for a quick fix.
What to Serve With This Dinner Roll Recipe
Dinner rolls are the ultimate sidekick for just about any meal. Pair them with hearty soups, stews, or chili for a cozy dinner.
They’re also perfect alongside lentil loaf, nut roast, or a vegan holiday ham. And let’s be honest, they’re just as good on their own with a slather of butter or honey.
More Bread Recipes You Will Love
Want to get creative with your bread? Take a look at some of m favorite recipes.
