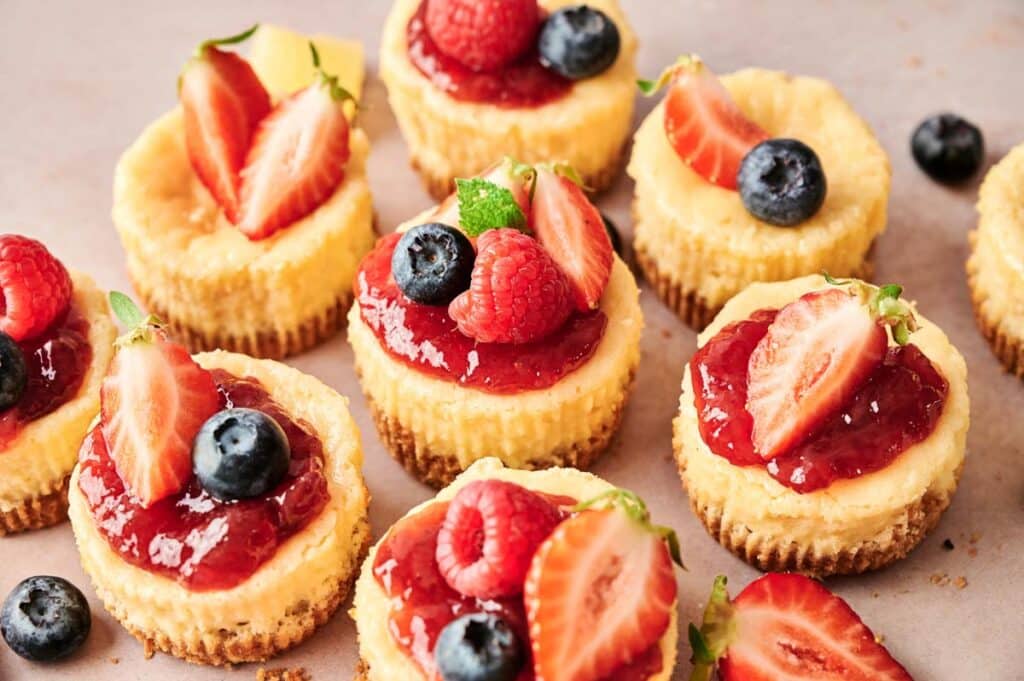
Mini Cheesecakes

These creamy Mini Cheesecakes are my favorite shortcut when I’m craving the velvety texture of full-size cheesecakes but want something quicker and lighter. You’ll find each bite rich, buttery, and sweet with a burst of fresh fruit on top, all thanks to a simple step that keeps them perfectly smooth.
This post contains affiliate links. As an Amazon Affiliate, if you purchase through those links, I earn a commission. Thank you!
When I’m hosting a small crowd for a holiday party, baby shower, or summer gathering, I love desserts that feel effortless but still make people smile, and Mini Cheesecakes always deliver. You can make them days ahead and keep them chilled until serving or freeze them for later when you need a quick treat for Easter brunch or Christmas dessert tables.
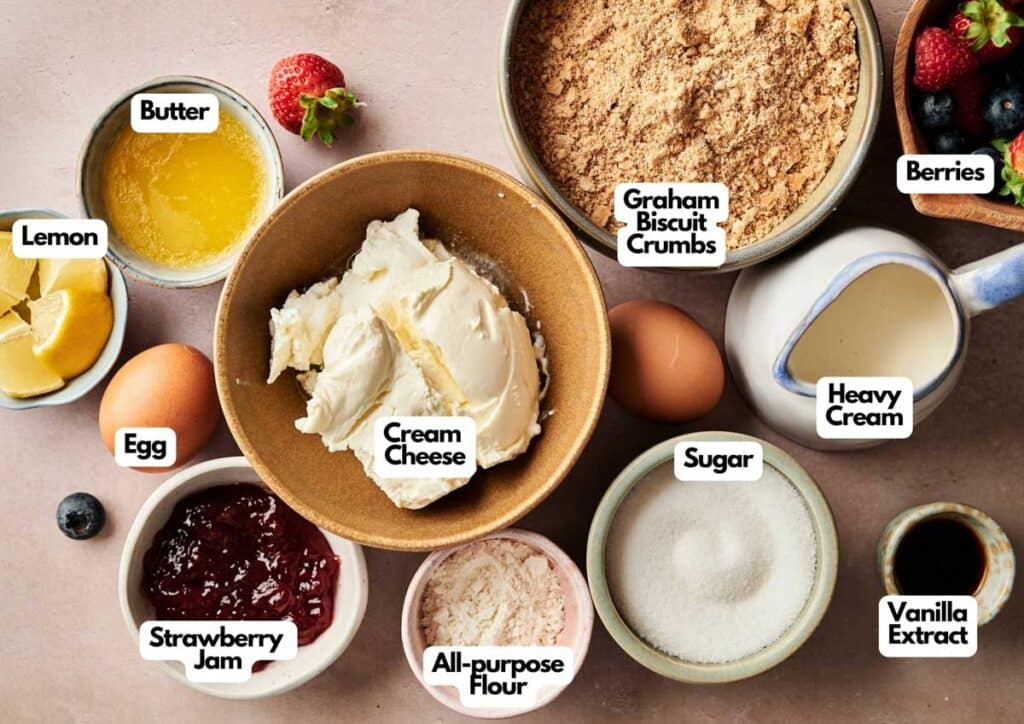
Ingredients You’ll Need
You’ll need all the ingredients shown in the photograph below.
How to Make Mini Cheesecakes with Step-By-Step Instructions
Scroll down for the full recipe card containing a full printable recipe and measurements in both US customary and metric units.
You’ll see how easy this mini cheesecake recipe is to make without the fuss once you follow my simple, step-by-step process.
Prepare the Crust
Combine graham cracker crumbs and melted butter in a bowl. To crush your graham crackers quickly and finely, a food processor makes the job super easy. Stir until the crumbs are evenly coated and resemble wet sand.
Divide the mixture evenly among 12 paper-lined muffin cups. This nonstick muffin pan helps make sure even baking and easy cleanup, while these greaseproof cupcake liners help the cheesecakes pop right out without sticking.
Press it firmly into the bottom with the back of a spoon to form an even base. You can also use a measuring cup; just go with the size the fits. Set the pan aside while you prepare the filling.
Make the Cheesecake Filling
In a large bowl, beat the softened cream cheese with an electric mixer on low speed until completely smooth and lump-free. A hand mixer makes this a lot easier than mixing by hand, especially when you’re working with thick cream cheese.
I love using a mixing bowl with a grippy bottom here to help hold everything steady while I’m stirring. Gradually add the sugar, so it dissolves evenly into the cream cheese, creating a smoother texture without any graininess.
Mix in the eggs one at a time, blending gently after each addition to keep too much air from getting into the cheesecake batter. Adding them slowly helps prevent cracks and makes sure the filling bakes up rich and creamy instead of airy or uneven.
SERIOUSLY GOOD
DESSERTS!

Dessert First is a collection of 61 RECIPES to show you that you can make beautiful, impressive desserts right in your own kitchen, no matter your skill level.
Immediate eBook download. No physical book available.
Includes ad-free recipes like:
∙ Lemon Pound Cake
∙ Key Lime Bars
∙ Boston Cream Pie
∙ No-Bake Chocolate Lasagna
∙ Raspberry Cheesecake
...and much more!
Now, stir in the vanilla extract, lemon juice, and flour, followed by the heavy cream. Continue mixing until the batter is thick, creamy, and silky smooth. A silicone spatula is perfect for scraping down the sides, so you don’t leave any bits behind.
Fill and Bake
Spoon or scoop the cheesecake mixture evenly over each graham cracker crust. Fill the cups just almost to the top, so the batter has room to expand slightly as it bakes. If you fill the cups completely, the cheesecake can rise too high and spill over or crack, so don’t overfill.
A cookie scoop or an ice cream scoop with a lever works really well here to portion out the filling evenly and neatly. Give the muffin pan a few gentle taps on the counter to release any air bubbles and smooth out the tops.
Bake for about 15 minutes in a preheated oven at 320°F (160°C), or until the centers look set but still have a slight jiggle when the pan is shaken. That little bit of wobble means the cheesecakes are perfectly baked, with a smooth and creamy texture.
They’ll continue to firm up as they cool, so don’t wait until the centers don’t jiggle at all, or they’ll end up overbaked and too dense or dry.
Cool and Chill
Remove the cheesecakes from the oven and let them cool completely in the pan at room temperature to help prevent condensation or cracks on the tops of the mini cheesecakes.
Setting the muffin tin on a cooling rack allows air to circulate so they cool evenly without getting soggy underneath.
Once fully cooled, transfer them to the refrigerator and chill overnight. This resting time helps them set just perfectly, giving you the classic, smooth cheesecake layer.
Add the Toppings
Layer on a spoonful of strawberry jam. Add a few fresh berries like raspberries, blueberries, and sliced strawberries, and even mint leaves on top of each cheesecake for added brightness. The color and flavor make them look irresistible with a refreshing finish that balances the rich filling.
Finally, enjoy! You can set them out on a cupcake stand like this; it looks fancy on the dessert table and makes the cheesecakes easier to serve and grab.
If you’re bringing these to a party, potluck, or gathering, transport can be tricky as the toppings can shift. I like to pack them in a muffin container that holds them in place without bumping into each other. A round insulated carrier keeps them cool until serving time.

Equipment
- Cookie scoop or an ice cream scoop with a lever
Ingredients
For the crust:
- 1 ½ cups graham cracker crumbs
- ¼ cup melted butter
For the filling:
- 8 ounces cream cheese softened to room temperature
- ½ cup sugar
- 2 large eggs room temperature
- 1 teaspoon vanilla extract
- 1 tablespoon lemon juice
- 1 ½ tablespoons all-purpose flour
- 6 ounces heavy cream room temperature
For topping:
- Strawberry jam
- Fresh berries or fruit of your choice
Video
Instructions
- In a bowl, combine graham cracker crumbs and melted butter. Mix until evenly coated. Divide the mixture among 12 paper-lined muffin cups, pressing it firmly into the bottom with a spoon. Set aside.1 ½ cups graham cracker crumbs, ¼ cup melted butter
- Using a hand mixer on low speed, beat the cream cheese until smooth. Gradually add sugar while mixing. Add eggs one at a time, mixing just until blended. Stir in vanilla, lemon juice, and flour. Finally, add heavy cream and beat until smooth and creamy.8 ounces cream cheese, ½ cup sugar, 2 large eggs, 1 teaspoon vanilla extract, 1 tablespoon lemon juice, 1 ½ tablespoons all-purpose flour, 6 ounces heavy cream
- Spoon or scoop the cheesecake filling over the prepared crusts, dividing it evenly among the muffin cups. Tap the pan gently to smooth the tops.
- Preheat the oven to 320°F (160°C). Bake for 15 minutes, or until the centers are just set but still slightly jiggly when gently shaken.
- Let the cheesecakes cool in the pan at room temperature, then refrigerate overnight to fully set.
- Top each mini cheesecake with strawberry jam and fresh berries (or your favorite fruit) before serving.Strawberry jam, Fresh berries
Notes
- Try crust variations: While the classic graham cracker crust is the go-to for its buttery crunch and familiar flavor, you can also use crushed vanilla wafer cookies or biscuits instead. They give the cheesecakes a nostalgic, cookie-like flavor that’s just as delicious.
- Build a strong base: Press the crust firmly so it stays crisp and holds together once baked. Use paper liners to easily lift each cheesecake out cleanly once they’re chilled.
- Use rich dairy for creaminess: Stick with full-fat cream cheese instead of reduced-fat for a richer taste. Blend in a few tablespoons of sour cream for a smooth, silky filling. Together, they give the cheesecakes that rich, classic flavor and creamy consistency.
- Balance sweetness: Using white sugar makes sure you get a smooth, lump-free batter that stays light in color. You can also add a small pinch of salt to balance the sweetness from the sugar and jam.
- Control temperature and mixing speed: Use room-temperature cream cheese, eggs, and heavy cream so they blend smoothly without lumps. Mix on low speed to keep air out of the batter. This prevents cracks and gives the cheesecakes their signature creaminess.
- Give it a water bath (bain-marie) for perfect baking: Placing the muffin tin inside a larger pan filled with a little hot water helps the cheesecakes bake gently and evenly. This technique prevents cracking and keeps them ultra-smooth and creamy.
- Watch for doneness and finish fresh: Pull the cheesecakes from the oven when the centers still have a slight wobble to keep them creamy smooth after chilling. Add your jam or fruit right before serving so the crust stays crisp and the topping looks fresh and glossy.
- Top with cherry pie filling for a classic finish: Replace the strawberry jam with cherry pie filling if you want. It’s sweet, tart, and vibrant, adding a pop of color that pairs perfectly with the creamy base.
Nutrition
SERIOUSLY GOOD
DESSERTS!
Dessert First is a collection of 61 RECIPES to show you that you can make beautiful, impressive desserts right in your own kitchen, no matter your skill level.
Immediate eBook download. No physical book available.
Includes ad-free recipes like:
∙ Lemon Pound Cake
∙ Key Lime Bars
∙ Boston Cream Pie
∙ No-Bake Chocolate Lasagna
∙ Raspberry Cheesecake
...and much more!
How to Store Leftovers
Store your mini cheesecakes in an airtight container in the fridge for up to 4 to 5 days. Since the filling is made with cream cheese and heavy cream, don’t leave them at room temperature for over 2 hours to prevent spoilage and to keep them safe and creamy.
These glass containers with locking lids stack nicely in the fridge, prevent any odors from seeping in, and keep the cheesecakes tasting fresh.
If you’d like to keep them longer, they freeze beautifully for up to 2 to 3 months. Flash freeze them on a baking sheet in a single layer until frozen solid. Then, wrap individual cheesecakes in plastic wrap before placing them in a freezer bag or container.
A freezer-safe baking tray like this one is sturdy and doesn’t warp or crack in the cold. This BPA-free plastic wrap clings really tightly, and a durable freezer container or a reusable freezer-safe bag helps prevent any freezer burn and preserve the creamy texture.
When you’re ready to serve, thaw them in the refrigerator overnight, then add your toppings just before serving.
What to Serve With Mini Cheesecakes
Mini Cheesecakes are one of those desserts that go with just about anything. I love serving them with coffee, espresso, or even a small glass of dessert wine when I want something a little fancy.
A drizzle of caramel or chocolate ganache takes them to the next level; they’re rich, glossy, and hard to resist. They also pair beautifully with chocolate truffles, fruit tarts, or cookies if you’re putting together a dessert spread for a party or special dinner.
More Easy Recipes for You to Try at Home
I’m all about desserts that feel impressive but come together easily like this easy recipe, and I’ve got plenty more cheesecakes are right up that alley.
