Heart Shaped Cookies

Heart Shaped Cookies are one of those things that just make you smile. They’re soft in the middle, slightly crisp on the edges, and super fun to decorate—whether you go all out with royal icing or keep it simple with a dusting of sugar. They’re perfect for gifting, especially when you want something a little more personal, but honestly, they’re just as great for a cozy afternoon of baking and decorating for yourself.

This post contains affiliate links. As an Amazon Affiliate, if you purchase through those links, I earn a commission. Thank you!
I love these heart-shaped cookies not only because they taste as great as they look but also because making them is quick, easy, and fun—the kids always want to join me! Whether it’s for gifting, birthdays, special occasions like Valentine’s and Mother’s Day, or just a beautiful and delicious treat to snack on, this is something you and your family will enjoy. Leftovers also keep well for days; you can even bake the cookies in advance and freeze them.
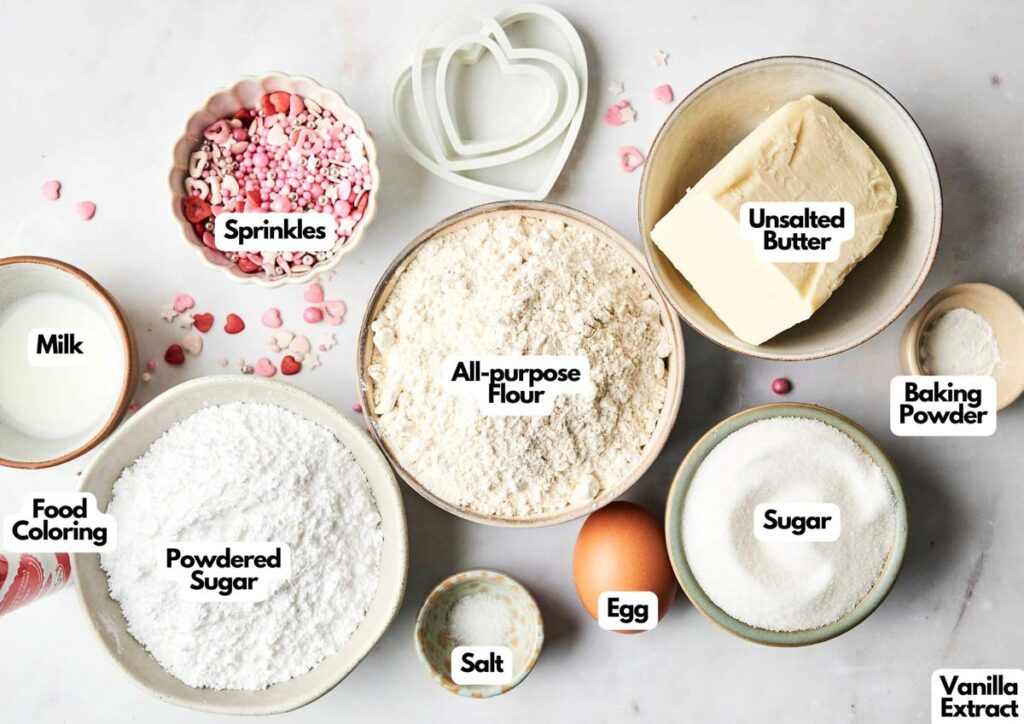
Ingredients You’ll Need
You’ll need all the ingredients shown in the photograph below.
Watch How to Make Heart Shaped Cookies
These heart cookies look bakery-ready but are so easy to make at home.
[adthrive-in-post-video-player video-id=”ESTTSidZ” upload-date=”2025-08-18T11:30:17+00:00″ name=”Cutest Cookies You’ll Bake All Year” description=”Cookies that look like gifts and taste even better—try these today.” player-type=”default” override-embed=”default”]
How to Make Heart-Shaped Cookies with Step-By-Step Instructions
Scroll down for the full recipe card containing a full printable recipe and measurements in both US customary and metric units.
Your cookies will turn out great if you follow my simple, easy steps.
Make the Cookie Dough
Cream together the butter and sugar in a large bowl until the mixture is light and fluffy. Then, add in the egg and vanilla extract. Stir until everything’s smooth and well combined.
Slowly mix in the flour and salt until a soft, slightly sticky dough comes together. Adding them a bit at a time prevents clumping and makes sure you don’t overwhelm the wet ingredients.
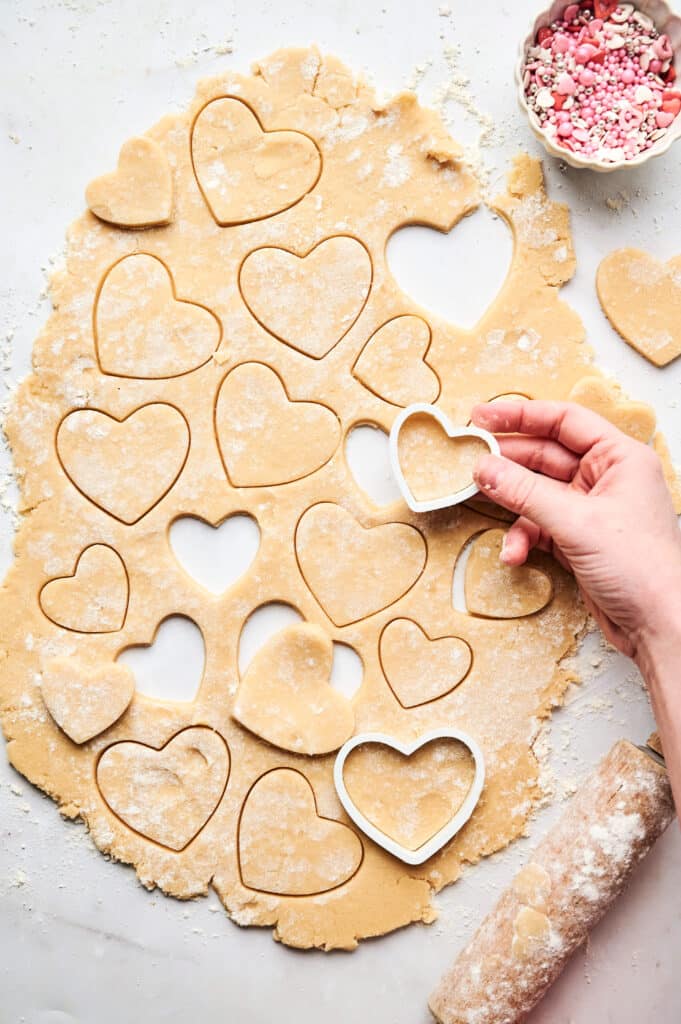
Roll and Cut the Dough
Line your baking sheet with parchment paper and lightly flour your work surface. Don’t use too much flour—the purpose is just so that your dough rolls easily and doesn’t stick. Make sure your work surface is clean, smooth, and spacious enough even before you get started.
SERIOUSLY GOOD
DESSERTS!

Dessert First is a collection of 61 RECIPES to show you that you can make beautiful, impressive desserts right in your own kitchen, no matter your skill level.
Immediate eBook download. No physical book available.
Includes ad-free recipes like:
∙ Lemon Pound Cake
∙ Key Lime Bars
∙ Boston Cream Pie
∙ No-Bake Chocolate Lasagna
∙ Raspberry Cheesecake
...and much more!
Roll the dough out to about ¼-inch thickness on the floured surface and use a heart-shaped cookie cutter to cut out your cookies. Don’t throw away the scraps—gather and re-roll them. Carefully transfer the cutouts to the lined baking sheet.
Bake the Cookies
Bake the cookies at 350°F for 8–10 minutes. You’re looking for the edges to just start turning golden—don’t overbake, or they’ll lose their soft bite.
Let them cool on the baking sheet for a few minutes before moving them to a wire rack to cool completely. They’re still too soft and not fully set yet when fresh out of the oven and may break if you try to move them immediately.
Prepare the Icing
While the cookies are cooling, whisk together the powdered sugar and milk in a bowl until smooth.
Divide the icing into two bowls if you’d like to create a red or pink version using red food coloring—just a drop or two goes a long way. You can also transfer them to piping bags if you want.
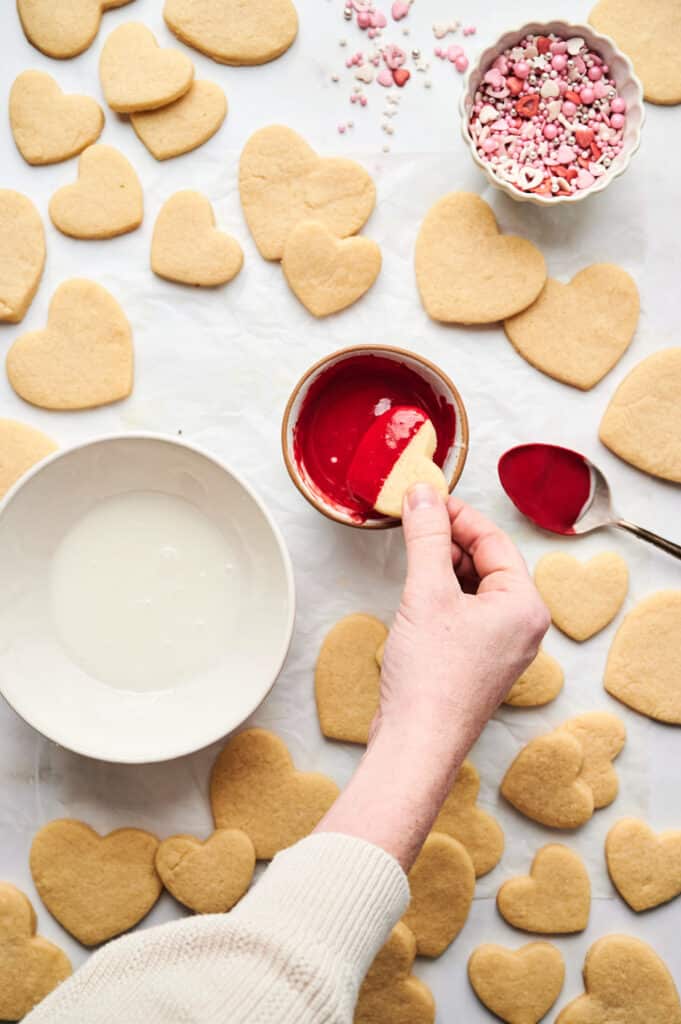
Decorate the Cookies
When the cookies are fully cooled, spoon or pipe on the icing. Add sprinkles while the glaze is still wet so they stick well. Let the icing dry completely before stacking or storing; if you don’t, they’ll get messy.
Once the icing’s dried completely, serve and enjoy!

Ingredients
- 2 ½ cups all-purpose flour
- 1 cup unsalted butter softened
- 1 cup sugar
- 1 egg
- 1 teaspoon vanilla extract
- ½ teaspoon baking powder
- ½ teaspoon salt
Decoration:
- 1 ½ cups powdered sugar
- 2 tablespoons milk
- Red food coloring
- Sprinkles
Video
Instructions
- In a large bowl, cream together the butter and sugar until light and fluffy. Add the egg and vanilla extract, mixing until fully combined. Gradually mix in the flour, baking powder, and salt until a soft dough forms.2 ½ cups all-purpose flour, 1 cup unsalted butter, 1 cup sugar, 1 egg, 1 teaspoon vanilla extract, ½ teaspoon salt, ½ teaspoon baking powder
- On a lightly floured surface, roll out the dough to about ¼-inch thickness.
- Use a heart-shaped cookie cutter to cut out the cookies and place them on a lined baking sheet.
- Bake at 350°F (180°C) for 8–10 minutes or until the edges are just beginning to turn golden.
- While the cookies cool, prepare the icing by whisking together the powdered sugar and milk until smooth. Divide into two bowls, and add red food coloring to one of them for a pink icing option.1 ½ cups powdered sugar, 2 tablespoons milk, Red food coloring
- Once the cookies are fully cooled, decorate with icing and sprinkles as desired. Let the icing set before serving or storing.Sprinkles
Notes
- Use Room Temperature Butter: It creams more easily with sugar and gives your dough a smoother texture, which is key for easier and neater cut-out cookies.
- Don’t Overmix the Dough: Once the flour is in, stir just until it all comes together. Overmixing can make the cookies tough.
- Chill the Dough if Needed: If your kitchen is warm or the dough feels too soft, a short rest in the fridge will make it easier to roll and cut.
- Roll Evenly for Even Baking: Aim for consistent thickness so all your cookies bake at the same rate. A rolling pin with thickness guides can help if you’ve got one.
- Keep an Eye on the Oven: These cookies bake quickly—pull them once the edges start to turn golden to keep them soft in the middle.
- Use Piping Bags for Precision: For detailed designs, piping bags or squeeze bottles give you better control over the icing.
- Let the Icing Set Fully: Before you move or stack them, make sure the glaze has dried completely so your decorations stay neat.
- Store Carefully in Layers: Place parchment paper between layers in a storage container to keep the cookies from sticking together.
Nutrition
SERIOUSLY GOOD
DESSERTS!
Dessert First is a collection of 61 RECIPES to show you that you can make beautiful, impressive desserts right in your own kitchen, no matter your skill level.
Immediate eBook download. No physical book available.
Includes ad-free recipes like:
∙ Lemon Pound Cake
∙ Key Lime Bars
∙ Boston Cream Pie
∙ No-Bake Chocolate Lasagna
∙ Raspberry Cheesecake
...and much more!
Recipe Notes and Expert Tips
I’ve made these heart cookies more times than I can count and found that these tips always help achieve the best results.
- Use Room Temperature Butter: It creams more easily with sugar and gives your dough a smoother texture, which is key for easier and neater cut-out cookies.
- Don’t Overmix the Dough: Once the flour is in, stir just until it all comes together. Overmixing can make the cookies tough.
- Chill the Dough if Needed: If your kitchen is warm or the dough feels too soft, a short rest in the fridge will make it easier to roll and cut.
- Roll Evenly for Even Baking: Aim for consistent thickness so all your cookies bake at the same rate. A rolling pin with thickness guides can help if you’ve got one.
- Keep an Eye on the Oven: These cookies bake quickly—pull them once the edges start to turn golden to keep them soft in the middle.
- Use Piping Bags for Precision: For detailed designs, piping bags or squeeze bottles give you better control over the icing.
- Let the Icing Set Fully: Before you move or stack them, make sure the glaze has dried completely so your decorations stay neat.
- Store Carefully in Layers: Place parchment paper between layers in a storage container to keep the cookies from sticking together.
How to Store Leftovers
Once your cookies are completely cool and the icing is fully set, store them in an airtight container. Separate layers with parchment papers if you’re stacking them so they don’t stick together. You can leave them at room temperature for up to 3 days; just make sure it isn’t hot there, or your icing will melt.
For longer storage, you can keep them chilled in the fridge for up to 2 weeks or even freeze them for up to 2-3 months. If you’re planning to freeze them, it’s best to do so before decorating—just freeze the baked cookies in a single layer on a baking sheet, then transfer them to a freezer-safe bag or container.
When you’re ready to enjoy them, let them come to room temperature, then add icing and fresh sprinkles so they look their best.
What to Serve With Heart-Shaped Cookies
Almost everything goes great with these cookies—you can pair it with coffee or tea for an afternoon treat or a tall glass of milk if you’re keeping it classic.
They also work nicely as part of a dessert platter alongside chocolate-dipped strawberries, brownies, or mini cupcakes. You can even package a few in cellophane bags with ribbon for easy gifting.
More Easy Recipes for You to Try at Home
If you’re looking for more easy cookie recipes, take a look at some of my favorites.
