Creme Brulee Cheesecake
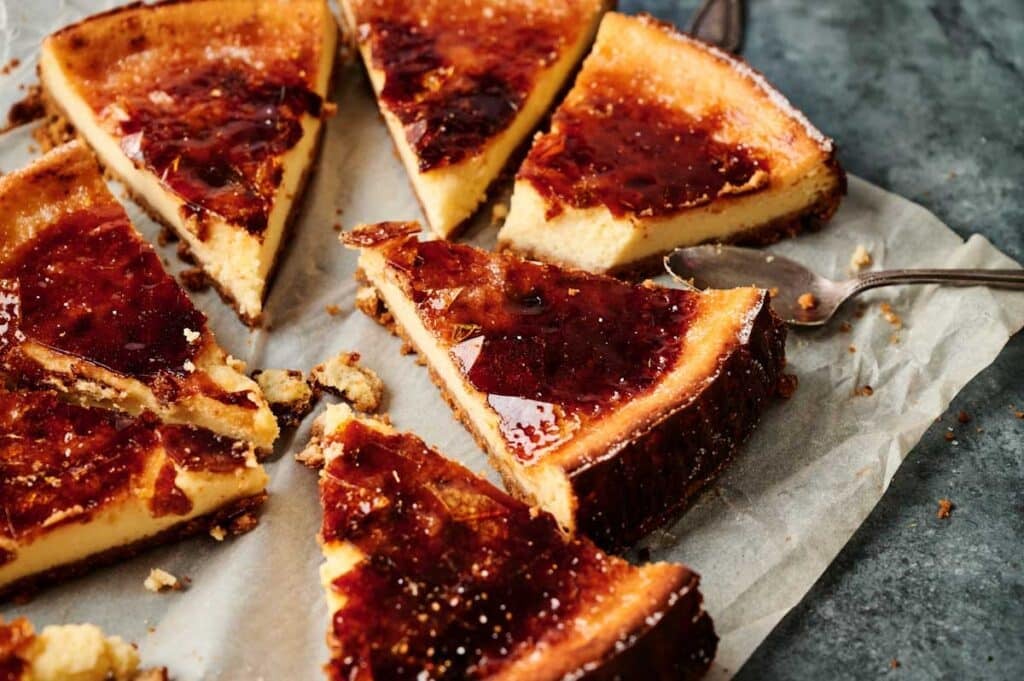
When dessert needs to earn a few gasps before the first bite, Crème Brûlée Cheesecake always delivers with its golden crust, soft-set filling, and glassy sugar top that cracks just right. Each bite is creamy with a touch of crunch, and there’s one trick I use before serving that keeps the top smooth every time. Once you try it, you’ll understand why it’s a showstopper.
This post contains affiliate links. As an Amazon Affiliate, if you purchase through those links, I earn a commission. Thank you!
I like making Crème Brûlée Cheesecake when I want a dessert that grabs attention and feels fancy without any hassle. It’s perfect for Christmas dessert, Thanksgiving dinner, or even as a birthday cake. I can prepare it the day before, let it chill overnight, and just torch the brûlée topping right before serving. It always adds a bit of drama to the table with minimal effort.
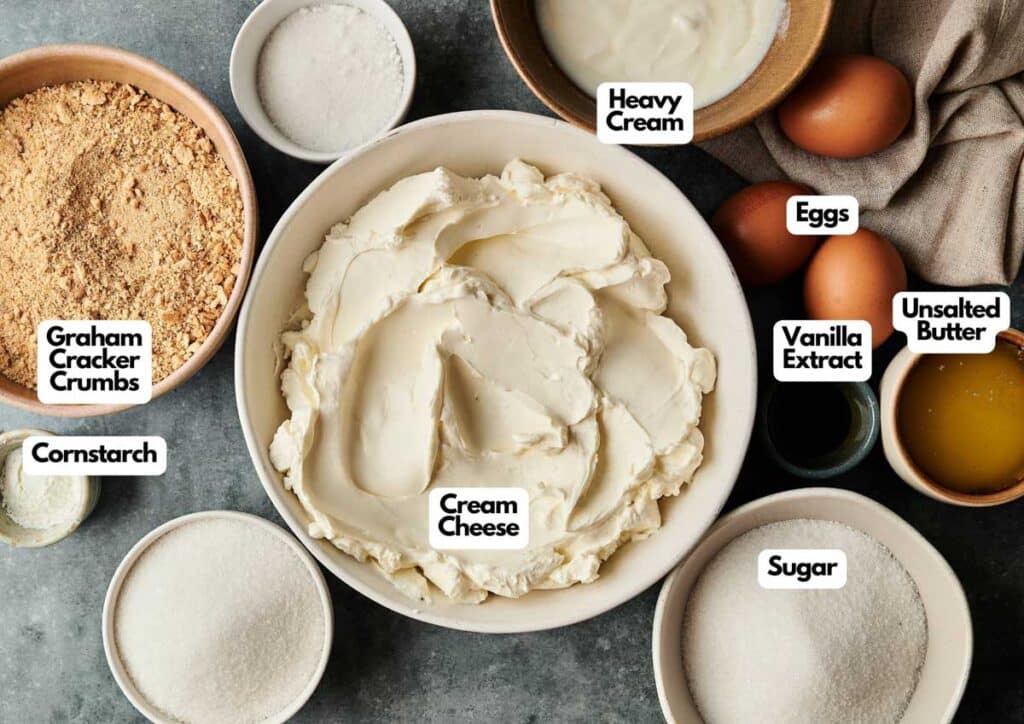
Ingredients You’ll Need
You’ll need all the ingredients shown in the photograph below.
How to Make Crème Brûlée Cheesecake with Step-By-Step Instructions
Scroll down for the full recipe card containing a full printable recipe and measurements in both US customary and metric units.
You’ll find this recipe easy to master if you follow my simple instructions below.
Make the Crust
Preheat the oven to 325°F (160°C). Mix the graham cracker crumbs, sugar, and melted butter in a bowl until they’re fully coated and have the texture of wet sand. I like using this glass mixing bowl because it lets me easily check if the ingredients are thoroughly mixed.
If you want your crumbs to be finer, a few quick pulses in a compact food processor will give you a nice texture.
Press the crumb mixture firmly into the bottom of a springform pan, using a measuring cup or a tart tamper to compress it and create a smooth, uniform base. This nonstick springform pan releases the cheesecake in a stress-free process. Then, I line the base of the pan with parchment rounds just to help prevent sticking.
SERIOUSLY GOOD
DESSERTS!

Dessert First is a collection of 61 RECIPES to show you that you can make beautiful, impressive desserts right in your own kitchen, no matter your skill level.
Immediate eBook download. No physical book available.
Includes ad-free recipes like:
∙ Lemon Pound Cake
∙ Key Lime Bars
∙ Boston Cream Pie
∙ No-Bake Chocolate Lasagna
∙ Raspberry Cheesecake
...and much more!
I always use a stainless steel measuring cup to press the crust in firmly, but this mini tart tamper is another great option, especially for getting clean edges around the sides.
Bake for 10 minutes, then set it aside to cool completely while you prepare the filling to achieve a buttery graham cracker crust.
Prepare the Cheesecake Filling
In a large mixing bowl, beat the softened cream cheese and sugar together until creamy and fluffy. I use my large stainless steel mixing bowl so there’s room to mix without batter splashing up the sides. This step sets the stage for a creamy filling.
Add the eggs one at a time, gently mixing after each addition to avoid incorporating too much air. An electric handmixer makes this quick and consistent. Overmixing can cause the cheesecake to puff up and then crack as it cools, so aim for a slow and steady beat.
Once the eggs are combined, stir in the heavy cream, vanilla extract, and cornstarch. Blend well, so the batter looks silky and cohesive.
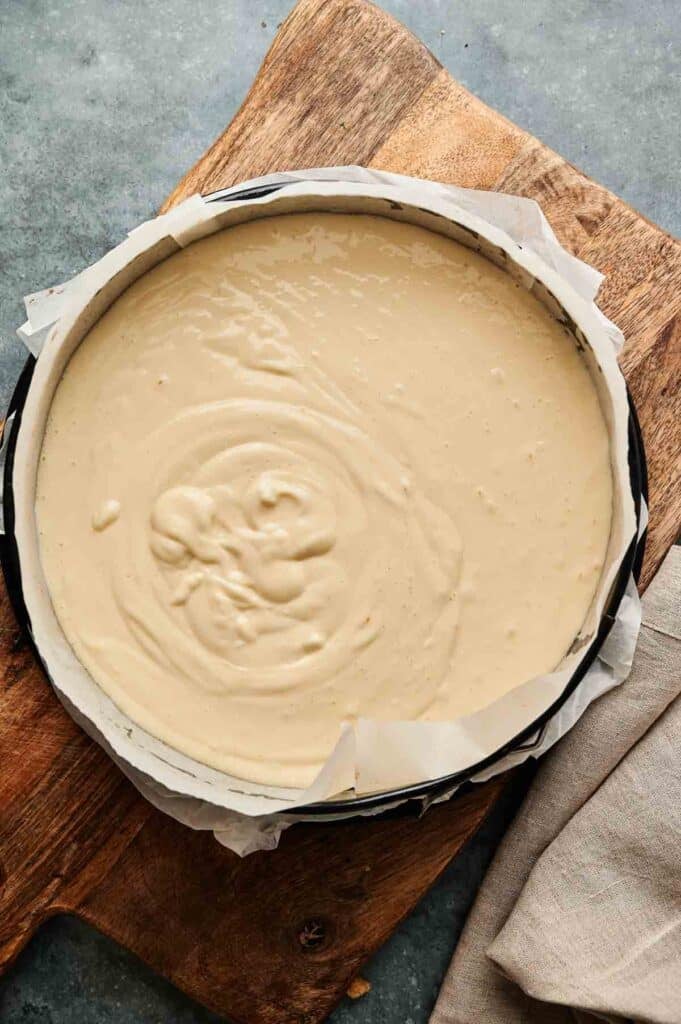
Bake the Cheesecake
Pour the filling into the cooled crust, smoothing out the top with a spatula to ensure an even surface. I always reach for this offset spatula to level the top and not disturb the crust.
Place the springform pan on a baking tray to catch any potential drips and make it easier to move in and out of the oven. A large roasting pan or rimmed baking sheet works well to catch drips and keep your oven clean.
Bake for 50–60 minutes, or until the edges are set and the center has a slight wobble when lightly shaken. Prevent opening the oven during baking, as sudden temperature changes can cause it to crack.
Remove the cheesecake from the oven and let it cool completely at room temperature. I like to place the pan on my wire cooling rack so the air can circulate underneath and let it cool fully, with no steam trapped.
This gradual cooling helps stop condensation, keeping the texture creamy. Once cooled, transfer it to the refrigerator and chill for at least 4 hours, or ideally overnight, to allow it to set fully.
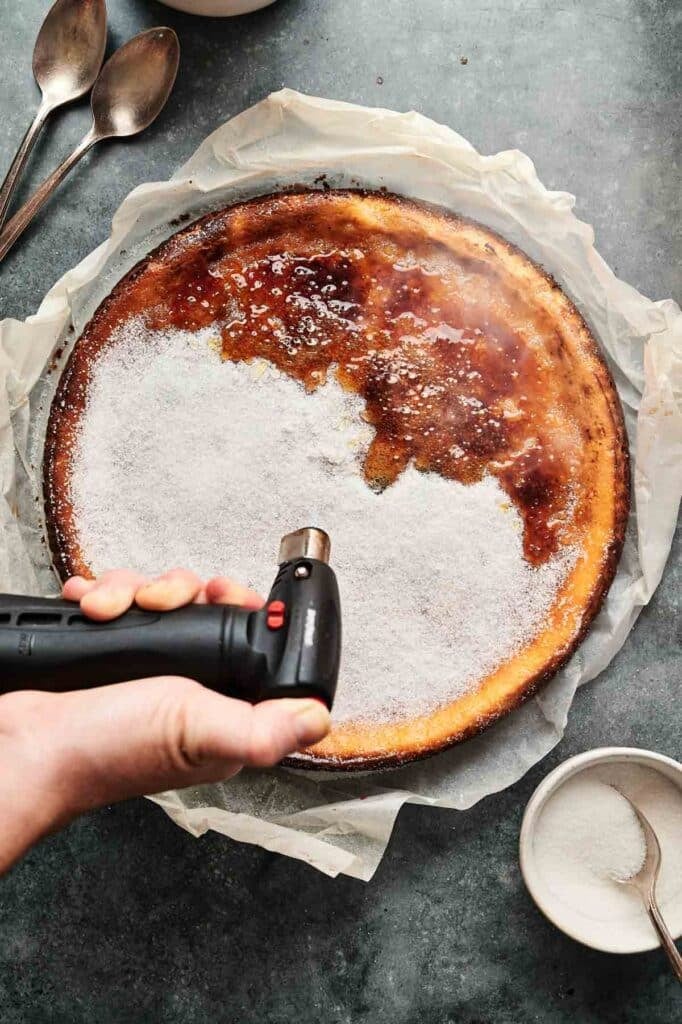
Add the Brûlée Topping
Just before serving, sprinkle the granulated sugar over the entire surface of the chilled cheesecake, covering it from edge to edge for a consistent brûlée finish. This flour sifter makes the step easier by providing a light, even dusting without clumps.
Use a kitchen blow torch to create a caramel layer from a thin layer of sugar, slowly moving the flame in small circles until the sugar melts, bubbles, and turns a deep golden brown. A kitchen torch with an adjustable flame works well here, giving more control as you move across the surface. Be patient and avoid holding the flame in one spot for too long to prevent burning.
Let the cheesecake sit for a few minutes after torching so the caramelized layer can cool and harden into a classic glassy, crackly top that’s so satisfying to tap with a spoon.
Serve the Cheesecake
Once the brûlée topping has cooled and hardened, slice the cheesecake using a sharp knife, wiping the blade clean between each cut to keep the slices tidy and precise. This chef’s knife cuts evenly. A cake cutter and server is also great for cutting and lifting each slice neatly onto plates.
The firm sugar layer on top of the cheesecake will crack slightly as you cut, allowing the smooth, creamy filling beneath to emerge. Serve the cheesecake chilled for the best texture, cool and velvety on the inside with a crisp, caramelized top that shatters just like classic crème brûlée.
It’s a satisfying contrast of textures in every bite. Enjoy!
If I’m taking this to a party or holiday dinner, I always place the whole cheesecake in a hard-sided cake container to keep the top protected and the structure intact. To help it stay cold during transport, I slide it inside this round insulated carrier, which also makes it easier to carry if you’re walking or driving with it.

Ingredients
For the crust:
- 1 ½ cups graham cracker crumbs
- ¼ cup sugar
- 5 tablespoons unsalted butter melted
For the filling:
- 24 ounces cream cheese softened
- 1 cup sugar
- 3 large eggs
- 1 cup heavy cream
- 1 tablespoon vanilla extract
- 1 tablespoon cornstarch
For the topping:
- ¼ cup granulated sugar
Video
Instructions
- Preheat the oven to 325°F (160°C). In a bowl, mix graham cracker crumbs, sugar, and melted butter. Press the mixture firmly into the bottom of a springform pan. Bake for 10 minutes, then let cool.1 ½ cups graham cracker crumbs, ¼ cup sugar, 5 tablespoons unsalted butter
- In a large bowl, beat cream cheese and sugar until smooth and creamy. Add eggs one at a time, mixing gently after each addition. Stir in heavy cream, vanilla extract, and cornstarch until combined. Pour over the cooled crust.24 ounces cream cheese, 1 cup sugar, 3 large eggs, 1 cup heavy cream, 1 tablespoon vanilla extract, 1 tablespoon cornstarch
- Place the pan in the oven and bake for 50–60 minutes, or until the center is set. Remove and let cool completely.
- Refrigerate the cheesecake for at least 4 hours, or overnight for best results.
- Before serving, sprinkle sugar evenly over the chilled cheesecake. Using a kitchen torch, caramelize the sugar until golden and crisp. Allow to cool for a few minutes so the topping hardens.¼ cup granulated sugar
- Serve & enjoy! Slice and enjoy the creamy cheesecake with its crackly brûlée topping.
Notes
- Crust Consistency Matters: Use fine graham cracker crumbs so the crust holds together well without cracking.
- Room Temperature Cream Cheese: Let the cream cheese fully soften to avoid lumps and get a silky-smooth batter.
- Use Real Vanilla: Swapping vanilla extract for vanilla bean paste or scraping in the seeds from a whole vanilla bean adds specks and a deeper flavor that makes a big difference in the final result.
- Watch the Bake Time: The center should look set but still have a slight wobble; it’ll firm up more as it chills.
- Cool Gradually: Let the cheesecake cool at room temperature before refrigerating to prevent condensation on the top.
- Chill Overnight: For optimal texture and flavor, refrigerate overnight to ensure it’s fully set and easier to slice.
- Even Sugar Layer: Spread the sugar out as evenly as possible to avoid burnt spots when torching.
- Use a Kitchen Torch: A handheld torch gives you control over the brûlée finish and keeps the cheesecake from warming too much.
Nutrition
SERIOUSLY GOOD
DESSERTS!
Dessert First is a collection of 61 RECIPES to show you that you can make beautiful, impressive desserts right in your own kitchen, no matter your skill level.
Immediate eBook download. No physical book available.
Includes ad-free recipes like:
∙ Lemon Pound Cake
∙ Key Lime Bars
∙ Boston Cream Pie
∙ No-Bake Chocolate Lasagna
∙ Raspberry Cheesecake
...and much more!
Recipe Notes and Expert Tips
I’ve learned a few things that make this process smoother and more reliable, especially when you’re serving guests.
- Crust Consistency Matters: Use fine graham cracker crumbs so the crust holds together well without cracking.
- Room Temperature Cream Cheese: Let the cream cheese fully soften to avoid lumps and get a silky-smooth batter.
- Use Real Vanilla: Swapping vanilla extract for vanilla bean paste or scraping in the seeds from a whole vanilla bean adds specks and a deeper flavor that makes a big difference in the final result.
- Watch the Bake Time: The center should look set but still have a slight wobble; it’ll firm up more as it chills.
- Cool Gradually: Let the cheesecake cool at room temperature before refrigerating to prevent condensation on the top.
- Chill Overnight: For optimal texture and flavor, refrigerate overnight to ensure it’s fully set and easier to slice.
- Even Sugar Layer: Spread the sugar out as evenly as possible to avoid burnt spots when torching.
- Use a Kitchen Torch: A handheld torch gives you control over the brûlée finish and keeps the cheesecake from warming too much.
How to Store Leftovers
Store leftover cheesecake tightly covered in the fridge for up to 5 days. I like to place mine on this large shallow serving plate and cover it snugly with plastic wrap, then add a layer of my heavy-duty aluminum foil for extra freshness.
To maintain that signature crisp topping, it’s best to brûlée only the portion you plan to serve, since the caramelized sugar will soften over time in the fridge. I keep extra slices in glass containers with locking lids so the texture stays perfect and nothing absorbs fridge odors.
If you want to make it ahead, you can freeze the plain, untorched cheesecake for up to 2 months. Wrap it well in plastic wrap and then foil to protect it from freezer burn.
When you’re ready to enjoy it, thaw overnight in the fridge, unwrap, and add the sugar topping just before serving. Use a kitchen torch to caramelize the sugar for that fresh, crackly finish.
What to Serve With Crème Brûlée Cheesecake
A simple berry compote or a handful of fresh berries adds a bright contrast to the rich filling. You could also serve it with espresso or a small glass of dessert wine to round out the evening.
More Easy Recipes for You to Try at Home
I like to keep a few reliable decadent desserts in rotation for when I want something special without too much fuss.

Really good. somewhat eggy and very creamy. I used regular heavy whipping cream and it turned out fine, just needed longer time in the oven than suggested. I also recommend for anyone else following this recipe to spread the crust to the sides as much as possible, as the crust is extremely thick.