Air Fryer Lemon Bars
Air Fryer Lemon Bars have a way of hitting that perfect balance between sweet and citrusy. Just like when using a traditional oven, you get a smooth, creamy lemon filling that sets just right on top of a crisp, buttery shortbread crust. The only main difference with the air fryer is that it bakes quicker, so less waiting time!

This post contains affiliate links. As an Amazon Affiliate, if you purchase through those links, I earn a commission. Thank you!
This air fryer version of lemon bars always saves the day when I need a delicious classic dessert without spending too much time in the kitchen. They’re easy to prep and store well in the fridge or freezer, so I can always have them ready for family gatherings, casual get-togethers, or simply whenever I want to reach for some delicious treats on hand.
Ingredients You’ll Need
You’ll need all the ingredients shown in the photograph below.

How to Make Air Fryer Lemon Bars with Step-By-Step Instructions
Scroll down for the full recipe card containing a full printable recipe and measurements in both US customary and metric units.
You’ll find making these lemon bars easy if you follow my simple instructions.
Prepare the Shortbread Crust
Line a 9×13-inch baking tray (or a dish that will fit in your air fryer) with parchment paper, extending it slightly over the edges for easy removal.
In a mixing bowl, whisk together 2 ½ cups of flour, the powdered sugar, and the salt. Pour in the melted butter and mix until everything comes together into a soft dough.

Bake the Crust
Press the dough evenly into the lined pan, making sure it reaches all the edges, then bake it in the air fryer at 350°F (180°C) for about 10 minutes or until the crust is just starting to turn golden.
Make the Lemon Filling
Add the sugar to a large mixing bowl and zest the lemons directly over it—this step helps release the natural oils and boosts the lemon flavor.
Mix well until fully combined and the sugar turns light yellow in color.


Next, add the remaining ½ cups of flour to the bowl and stir until evenly combined. Pour in the lemon juice, then crack in the eggs.
Whisk everything together until the mixture is smooth, making sure there are no streaks of egg or lumps of flour.
Bake the Lemon Bars
Carefully pour the lemon filling over the warm crust and spread it evenly. Return the pan to the air fryer and bake at 350°F for about 12 minutes, turning the pan halfway through for even cooking.
Don’t wait until all the filling is firm, or you might end up with overcooked bars and lose their creamy consistency. You’ll want the filling to be just set right around the edges but still have a slight wobble in the center when you gently shake the pan after baking.


Cool and Serve
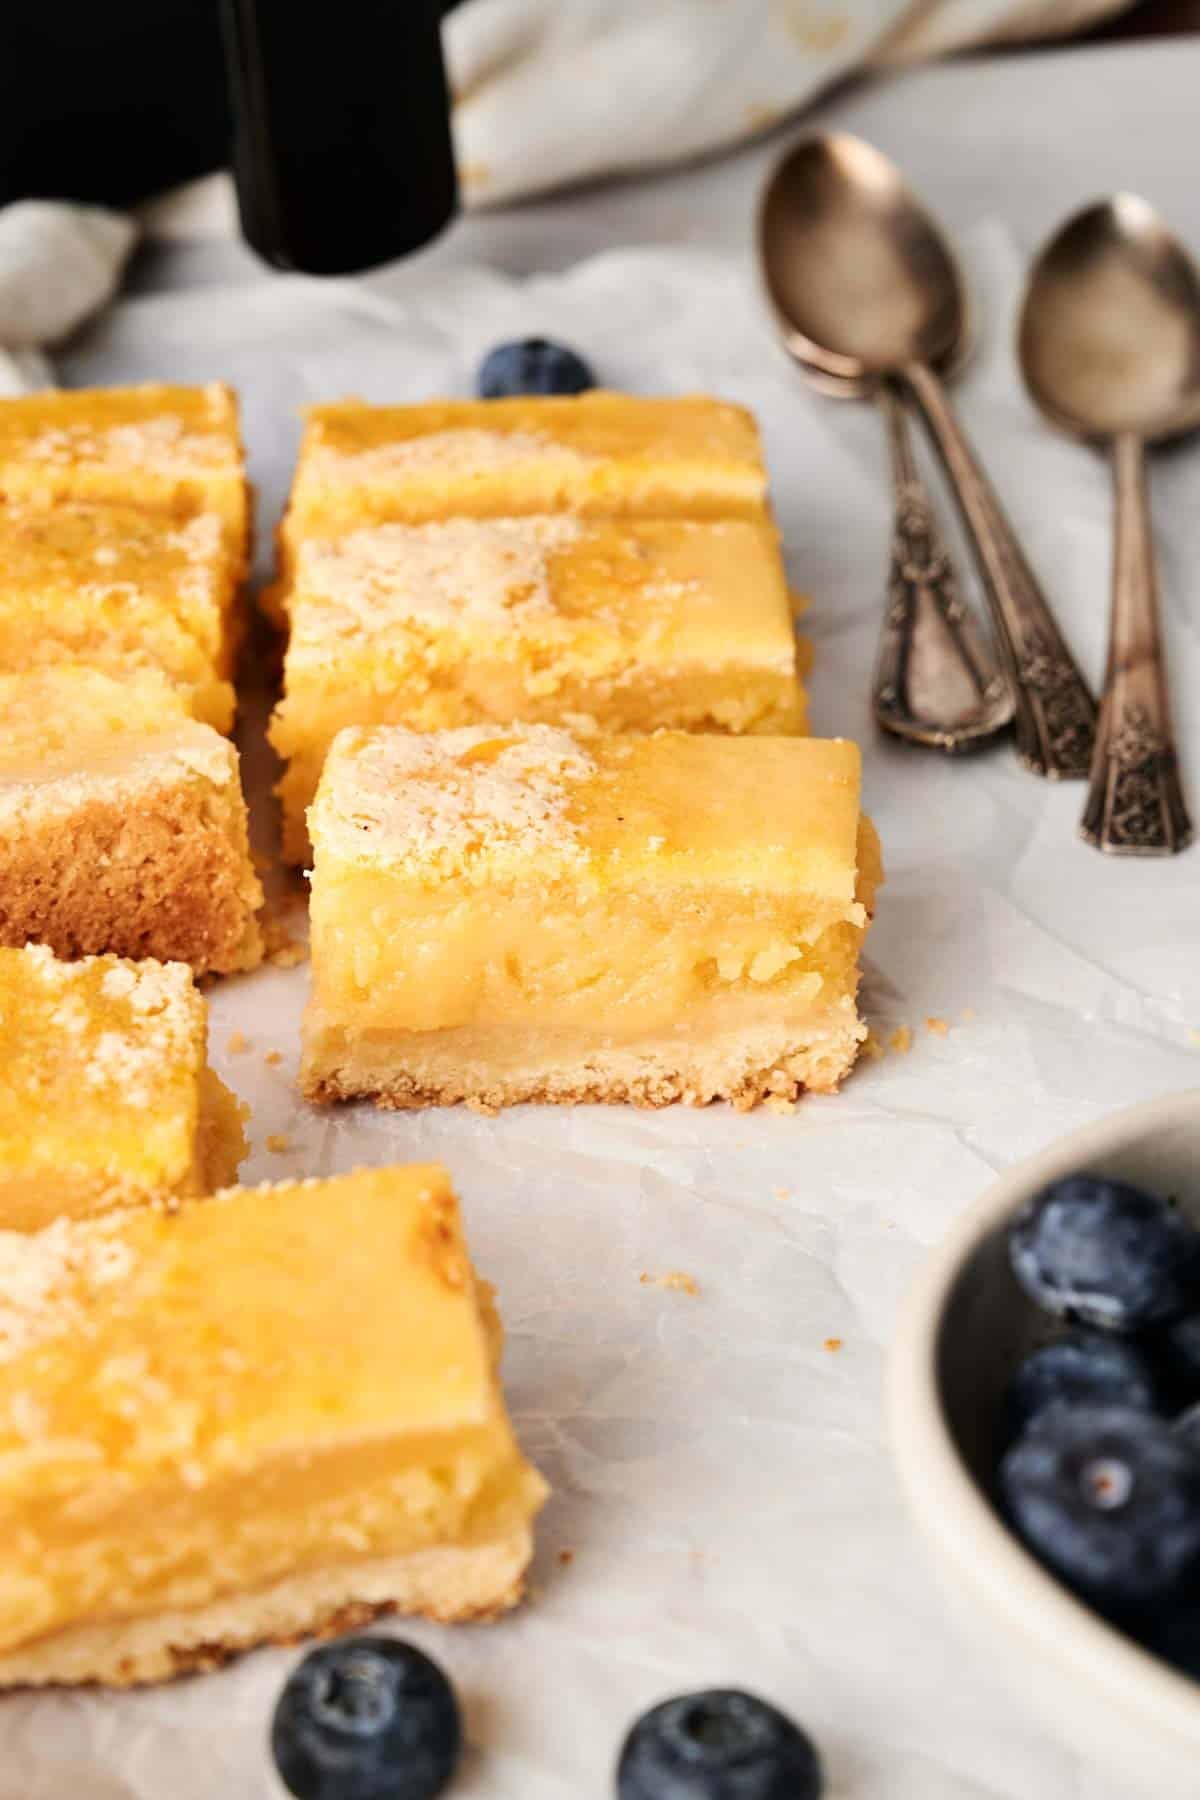
Remove the lemon bars from the air fryer and let them cool at room temperature for an hour. Then, transfer them to the refrigerator to chill for at least two hours—this helps the filling set fully and makes slicing easier.
Once chilled, use a clean, damp knife to cut into bars, wiping the blade between cuts for a smoother slicing.
Finally, finish with a dusting of powdered sugar before serving. Enjoy!

Recipe Notes and Expert Tips
I have a few tips to make sure your lemon bars turn out perfect every time.
- Press the crust evenly: An even layer prevents some spots from baking faster than others, so take your time pressing it into the pan.
- Rub the zest into the sugar: This step is key—it brings out the oils in the lemon zest, making the flavor even stronger.
- Use fresh lemon juice: Bottled juice won’t give you the same bright, natural citrus flavor, so squeeze your own for the best results.
- Pour the filling over a warm crust: This helps the lemon layer stick to the shortbread base. If you let the crust cool completely before adding the filling, they’ll separate once you slice or serve them.
- Turn the pan halfway through baking: Air fryers use circulating hot air, and some spots can get hotter than others. So, rotating the pan helps with achieving an even level of doneness.
- Test for doneness: Gently shake the pan—if the edges are set but the center still moves slightly, they’re ready. Baking too long can make the bars dense and take away their smooth, creamy texture.
- Chill before slicing: Lemon bars need time to firm up in the fridge; otherwise, they may be too soft to cut neatly.
- Use a damp, sharp knife for clean cuts: Wipe and slightly wet your knife between slices to keep the edges neat and prevent sticking.

How to Store Leftover Air Fryer Lemon Bars
Once cooled, store your lemon bars in an airtight container in the refrigerator for up to 5-7 days. Use some parchment paper between the layers to keep them from sticking together if you’re stacking them.
You can also freeze them for up to 3 months, but keep in mind that the texture might change slightly once thawed. To serve from frozen, let them defrost overnight in the fridge, or if you can’t wait that long, let them sit at room temperature and they will thaw within 30 minutes.
What to Serve with Air Fryer Lemon Bars
I like pairing these air-fried lemon bars with hot tea or coffee. They also go well with a scoop of vanilla ice cream or fresh berries.
If you’re serving them for dessert, a light whipped cream topping can make them even better!

More Easy Recipes for You to Try at Home
I have more air-fried dessert recipes that you will love, so check these out!
- Air Fryer Chocolate Cake
- Air Fryer Strawberry Cheesecake
- Air Fryer Lemon Cookies with Lemon Glaze
- Air Fryer Chocolate Crinkle Cookies
- Air Fryer Chocolate Chip Cookies
Ingredients
- 3 cups all-purpose flour divided 2 ½ cups for crust and ½ cup for filling
- ⅔ cups powdered sugar for the shortbread, plus more for dusting
- ½ teaspoon salt
- 12 tablespoons unsalted butter melted
- 3 lemons zested
- 3 cups sugar
- 8 large eggs room temperature
- 1 cup lemon juice fresh
Instructions
- Line a 9×13 baking dish with parchment paper.
- Whisk together 2 ½ cups of flour with the powdered sugar and salt, then pour in the melted butter and mix until combined.3 cups all-purpose flour, ⅔ cups powdered sugar, ½ teaspoon salt, 12 tablespoons unsalted butter
- Sprinkle the dough into your lined pan and press down into a flat layer. Bake in the air fryer at 350°F (180ºC) for about 10 min or until a light golden color.
- Add the sugar to a big bowl and add the zest of three lemons. Mix until the zest is fully incorporated and sugar is a light yellow color.3 lemons, 3 cups sugar
- Add the sugar and remaining half cup of flour to a large bowl and mix well.
- Pour in the lemon juice and add the eggs then mix very well until completely combined.8 large eggs, 1 cup lemon juice fresh
- Pour the filling onto the warm crust then transfer to the oven and bake in the air fryer for about 12 minutes, turning halfway through the bake. Remove from the air fryer and allow to cool for an hour before chilling in the refrigerator for two hours.
- Cut into bars using a clean, sharp, damp knife. Clean and re-wet the knife after each cut.
- Serve and enjoy your lemon bars!
Notes
- Press the crust evenly: An even layer prevents some spots from baking faster than others, so take your time pressing it into the pan.
- Rub the zest into the sugar: This step is key—it brings out the oils in the lemon zest, making the flavor even stronger.
- Use fresh lemon juice: Bottled juice won’t give you the same bright, natural citrus flavor, so squeeze your own for the best results.
- Pour the filling over a warm crust: This helps the lemon layer stick to the shortbread base. If you let the crust cool completely before adding the filling, they’d separate once you slice or serve them.
- Turn the pan halfway through baking: Air fryers use circulating hot air, and some spots can get hotter than others. So, rotating the pan helps with achieving an even level of doneness.
- Test for doneness: Gently shake the pan—if the edges are set but the center still moves slightly, they’re ready. Baking too long can make the bars dense and take away their smooth, creamy texture.
- Chill before slicing: Lemon bars need time to firm up in the fridge; otherwise, they may be too soft to cut neatly.
- Use a damp knife for clean cuts: Wipe and slightly wet your knife between slices to keep the edges neat and prevent sticking.